 8 New Beauty Marks
SCREENSHOTS

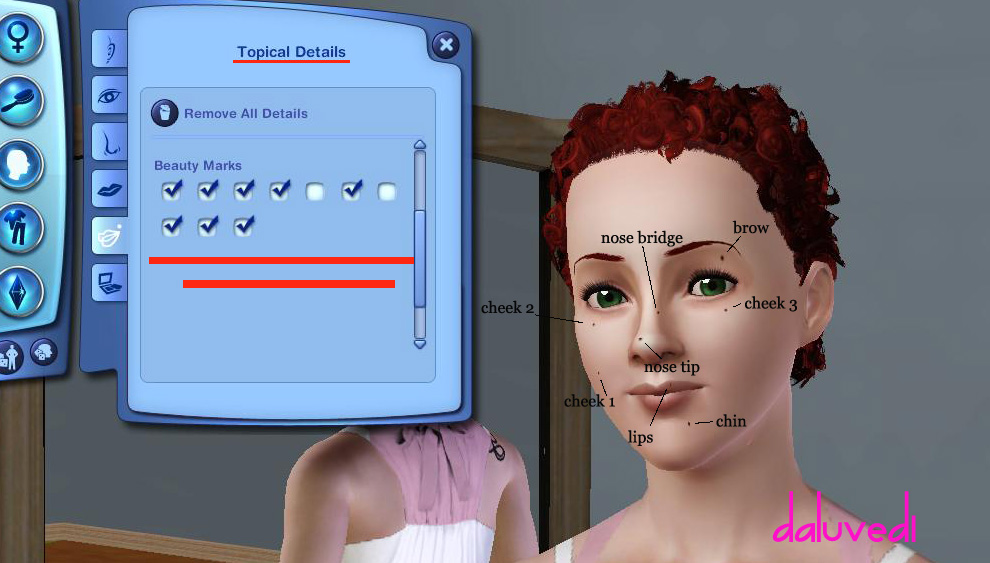
allmoles.jpg - width=990 height=563

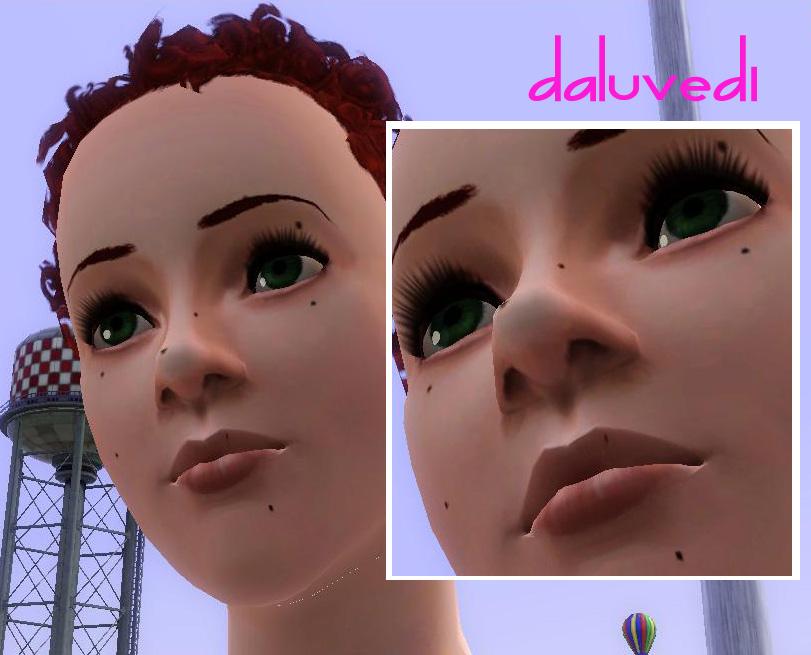
light.jpg - width=811 height=655

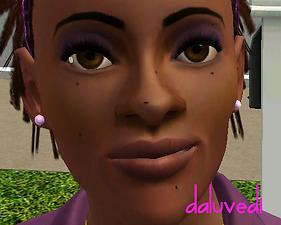
dark.jpg - width=493 height=395

thumbs.jpg - width=141 height=170
Downloaded 36,678 times
2,044 Thanks
272 Favourited
146,416 Views
Say Thanks!
Thanked!
Picked Upload!
This is a picked upload! It showcases some of the best talent and creativity available on MTS and in the community.
Uploaded: 23rd Dec 2009 at 11:04 PM
Updated: 12th Jul 2010 at 6:46 PM - Revamped and redone :D
Updated: 12th Jul 2010 at 6:46 PM - Revamped and redone :D
 UPDATED!
I've had this project sitting on my computer for months now, and I finally decided to go ahead and finish it.
 Like the title says, I've created 8 new beauty marks. Why did I bold the words "beauty marks", you ask? Well, instead of making these costume make up like so many others out there, these show up under the Topical Details Section and are 100% layerable!
Yes, these moles actually show up under the beauty marks section and can be checked and layered with makeup, freckles, other beauty marks and costume make up!
How did I do this? Well, I used this tutorial by CmarNYC and tweaked it a bit. To make these took a little extra coding, but freeing up an accessory slot was worth it
Anyhoos, like I said, there are eight new moles but you can have only three custom beauty marks in your game at one time. Like with sliders, the game has a hard-coded limit of the amount of beauty marks that can be in the game (which is five by the way). Because you can only have five total, minus the two EA ones only left room for three custom beauty marks. However there is a mod by Rez Delnava that expands the GUI size in CAS, allowing for more beauty mark/freckles slots. The mod can be found here: http://modthesims.info/download.php?t=410965%29
 If you do not have this mod, then you can only have three of my beauty marks in your game at one time.
These are Unisex and Uni-age (is that a word?) which means your sim well retain this beauty mark their entire life. When your sim ages up they will still keep their beauty mark and their children can inherit them

These are NOT recolorable because they function like the EA beauty marks. Yes you lose the ability to recolor them BUT it frees up the custom make up slot for something more useful like pretty contacts

Time for the boring stuff:
-You may upload/include these with sims (with proper credit, of course)
-You may not redistribute these on any other site, or claim them as your own
-You may "piggyback" off of these to make your own moles and blemishes
Additional Credits:
Cherub Curly Hair By HystericalParoxysm at MTS
Default Replacement Eyes by Syera at MTS
MTS has all free content, all the time. Donate to help keep it running.
|
Layerable Beauty Marks.rar
Download
Uploaded: 25th Dec 2009, 1.87 MB.
46,698 downloads.
|
||||||||
| For a detailed look at individual files, see the Information tab. | ||||||||
Install Instructions
Quick Guide:
1. Click the file listed on the Files tab to download the file to your computer.
2. Extract the zip, rar, or 7z file. Now you will have either a .package or a .sims3pack file.
For Package files:
1. Cut and paste the file into your Documents\Electronic Arts\The Sims 3\Mods\Packages folder. If you do not already have this folder, you should read the full guide to Package files first: Sims 3:Installing Package Fileswiki, so you can make sure your game is fully patched and you have the correct Resource.cfg file.
2. Run the game, and find your content where the creator said it would be (build mode, buy mode, Create-a-Sim, etc.).
For Sims3Pack files:
1. Cut and paste it into your Documents\Electronic Arts\The Sims 3\Downloads folder. If you do not have this folder yet, it is recommended that you open the game and then close it again so that this folder will be automatically created. Then you can place the .sims3pack into your Downloads folder.
2. Load the game's Launcher, and click on the Downloads tab. Find the item in the list and tick the box beside it. Then press the Install button below the list.
3. Wait for the installer to load, and it will install the content to the game. You will get a message letting you know when it's done.
4. Run the game, and find your content where the creator said it would be (build mode, buy mode, Create-a-Sim, etc.).
Extracting from RAR, ZIP, or 7z: You will need a special program for this. For Windows, we recommend 7-Zip and for Mac OSX, we recommend Keka. Both are free and safe to use.
Need more help?
If you need more info, see:
- For package files: Sims 3:Installing Package Fileswiki
- For Sims3pack files: Game Help:Installing TS3 Packswiki
About Me
Want to convert one of my TS3 creations to TS4? Go right ahead! Just please credit me for the original texture/mesh.
MY INBOX IS DISABLED. I WILL NOT RECEIVE ANY PMS.
Because my policy is really inconsistent on my uploads, I've decided to make an official policy! So whatever you see here on my profile is my current policy. You may disregard any ''policy'' information you see on the actual upload itself.
-You may use my creations with sims
-You may use my objects with lots.
-You may retexture my meshes.
-You may include my meshes with retextures.
-You may NOT upload my creations with sims
-You may NOT upload my objects with lots.
-You may NOT upload my creations to paysites.
-You may NOT upload my creations to the exchange.
-Always credit me with a link
-I do NOT take requests!

 Sign in to Mod The Sims
 8 New Beauty Marks


