Hi there! You are currently browsing as a guest. Why not create an account? Then you get less ads, can thank creators, post feedback, keep a list of your favourites, and more!
Test Subject
Original Poster
#1 Old 27th Aug 2022 at 2:44 PM
Default Making Custom Accessory removed original Maxis mesh
Hi, i was carefully following creating custom accessory tutorial by Scorpicus, step by step https://modthesims.info/t/295369 but after i linked everything to my custom project package, not only does my custom mesh not appear in Body Shop as visible mesh, but original Maxis glasses i created project from lost mesh too. I'm not sure at what step was original Maxis mesh modified, as tutorial is very simple to follow and by the book. It seems that no one else had this issue as i found no questions or answers about it elsewhere. I think 3D reference file must be an issue because 2 tutorials that i checked out so far say to link all valid 3D references with correct mesh, instead just single one under correct XMOL id. In other words, am, cu and tm have 2 correct linkable 3D references for thick glasses instead one for each, and tutorials implied linking both of them to new am, cu, and tm mesh package.
Another question would be, if all 3D references that should be linked are linked, why is mesh still not showing up, custom nor maxis?
Here is preview of original Maxis mesh after i modified (only) my custom mesh


I hope this wasn't overly complicated explanation, any help is much appreciated! I was really looking forward creating custom meshes as 3D artist but so far all my attempts went really south.
Advertisement
Mad Poster
#2 Old 27th Aug 2022 at 4:25 PM Last edited by simmer22 : 27th Aug 2022 at 4:38 PM.
The steps that make the accessory standalone are when you extract the resources belonging to the mesh(es), put them in a new package, then to do "Fix Integrity" and give the file a new name internally in the box that pops up. Did you do this?

This has to be done BEFORE you link it up to the recolor file. If you do it after, the recolor will still be linked to the glasses.

If you're linking manually the CRES and SHPE, only do the first Resource Node and SHPE in the list, not the second set. You have to link the XMOLs to the mesh they belong to (there's one for each age/gender in the file, so match them up - accessories automatically make cf/cm and tf/tm).

Also make sure to delete the cache files whenever you go in or out from Bodyshop, because those files save old info about the files, so changes don't always show up.
Test Subject
Original Poster
#3 Old 29th Aug 2022 at 1:46 PM
Quote: Originally posted by simmer22
The steps that make the accessory standalone are when you extract the resources belonging to the mesh(es), put them in a new package, then to do "Fix Integrity" and give the file a new name internally in the box that pops up. Did you do this? This has to be done BEFORE you link it up to the recolor file. If you do it after, the recolor will still be linked to the glasses.


Tutorial itself noted that after extracting resources and putting them in a new package, they have to have "fixed integrity" with a new name in order to not overwrite the original. I did all of that before linking stage, so i think i did this part correctly.

Quote: Originally posted by simmer22
If you're linking manually the CRES and SHPE, only do the first Resource Node and SHPE in the list, not the second set. You have to link the XMOLs to the mesh they belong to (there's one for each age/gender in the file, so match them up - accessories automatically make cf/cm and tf/tm).


I did linking stage with PJSE but since i wanted my accessory to be for all available genders/ages like Maxis mesh was, i did PJSE extracting stage for every gender/age as separate mesh with their respective gmdc/gmnd/shpe/cres set prior linking (i didn't just leave all age/gender resources in one mesh as that can't be linked to 3D Resources).
Then i carefully linked with PJSE every 3D Resource to their respective age/gender mesh. This should have probably be done manually instead PJSE? Or perhaps that is the correct way?
I also probably shouldn't have picked both resources for cu,tm and am, so that could be the reason original Maxis mesh got bonked. I would like to test this again on same thick glasses but i need to find a way to restore Maxis mesh before anything else.
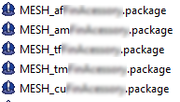
I'll attach pictures of my meshes in folder and cu one inside SimPE (with blurred custom name since this was surprise gift for someone)


{Thank you for letting me know about cache, and altho it didn't fix the invisibility, it's good to know)
Mad Poster
#4 Old 29th Aug 2022 at 2:58 PM
The PJSE tool won't work if you have all meshes in the same file, but if you have each mesh in a separate file, you can link with the PJSE tool, that's fine.

One other problem could be if you used the wrong recolor file. Did you use the file in the Project folder, or the file in SavedSims? You have to use the file in SavedSims for the linking (make sure it's the one with numbers in front). The file in the Project folder is only a template for recolors, and doesn't work ingame or in Bodyshop, it only works while you're making a recolor - when you do "import to game" the working file will appear in SavedSims.

(For recolors, you'll have to make a new project with the finished file after you're done).
Test Subject
Original Poster
#5 Old 29th Aug 2022 at 6:04 PM
Quote: Originally posted by simmer22
The PJSE tool won't work if you have all meshes in the same file, but if you have each mesh in a separate file, you can link with the PJSE tool, that's fine.

One other problem could be if you used the wrong recolor file. Did you use the file in the Project folder, or the file in SavedSims? You have to use the file in SavedSims for the linking (make sure it's the one with numbers in front). The file in the Project folder is only a template for recolors, and doesn't work ingame or in Bodyshop, it only works while you're making a recolor - when you do "import to game" the working file will appear in SavedSims.

(For recolors, you'll have to make a new project with the finished file after you're done).


I did use file from SavedSims and didn't visit Project Folder even once. After linking each mesh to respective Resource in SimPE and saving, i went to 'Create New Parts' screen in Body Shop. My custom glasses initially had preview for adult male and elders, but once i selected adult female preview, mesh became invisible for all ages and genders including previously visible elders and adult males. At same time, Maxis original mesh also lost visibility.
Mad Poster
#6 Old 29th Aug 2022 at 6:27 PM Last edited by simmer22 : 29th Aug 2022 at 6:39 PM.
Would you mind uploading the recolor and mesh files so I can take a look at them? Could be how the meshes are set up or something in the linking, but it's difficult to guess - much easier to look through the files.
Test Subject
Original Poster
#7 Old 29th Aug 2022 at 6:49 PM
of course, i can upload files for you. Would MTS forum accept links from mediafire?
Mad Poster
#8 Old 29th Aug 2022 at 6:51 PM
It's fine for creation help and such, so in this area it's okay.
Test Subject
Original Poster
#9 Old 29th Aug 2022 at 7:10 PM
https://www.mediafire.com/file/78ab...c_sims.zip/file here are the packages, let me know if i should upload the project file too (it's just thick glasses copy)
Mad Poster
#10 Old 29th Aug 2022 at 7:41 PM Last edited by simmer22 : 29th Aug 2022 at 8:07 PM.
Looks like something might have gone wrong in the "fix Integrity" part. Your meshes have for some reason kept their instance numbers from the original meshes, which is why they're trying to overwrite the original mesh. Looks like this has happened for all the meshes.

You can make new files, or do Fix Integrity again on the files you already have (just add an extra word).

If you make new files - after you extract the mesh files (the easiest is to use the PJSE tool), don't click on any of the resources in any of the windows (the "plugin view" should remain empty, the files in the "resource list" should be in italics and not marked in blue, and don't save the file yet).

Whether or not you use the same files or make new ones (if you use the same ones, make sure you don't click on any of the resources after opening them) -

Go directly to "Tools --> Object tools --> Fix Integrity" and write your preferred text in the "model name". Click "Update" and "OK". Don't click anything in any of the windows, just do "File --> Save as"

After this, if I have the GMDC ready to replace, I tend to do "file -> new" and then open the file back up again before replacing the GMDC, because there's been some occasions with broken CRES resources if the mesh is replaced in the wrong step. Only way to fix it is to remake the mesh package, so it can be a bit of an annoyance.

---

A few accessory tips that could save you a lot of frustration, because the original glasses have a lot of potential issues in their settings:

Go to the TXMT/Material Definition resources, and the "cMaterialDefinition" tab.
Check all the "Type" lines in all the "Frame_txmt" and change all the "StandardMaterial" to "SimStandardMaterial". The "StandardMaterial" causes the items to turn inside-out from certain angles for CAS items.

If you're making anything meant to blend with clothes or skin, these settings change accessories to have the same lighting level as most clothes/skin.
Change them for the "Frame" TXMTs, under "Properties"
- stdMatDiffCoef: 1,1,1
-stdMatSpecCoef: 0.099,0.099,0.099
-stdMatSpecPower: 2

(I keep custom recolors at hand with these things already fixed, so I don't have to clone the glasses - there's a limit to how many times a person wants to edit the same things over and over again, when there's a handy cheat).

Once you've made all your files and checked that everything is linked properly and works fine, you can drag-drop all the mesh files into SimPE and do "file --> save as", to make a mesh package that contains the meshes for all the ages. Lets you have one mesh file instead of five.
Test Subject
Original Poster
#11 Old 29th Aug 2022 at 10:04 PM
Quote: Originally posted by simmer22
Looks like something might have gone wrong in the "fix Integrity" part. Your meshes have for some reason kept their instance numbers from the original meshes, which is why they're trying to overwrite the original mesh. Looks like this has happened for all the meshes.

You can make new files, or do Fix Integrity again on the files you already have (just add an extra word).

If you make new files - after you extract the mesh files (the easiest is to use the PJSE tool), don't click on any of the resources in any of the windows (the "plugin view" should remain empty, the files in the "resource list" should be in italics and not marked in blue, and don't save the file yet).

Whether or not you use the same files or make new ones (if you use the same ones, make sure you don't click on any of the resources after opening them) -

Go directly to "Tools --> Object tools --> Fix Integrity" and write your preferred text in the "model name". Click "Update" and "OK". Don't click anything in any of the windows, just do "File --> Save as"

After this, if I have the GMDC ready to replace, I tend to do "file -> new" and then open the file back up again before replacing the GMDC, because there's been some occasions with broken CRES resources if the mesh is replaced in the wrong step. Only way to fix it is to remake the mesh package, so it can be a bit of an annoyance.

---

A few accessory tips that could save you a lot of frustration, because the original glasses have a lot of potential issues in their settings:

Go to the TXMT/Material Definition resources, and the "cMaterialDefinition" tab.
Check all the "Type" lines in all the "Frame_txmt" and change all the "StandardMaterial" to "SimStandardMaterial". The "StandardMaterial" causes the items to turn inside-out from certain angles for CAS items.

If you're making anything meant to blend with clothes or skin, these settings change accessories to have the same lighting level as most clothes/skin.
Change them for the "Frame" TXMTs, under "Properties"
- stdMatDiffCoef: 1,1,1
-stdMatSpecCoef: 0.099,0.099,0.099
-stdMatSpecPower: 2

(I keep custom recolors at hand with these things already fixed, so I don't have to clone the glasses - there's a limit to how many times a person wants to edit the same things over and over again, when there's a handy cheat).

Once you've made all your files and checked that everything is linked properly and works fine, you can drag-drop all the mesh files into SimPE and do "file --> save as", to make a mesh package that contains the meshes for all the ages. Lets you have one mesh file instead of five.


Thank you very much, your integrity method worked! As soon as i deleted all files created by me in SavedSims and project from Body Shop, Maxis mesh was free from limbo. From there i just redid creating whole project.
Brief rundown on how i separated meshes without compromising integrity for future reference:
-In extracting stage i followed your advise and didn't touch anything before Fixing Integrity after i imported in new file. I saved mesh without touching anything after changing resources names (at this stage error will appear if i try to delete anything, "resource is not linked")
-I created backup of this mesh, duplicated it few times and renamed each for cu, tf, tm, af, am, then i moved backup mesh from SavedSims elsewhere to avoid collision.
-Only then i opened each of these mesh files for appropriate gender/age and removed resources that are not for that mesh, and saved each.
The linking stage is pretty straightforward. Thank you for the tip about merging meshes, i just returned my initial unified mesh backup back to SavedSims and put separated ones elsewhere and it worked same way!


I can't thank you enough for bonus into about textures, i didn't know standard material would invert normals, which would be stressful to fix. I followed your instructions about values and preview so far has very nice shading (will absolutely take your advise about keeping custom recolors, changing these numbers does take lot of time)

Thank you so much for massive help in all aspects, hopefully this will be helpful for future acc modders too
Mad Poster
#12 Old 30th Aug 2022 at 12:36 AM
Happy to help

I have a (text-only) tutorial here with some more on all-age accessories, if you need any tips. There's how to add toddler and infant accessories too, if you ever need that.
Back to top