 Tutorial: Making real lakes swimmable
This tutorial combines two tricks gleaned from other tutorials (
swimmable ground and
underwater building) and uses one custom object (
transparent floor tiles) to enable sims to swim in an actual lake, created with the water territory tool.
For seasoned experts, who only need to know the "what", not the long, tedious "how": we're going to build a surface of transparent floor tiles on the first level above the lake, push it down until it is submerged directly beneath the water surface, build a second-level surface on top of it for the diving board and ladder, then push part of that down until it is lying directly on top of the water surface.
If you're not an expert, you should probably be at least a seasoned builder, who knows his way around the available tools, particularly the ground-shaping ones, and has successfully used the "constrainFloorElevation" cheat before.
Here's how to do it:
First we need a lake for our sims to swim in. Build one with the water terrain tool.
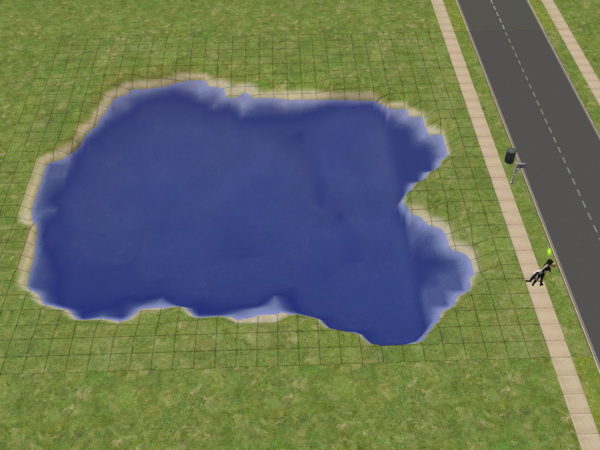
Now create a scaffolding for the swimmable surface by framing the lake in a large foundation rectangle. I like to use the platform type, because it doesn't block the light in the enclosed space.

Use the "flatten ground" tool and drag it all the way across the foundation rectangle.
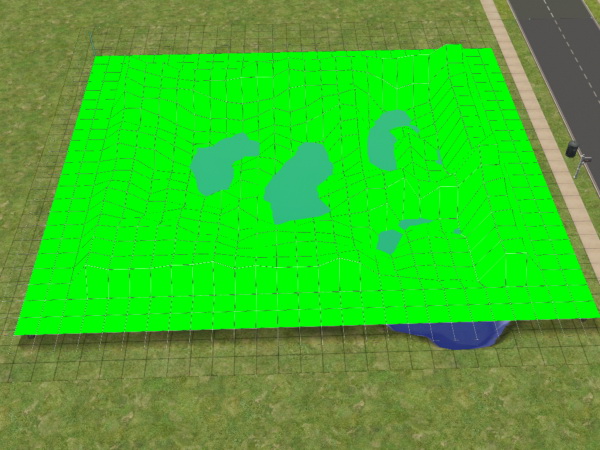
The gives us a nice, flat grid on the first level to create our swimmable surface.
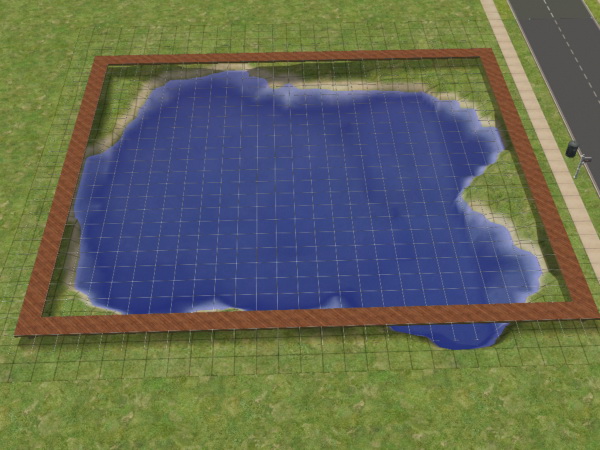
But first we prepare the support for the second-level platform that will hold our diving board. Extend the framing foundation into the lake and there extend it further to create a platform. It has to be built as an extension, because building it as an isolated foundation in the lake won't work properly unless the submerged ground there happens to be flat - and even then we'd have to flatten the first level again to bring it back up in line.

You can separate the platform in the lake from the scaffolding now.
 Note: I had to fix the ground underneath the connection slightly first, because deleting the connection screwed with the elevation of the ground underneath, which screwed with the water level. Remember, if a piece of the bank is pushed down below the water level by any means other than the "Water terrain" tool, the game assumes you want it to remain dry land and adjusts the water level for the entire lot downwards. If you push "lower ground" on a piece of the bank, you can watch your entire lake dwindle and vanish!
In this case, I should have built the extension from a point of the scaffolding that was already above the lake.
Now we create our swimmable surface by placing flooring tiles on the grid provided by our scaffolding. Keep it well away from the bank of the lake and keep the shape simple. We're going to push this thing underwater later, and with a complicated shape that can get pretty annoying. For the sake of visibility in this tutorial, I've used a regular floor tile, which will later on be replaced with a custom transparent floor.
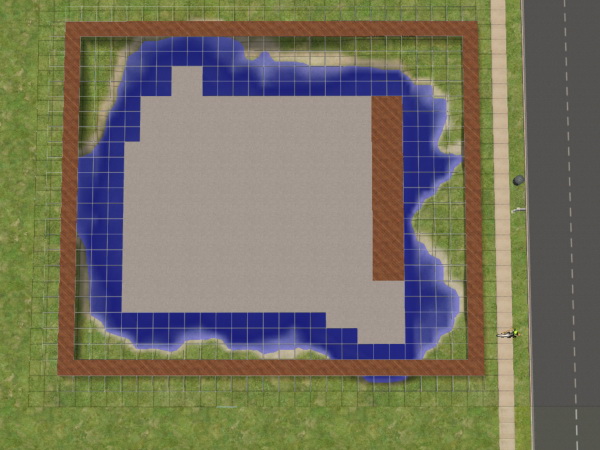
We no longer need the scaffolding, so we can remove it.
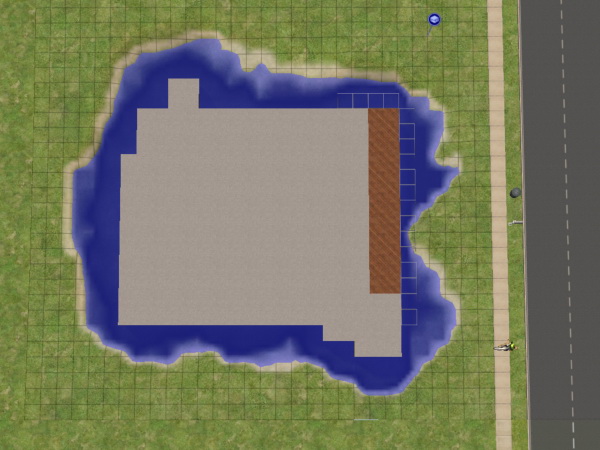
It's time to submerge our swimming surface. To do this we need to engage a cheat. Press Shift+Ctrl+C to open the cheat console, type there "boolProp constrainFloorElevation false" and Enter. This allows moving the ground and upper levels, even after they have already been built on, which is exactly what we'll be doing.
Now we find the submerged ground beneath one corner of the flooring and lower it. Thanks to the cheat we can do this, and the corner of the floor will be dragged down along with the lowering ground.
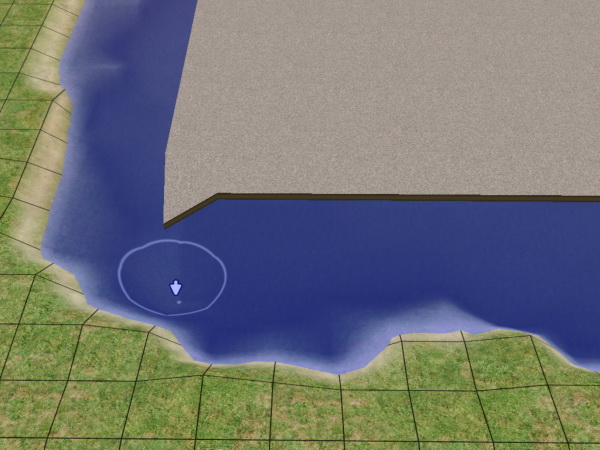
Keep lowering the ground until the corner of the floor above is JUST beneath the surface of the water.
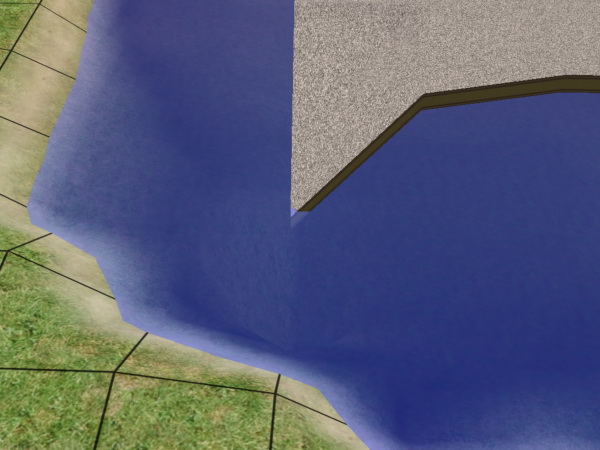
We repeat this for the other three corners of the tile, until it is once again flat and submerged right beneath the surface of the water.
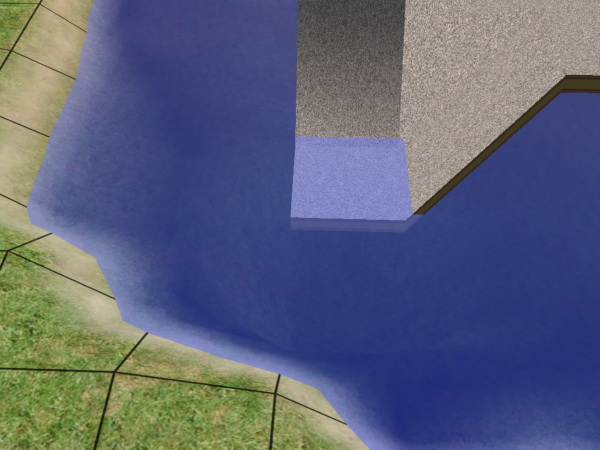
Now we can use the "flatten ground" tool to bring the entire floor to the same level. Be careful not to use the tool to liberally; only flatten the squares that have actual floor tiles on them. If you push down too much of the first level, it will automatically push down the ground underneath, and if that happens to a piece of the bank, it can screw up the entire lake, as I explained earlier.
This is also why simple shapes work best. Trying to flatten a very irregular shape, but no more than that, can get frustrating.
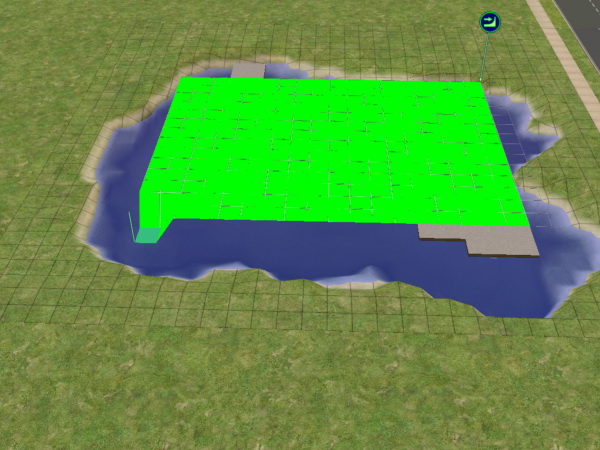
Our surface is submerged now. When our sims swim in this, it will look as if they're actually swimming in the water.
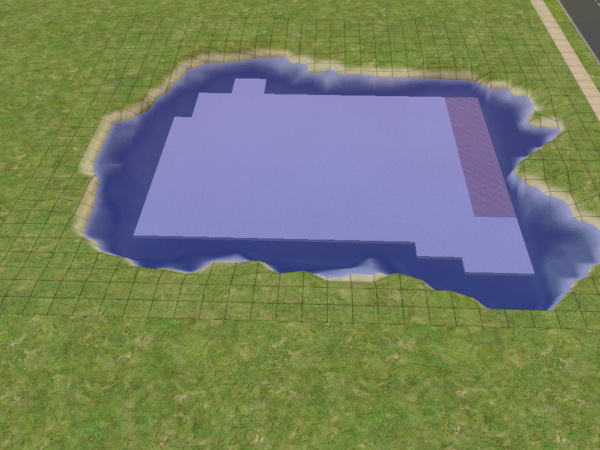
To enable Sims to swim in it, though, we need another level above this surface, where we'll place the diving board and ladder. If you place one of these on a level, then sims can use it to dive or climb into the surface of the next lower level, swimming in it like in a pool. So, if you place it on the first level, they can swim in the ground, and if you use the second level, they can swim in first-level flooring - which is exactly what we're doing.
Select the platform foundation again and, while holding the Shift key, build another platform on top of the already existing one, so that the supports of the upper and lower platform line up. (This is not necessary for it to work - it's just so it'll look nice, later on.)

The new platform will appear a full story height (16 clicks) above the submerged ground. We'll have to fix that.
For this we'll use the connecting stairs, because as long as the floorElevation cheat is on, they can push exactly measured dents into level ground. In this case, build three consecutive stairs into the submerged surface, creating dents that are 4, 8, and 12 clicks deep respectively.
It's probably best to do this over the middle of the lake, because these dents may push down the ground below, if it isn't deep enough, and in the middle this won't be so noticable.
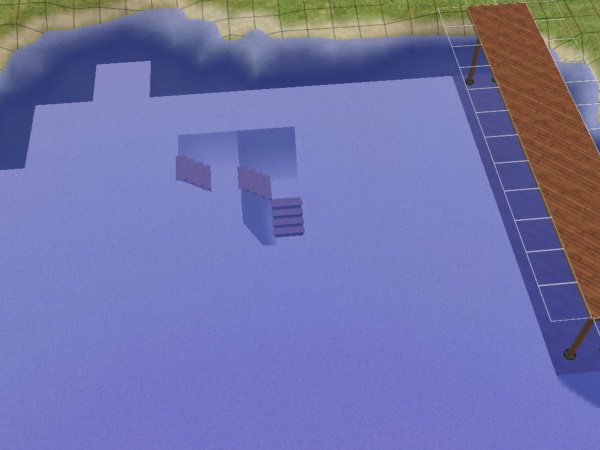
Once we have those dents, we can remove the stairs again (Hold Ctrl and click on them).
Using the "flatten ground" tool, we extend the lowest dent a little to the side, to prevent interference in the next step.

Once more holding down Shift, we place two platform foundations into the lowest and second lowest dents we created. Keep them at least two squares apart to prevent them from interfering with each other. The platforms will be 8 and 4 clicks above the undented floor. These are the reference heights we will use to fix the other platform.
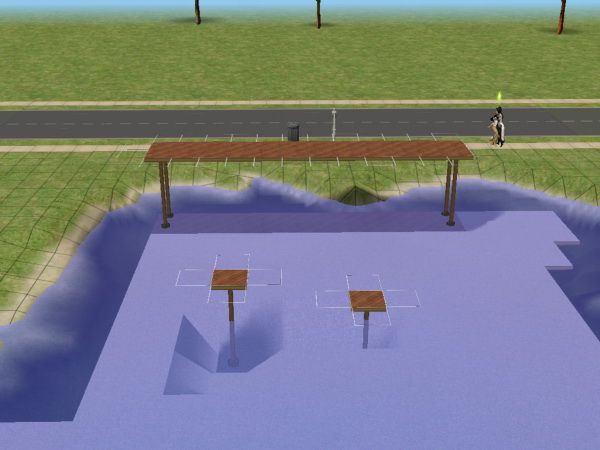
First we drag the flattening tool from the higher reference platform to one half of the too high platform, thus pushing it down.
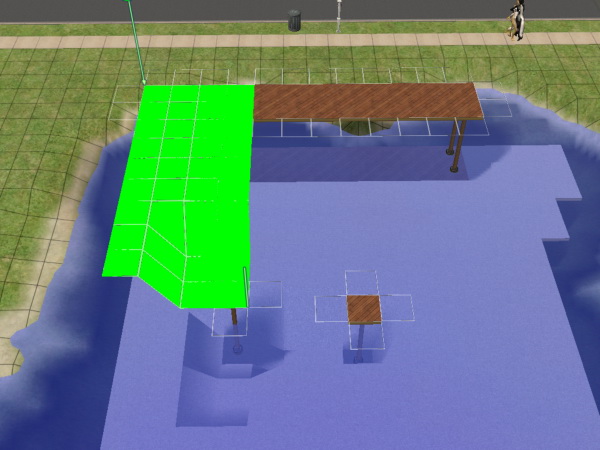
The we push the other half down to the lower reference level. (We're going to lower it even further, later on, but this is the lowest we can go right now, without distorting the flooring underneath.)
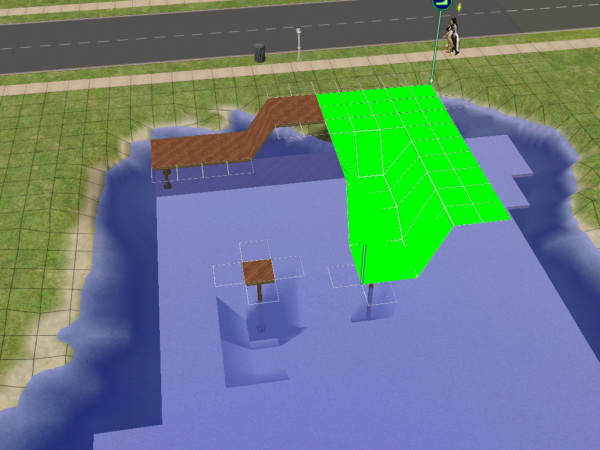
Finally we fix any bits that still stick up, by pushing them down to one of the two heights.
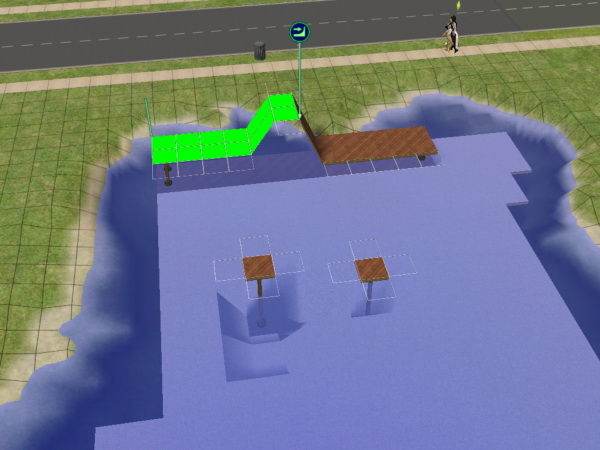
Good, we now have a two-height platform, which we'll need later on. The higher part can be connected to the ground at the bank, and the lower part will hold the diving board.
Now we can do away with the reference platforms and level the dents out of the flooring.
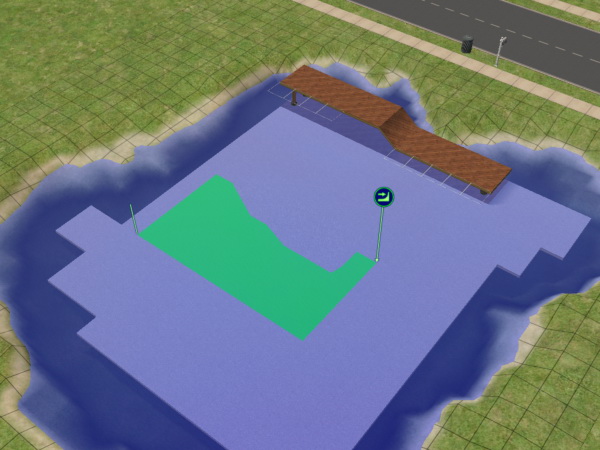
Now we should apply the transparent floor tiles at last, because in the next step we'll warp part of the submerged swimming surface. I used
RGiles ones, but I'm sure any other transparent flooring will work just as well.
It's best not to click/drag the flooring across the surface, because then the floor tiles will attempt to flatten all adjacent squares, which can - once again - screw with the banks of the lake. It's better to fill the surface by holding shift and clicking.
Also cover the lower platform with these tiles, so that it looks like the upper platform is standing on long supports, rather than on another platform.
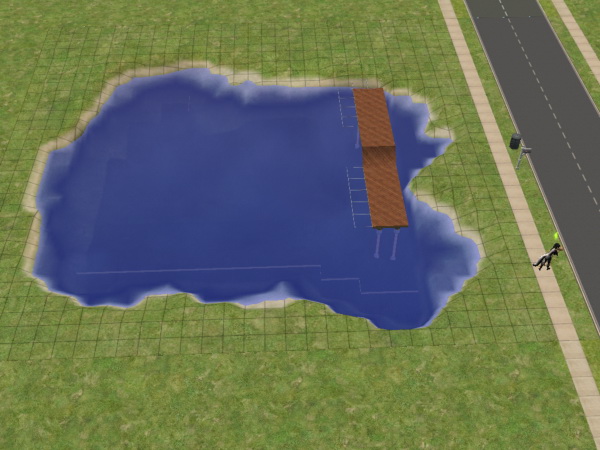
As you can see, the tiles are not completely invisible - there is still an edge that can be seen from certain angles, and a shadow is cast on the ground of the lake.
Now comes another fiddly bit. We'll lower the low part of the platform still further, until it appears to be sitting right on top of the water. To do this, we find the ground underneath one of the supports of the lower end and push one corner down by 3 clicks.

Since the flooring is one click below the water and the platform is four clicks above the flooring, three clicks will put it right above the water.
Just like we did with the corner of the flooring, when we submerged it, we lower all four corners of the square, until it is flat again.
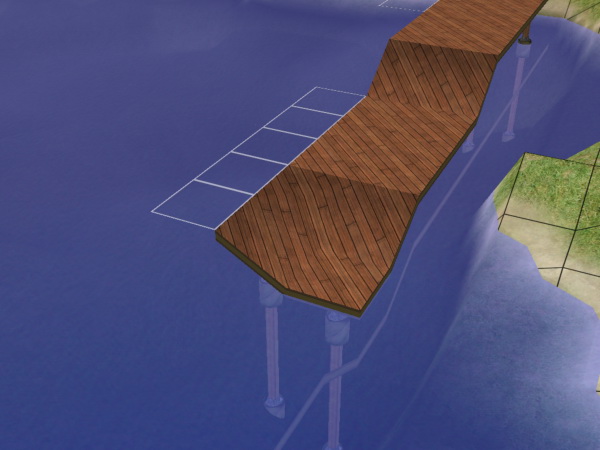
Now we flatten the rest of the lower platform, up to one square away from the sloped "ramp".
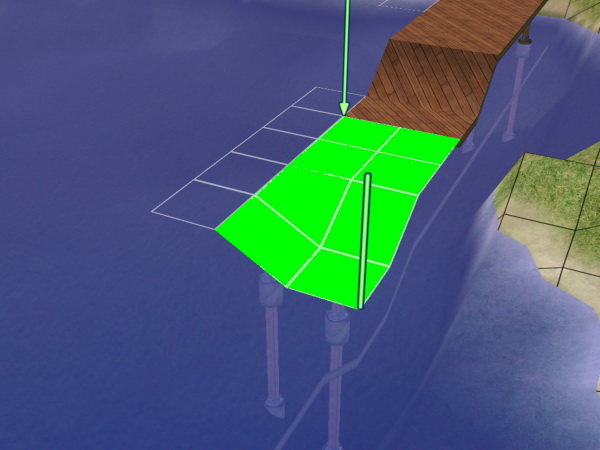
That last square will slope to extend the ramp down to the new lower level.
Note: Technically, you don't need to use a ramp. You could have two completely separate platforms and connect them with stairs - but since the two platforms are 7 clicks apart, not the usual 8, connecting stairs would run into trouble, and correcting for that would make this tutorial needlessly complicated.
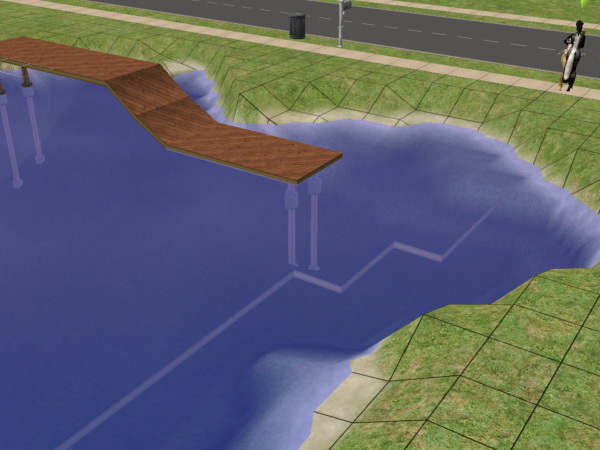
Now we need to enter another cheat. Open the cheat console again and type "moveObjects on". This allows us to place the diving board and pool ladder on the platform, even though we have no pool. We need to pay attention to the green "footprint" squares of these objects. Both of them require an accessible, empty square of ground behind them, so that sims can get to them and use them. The required empty squares of the ladder and the board can overlap, though, as in the example below.
Afterward you can turn off the moveObjects cheat. We needed it just for this.
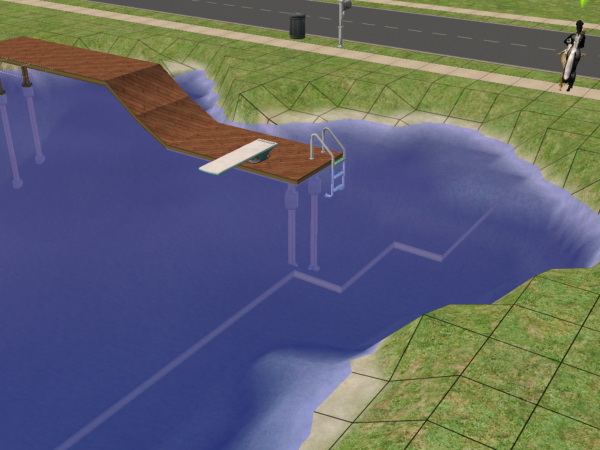
Now we extend the ground from the bank into the lake a bit, by using the flattening tool again. Stay exactly one square away from the higher end of the platform.
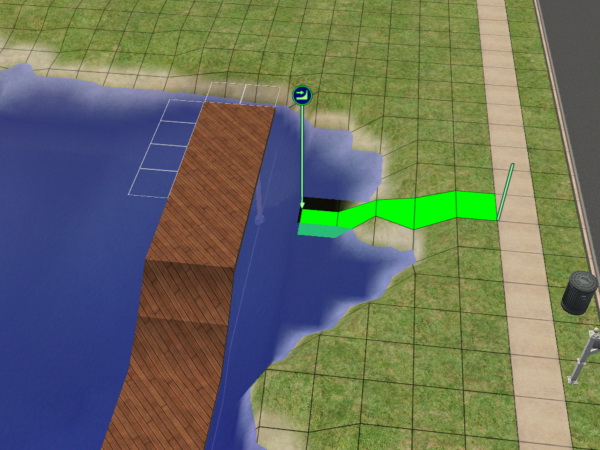
This way we can build a connecting stair from the platform to the ground. Depending on the elevation of the ground at this place of the bank, this may take a bit of fiddling with the ground heights to make things fit. In this case it fit perfectly.

And that's it.
You now have made your real lake swimmable for your sims. You can set the constrainFloorElevation property back to "true" now.
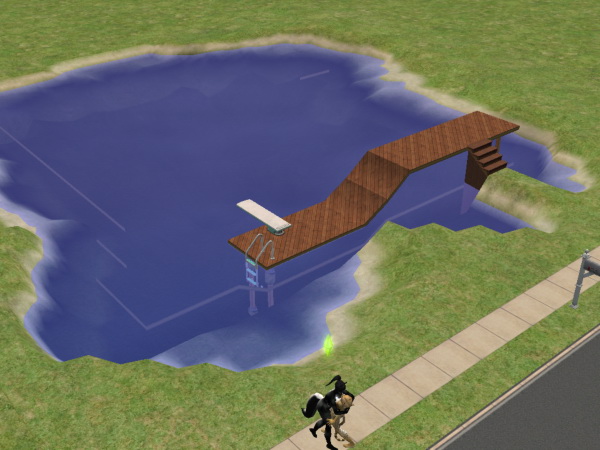
Because we pushed the platform with the pool accessories down to one click above the swimmable surface, the sims don't "fall through" the diving board, when they use it, and don't jump through the air to reach the ladder. And because the swimmable surface is not connected to anything else, except by the pool ladder, there is no danger of the swimmers escaping the lake and swimming around in the ground or the house floors.
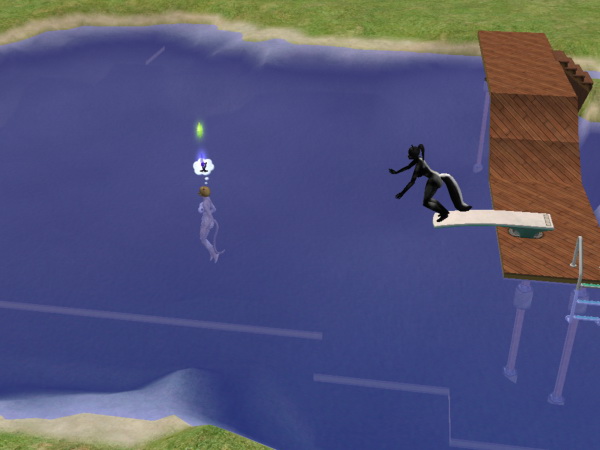
For laffs, you could build a regular stair down to the submerged surface, to let your sims feel all messianic, as they walk on water - but then, the stair also allows swimmers to escape and start swimming all over, so perhaps better not.

If the visible edges of the floor tiles are too annoying, maybe they can be covered up with appropriate decorations, such as reeds and water lilies, as niol suggested to me.
I hope you have fun with this.
 18th May 2006 at 2:35 PM
Last edited by JustTheBast : 6th Aug 2015 at 4:08 PM.
Reason: Spelling correction and fixing the images
 18th May 2006 at 10:46 PM
Last edited by niol : 30th Oct 2007 at 5:01 PM.
 18th May 2006 at 11:31 PM
 19th May 2006 at 7:46 PM
 19th May 2006 at 8:35 PM
 19th May 2006 at 9:00 PM
 22nd May 2006 at 6:19 PM
 22nd May 2006 at 9:34 PM
 23rd May 2006 at 6:24 PM
 24th Jun 2006 at 12:34 AM
 24th Jun 2006 at 5:01 AM
 24th Jun 2006 at 7:27 PM
 25th Jun 2006 at 8:12 AM
 25th Jun 2006 at 9:56 AM
Last edited by niol : 30th Jul 2006 at 8:33 PM.
 1st Jul 2006 at 8:41 AM
 23rd Jul 2006 at 1:29 PM
 24th Jul 2006 at 5:52 PM
 25th Jul 2006 at 4:34 PM
 30th Jul 2006 at 4:23 AM
 30th Jul 2006 at 9:54 AM
 4th Oct 2006 at 3:46 PM
 21st Oct 2006 at 9:45 PM
 21st Oct 2006 at 10:17 PM
 22nd Oct 2006 at 1:16 AM
 22nd Oct 2006 at 1:28 AM

 Sign in to Mod The Sims


 i really like ity
