Purpose of this Tutorial:
To show how easy it is to make an open beam ceiling without CC.
Level of Difficulty:
Beginner: With just a basic knowledge of the CFE cheat, you should have no difficulty lowering a flat ceiling.
There are several open beam options around the net. Some are available as horizontal columns and some are fencing that is placed
below the ceiling. I am providing an alternative to those options – a way to enjoy an open beam effect without using any CC.
With my method, you only need the Monorail Fence or the Stream of Consciousness, and a basic knowledge of the CFE cheat.
There are other obvious applications for this method, including open rafters in a vaulted ceiling,
but for this tutorial, we will be focused on only a nice, simple
flat ceiling with open beams.
You will be building two levels. The lower level (in red) will be the level where you place your beams. The upper level (in green) will become your new ceiling.
1. Type in:
testingcheatsenabled true
2. Type in:
buydebug
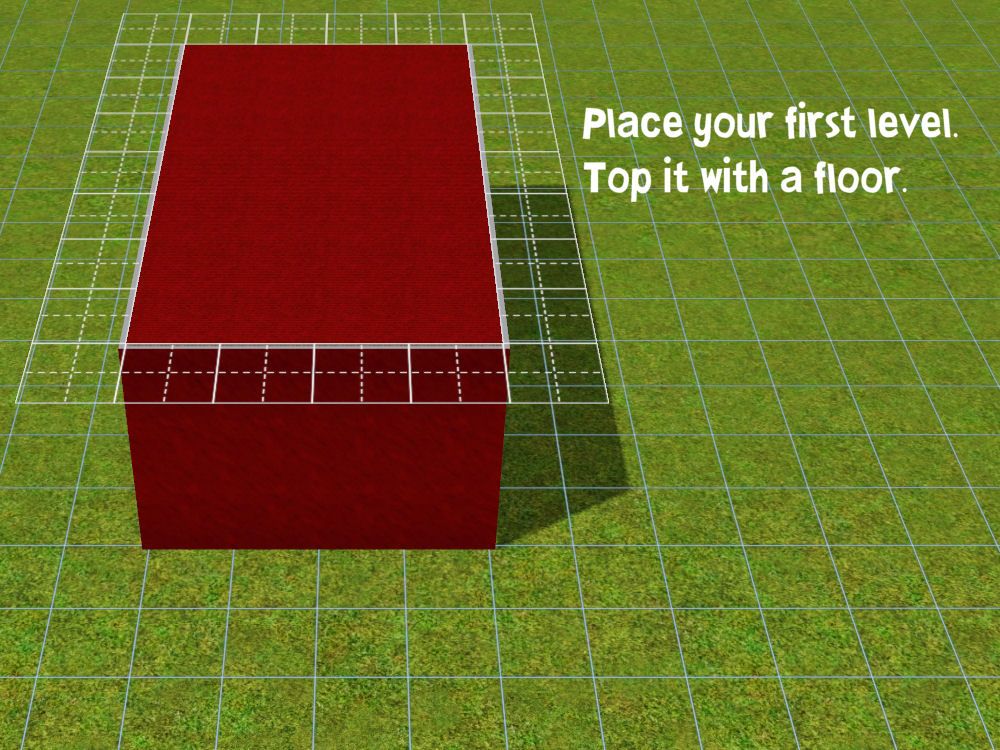
3. Place your lower level, and top it with a floor.
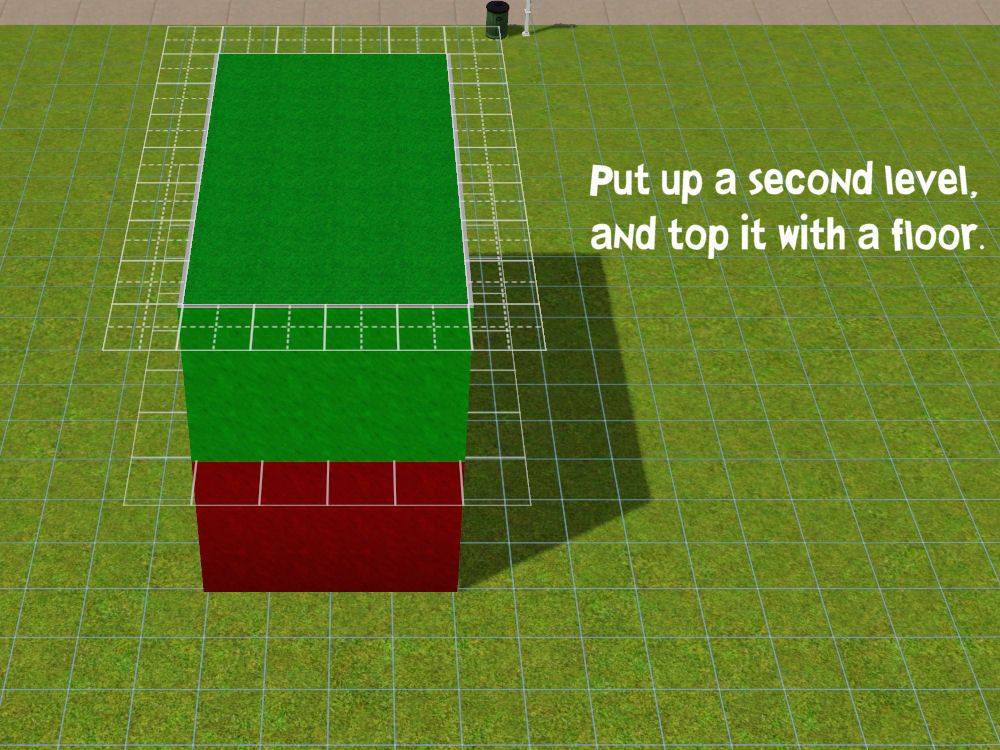
4. Place your upper level, and top it with a floor, too. Remember the underside of
this floor will be your new ceiling.
5. Remove any roofs, and disable Auto-Roof.
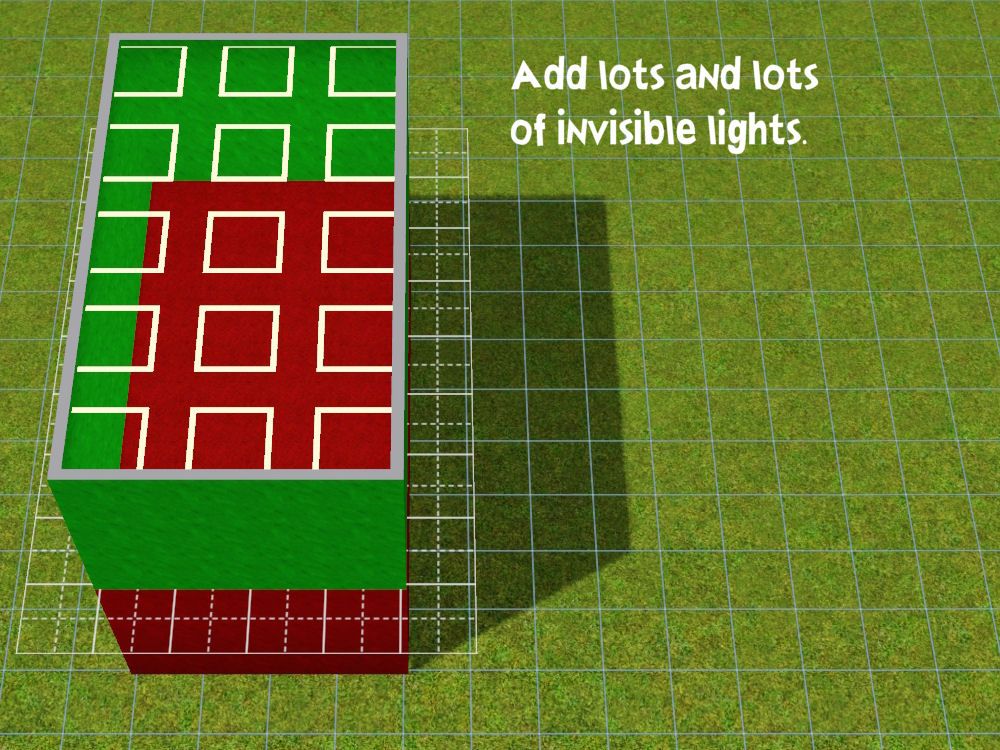
6. Place invisible lights on both levels at the same spots – up against walls and in the center spaces.
(Invisible lights are found under miscellaneous in the buydebug
section.)
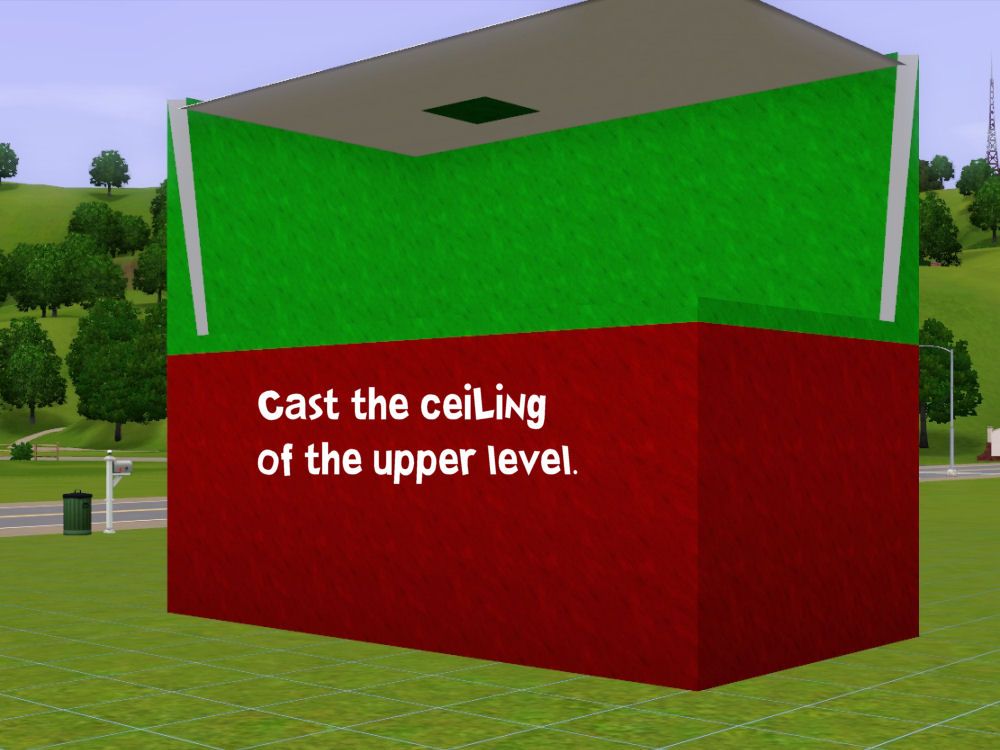
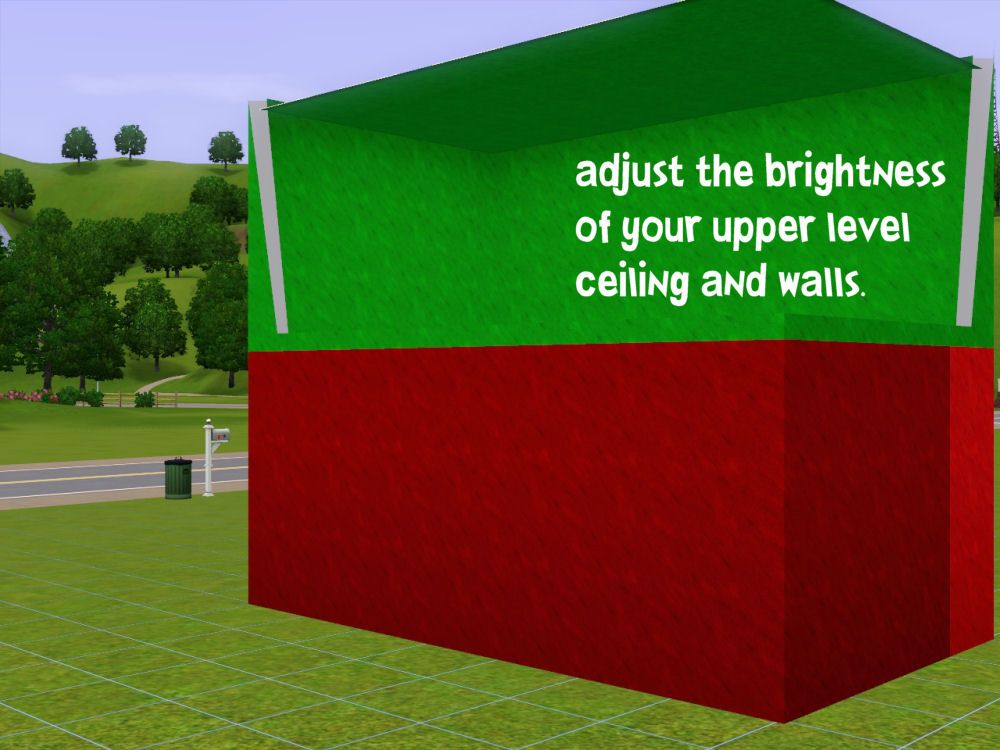
7. Place wallpaper on all your walls, and a ceiling on your upper level. (CASt before you lower it.)
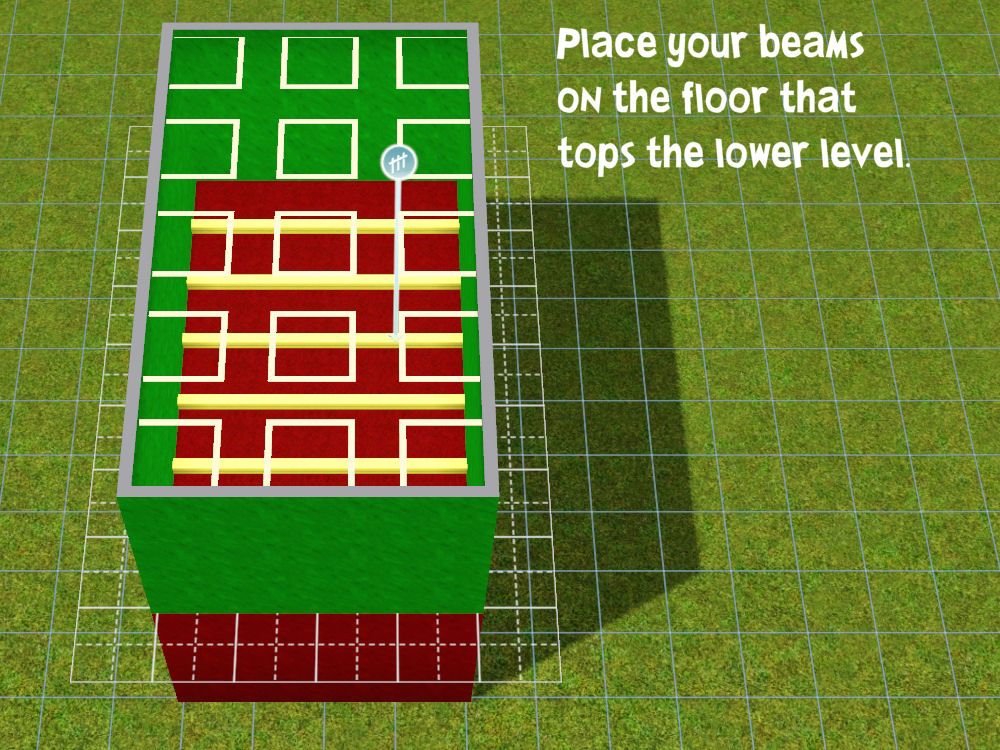
8. Place fencing (your new beam{s}) where you want it, on top of the lower level. (The red floor)
9. Type in:
constrainfloorelevation false
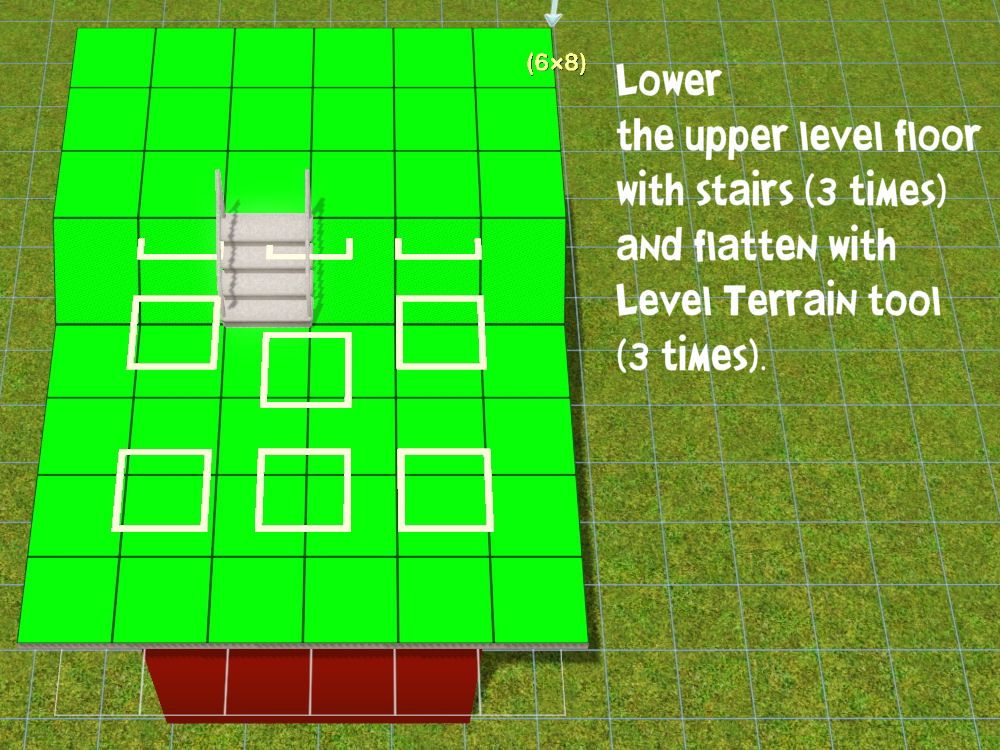
10. Lower the upper-level floor 3 stairs worth. And then flatten it with the Level Terrain tool.
11. Now, depending on how low you want the ceiling, you will need to work with only one step at a time.
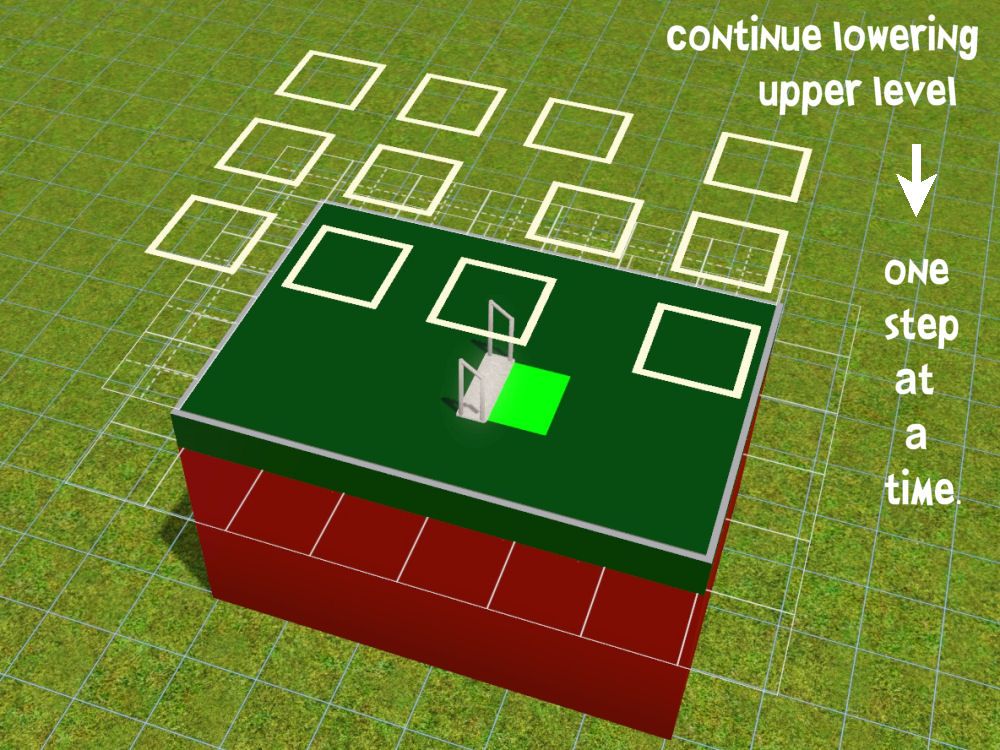
3 steps will bring the ceiling right down onto the beams.
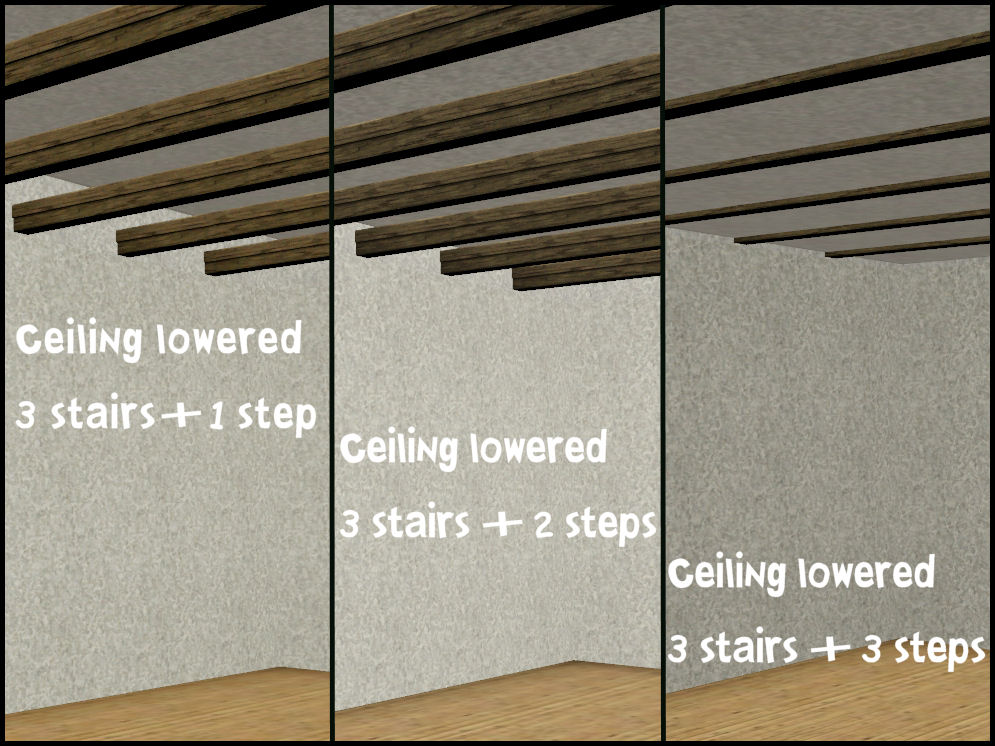
12. Type in:
constrainfloorelevation true
13. Delete the flooring below the beams.
14. Adjust the lighting and/or wall brightness as needed.
15. Furnish and decorate at will.
 Please Read This
1. The walls of your upper level may not necessarily light up the same way as the walls of the lower level. Part of the way to fix this is to
light up both levels a LOT. Use invisible lights right up against the wall tucked up into each corner, and then along
the walls about 1 to 2 spaces apart. And then along the middle.
Remember: You won’t be able to come back later, and light up the upper level. So, be generous – overdo the lights.
If it’s too much, you can always lower the intensity of different lights, turn them off, or even delete them.
But once you’ve altered that upper level, there's no guarantee you'll ever be able to go back and insert lights into that floor.
After using CFE to lower the floor, the lights will show up in build/buy mode
above the floor of the level they’re lighting.
But this is okay; the game still reads them as lights on that floor. So the effects will work on the floor you originally placed those lights. Promise.
CASting is the other way to fix the lighting of the walls and ceiling. You can lighten/darken the walls to match each other, and you can lighten the ceiling to match the walls next to it.
2. To be on the safe side, not only do you need to
place your ceiling before CFE, you should decide what your ceiling is going to look like. I’ve had many times when the game would not allow me to CASt a ceiling after I’d used CFE.
In addition, if you are bringing the new ceiling snug onto the beams, it will be impossible to access the center parts of that ceiling for any reason.
Depending on the height of your new ceiling, when CASting it, you will want to lighten its pattern a little, or even a great bit.
In fact, you may wish to experiment on a different lot before applying this to a home you’re building, just so you can
get a sense of how much lightening is required for your needs. That way, you can save the ceiling and walls presets for the house
you’re building.