 Tutorial: Creating a Volcanic Island Heightmap using Photoshop
This tutorial will walk you through building the heightmap for a volcanic island, using Photoshop. You will also create, and apply two basic alpha maps for terrain painting.
Tools Needed: Photoshop (Tutorial written using Photoshop 7.0, there may be some menu variation with other versions.)
Skill Level Required: Moderate to Advanced (Familiarity with Layers and Actions)
Before you begin, make sure you can save images as 16 bit PNG files. If you can't, go grab a plug-in.
Prep Work:
Open a new image file. Bring your Actions tab to the top. (If it's run off, retrieve it from Window--->Actions.) Create a new set and name it CAW or something similar.
With your Rectangular Marquee Tool make a selection of at least 100x100 pixels.
Create a new Action named "Slope 1". It will start recording automatically.
Follow these steps exactly:
#1 Click "Image---->Adjustments---->Brightness/Contrast" Increase brightness +1
#2 Click "Select----> Modify---->Contract" Contract by one pixel
Repeat four times. (Five rounds total.) Stop the recording in the Actions tab.
Create three more actions. Slope 2, Slope 3, and Slope -1. Slope 2 should adjust the brightness by +2, ect.
Once you've made all four actions, close the current document.
Create a new 512x512 image, greyscale, with background color set to black.
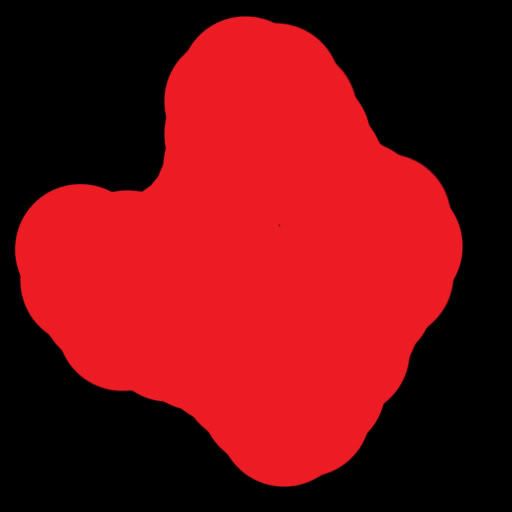
Create a new layer, and in this layer draw a large blob, filling most of the image. Use a SOLID brush, that will leave clean edges. This blob will be the basic shape of your island. Don't make it too complex, three or four bumps should do it.

CTRL-Click "Layer 1" in the layer tab to select the outline of your island.
Select---->Modify---->Smooth
Try 20 at first, and see how that looks; Undo, and try again if needed. You want the curves to be fairly smooth, but don't want to lose all detail. I ended up going with 40 this time.
Delete "Layer 1", we're done with it, but keep the selection.
You should be back on the background layer now. Run Action "Slope 1." Press play at least five times, but you can keep going. Each click will bring it in five pixels. Each pixel is equal to one grid square in game. Running the action five times would create a sloped beach, twenty-five squares wide.
When you're done, create a new layer. Name this layer "Beach Alpha". Select---->Inverse; Edit---->Fill, White 100% Opacity
Select---->Inverse to get back to your original selection. Hide the beach alpha layer; you'll need that later.
Go back to the background layer.
Select---->Modify---->Contract 20 pixels
Select---->Modify---->Smooth 20 pixels
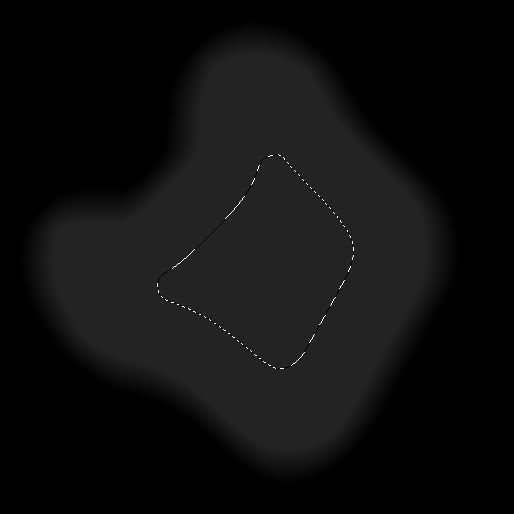
Repeat the above two steps two more times. This will give you sixty squares of flat, buildable land, all the way around the island. You should be left with an irregular blob in the center, for the volcano. See below.

Your blob needs to be at least 80 pixels across to build a proper volcano. If it looks too small, expand the selection by a few pixels, but that will mean less flat land.
Create a new layer. Name it Volcano Alpha. Fill selection with white. Hide it, and return to the background layer.
Play action "Slope 2" three or four times. Select---->Modify---->Smooth 20 pixels
Repeat once.
Play action "Slope 3" three or four times, until you are left with a small selection at the center.

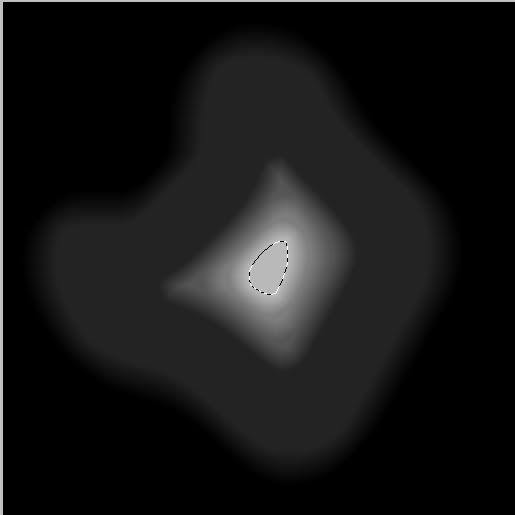
Play action "Slope -1" until you run out of selected pixels.
Should look something like this:

Save your image as a photoshop file first.
Then Layer---->Flatten Image, discard hidden layers
Image---->Mode 16bits/Channel
File---->Save As: somethingdescriptive1.PNG
Undo, Undo again. Got layers? Good. Create a new one, right above the background layer, and fill it entirely with black. Unhide "Beach Alpha", flatten image, save as somethingdescriptive1-beachAlpha.png. Undo, repeat with the volcano alpha.
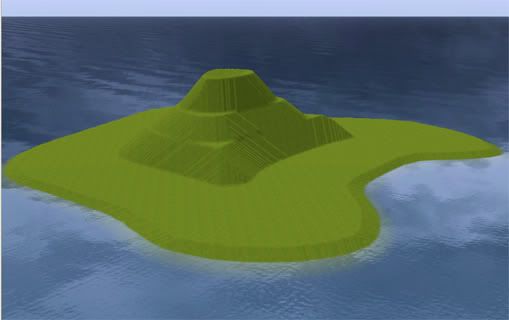
Close Photoshop, and load up CAW. Create a new world, with your new height map, set to 100.

Ugly, ain't it?
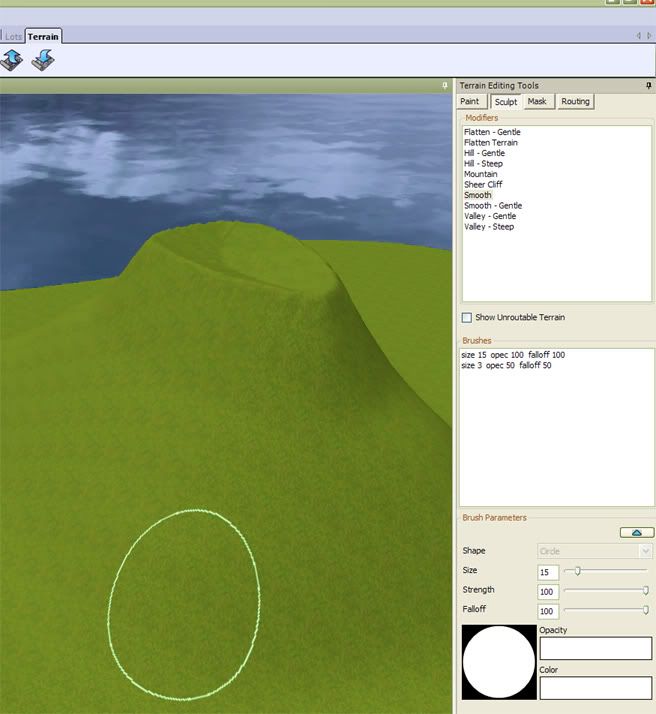
Take it into terrain sculpting, grab the smooth tool, and go to work. Smooth the beach, and the sides of the volcano, but don't go all the way to the top, you'll want it a little jagged up there.

When you're done smoothing, save. Now, you can either use as is, or use the valley and smooth tools to expand, or collapse part of the caldera.
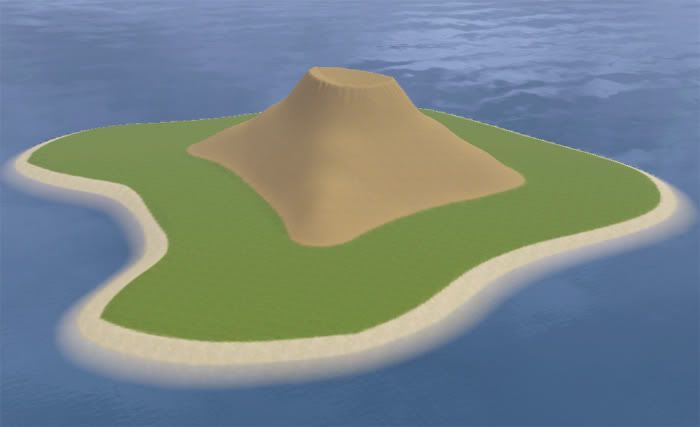
Final steps, go into terrain paint. Choose, or add, a terrain paint to use for the volcano. Right click and choose Import. Find your volcano alpha file. Choose a beach paint and do the same. It's hardly perfect, but I find it helps to have at least an outline for the actual painting process.

And that's as far as I'll be taking you. Enjoy.
ETA: Obviously, for a full 'hood you would need a much larger map, or several islands, linked together with bridges. But for practice, small is best.
 2nd Jan 2010 at 7:47 AM
Last edited by deathoflight : 2nd Jan 2010 at 9:39 AM.
 2nd Jan 2010 at 10:46 AM
 2nd Jan 2010 at 2:48 PM
 2nd Jan 2010 at 7:59 PM
 28th May 2012 at 2:55 AM
 8th Jun 2012 at 11:20 AM

 Sign in to Mod The Sims