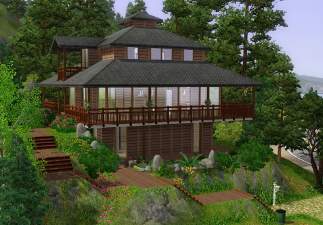
 An Improved Thicker Transparent Wall

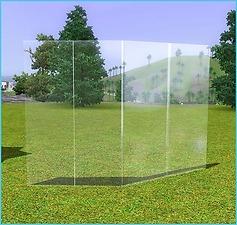
GWV2-main.jpg - width=735 height=600

GWV2-doorscol.jpg - width=662 height=500

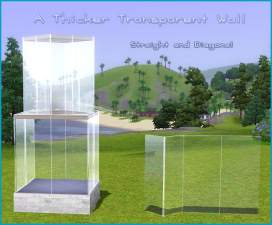
GWV2-straightdiag.jpg - width=631 height=600
 New version of the set, tested for patch 1.33 and fixed with Granthes fix for pets !!
A huge thank you to Volvenom and Corpntr for fixing the set in my place, since I've been mostly absentee for the past year (and more).
Unfortunately, the diagonal are still borked, but there seem to be no fix for that.
You'll find the whole fixed set in it's own zip file, it is named "TransparentSetFixed".
Enjoy and once again a big THANKS to Volvenom and Corpntr !!

Here is the upgraded version of my full wall transparent window, straight and diagonal.
Note that:
- it is not seamless on purpose. I am working on a seamless version.
- This version will NOT overwrite my previous version of a Thicker Transparent Window. If you decide to use this one over the other, just delete the old one.
- If you wish to be alerted to eventual upgrades to this new version, please subscribe to this thread.
It features :
- The best luminosity a window can bring (it's cloned on the most luminous one-tile window in the game).
- A new and improved mesh (better reflections on the sides of the window pane).
Added to the set are 3 full wall transparent doors (warning : they do not look good on diagonal walls due to the difference in size) :
- One with transparent handle (a simple conversion from the full wall door in the game)
- One with no handle whatsoever, essentially similar to the glass window.
- One similar to the precedent, but with a round glass inset to indicate where the door is.
Plus a thin glass column I made as an experiment. I have no real use for it at the moment, but I'm including it.

All items cost 10 simoleons and are located in their respective categories.
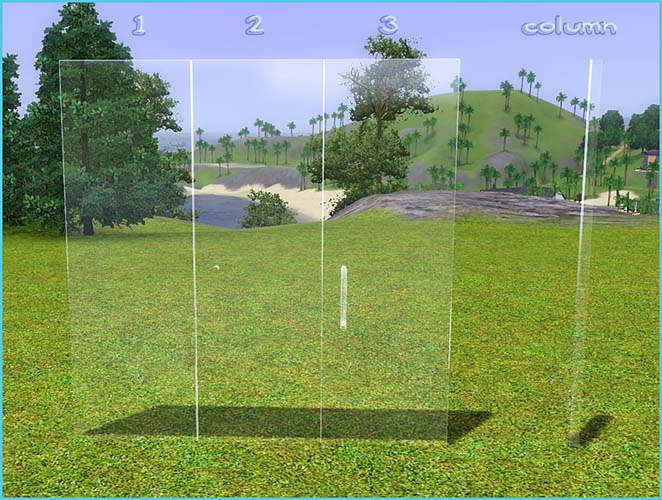
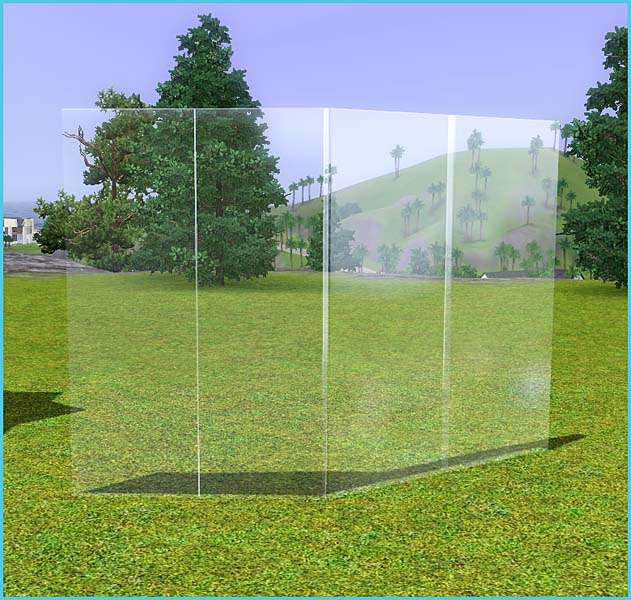
One last thing : making glass objects and making a glass FLOOR tile are very VERY different matters. A glass floor is NOT possible at the moment, so please, do not request one. Once someone finds out a way of making them, I'm pretty sure they will be offered for download asap.

Have fun ! ^^
Polygon Counts:
Window straight and diagonal : vertices : 528 /triangles : 572
door with handle and no-handle : vertices : 306 /triangles : 344
door b : vertices : 146 /triangles : 88
column : vertices : 104 /triangles : 74
Additional Credits:
Peter and Inge Jones, Wes Howe for giving us the tools, and everybody at the Create MTS forum.
This is a new mesh, and means that it's a brand new self contained object that usually does not require a specific Pack (although this is possible depending on the type). It may have Recolours hosted on MTS - check below for more information.
|
TransparentSetFixed.zip
Download
Uploaded: 21st Jul 2012, 2.29 MB.
52,646 downloads.
|
||||||||
|
Columntransparent.zip
Download
Uploaded: 12th Nov 2009, 309.1 KB.
85,492 downloads.
|
||||||||
|
GlassWalDoorsV2.zip
Download
Uploaded: 12th Nov 2009, 1.49 MB.
108,599 downloads.
|
||||||||
|
GlassWallV2.zip
Download
Uploaded: 12th Nov 2009, 478.3 KB.
114,597 downloads.
|
||||||||
| For a detailed look at individual files, see the Information tab. | ||||||||
Install Instructions
1. Click the file listed on the Files tab to download the file to your computer.
2. Extract the zip, rar, or 7z file. Now you will have either a .package or a .sims3pack file.
For Package files:
1. Cut and paste the file into your Documents\Electronic Arts\The Sims 3\Mods\Packages folder. If you do not already have this folder, you should read the full guide to Package files first: Sims 3:Installing Package Fileswiki, so you can make sure your game is fully patched and you have the correct Resource.cfg file.
2. Run the game, and find your content where the creator said it would be (build mode, buy mode, Create-a-Sim, etc.).
For Sims3Pack files:
1. Cut and paste it into your Documents\Electronic Arts\The Sims 3\Downloads folder. If you do not have this folder yet, it is recommended that you open the game and then close it again so that this folder will be automatically created. Then you can place the .sims3pack into your Downloads folder.
2. Load the game's Launcher, and click on the Downloads tab. Find the item in the list and tick the box beside it. Then press the Install button below the list.
3. Wait for the installer to load, and it will install the content to the game. You will get a message letting you know when it's done.
4. Run the game, and find your content where the creator said it would be (build mode, buy mode, Create-a-Sim, etc.).
Extracting from RAR, ZIP, or 7z: You will need a special program for this. For Windows, we recommend 7-Zip and for Mac OSX, we recommend Keka. Both are free and safe to use.
Need more help?
If you need more info, see:
- For package files: Sims 3:Installing Package Fileswiki
- For Sims3pack files: Game Help:Installing TS3 Packswiki
Loading comments, please wait...
Uploaded: 12th Nov 2009 at 8:44 PM
Updated: 21st Jul 2012 at 1:03 AM - Fixed version of the set added !
-
by lemoncandy 10th Oct 2009 at 8:58am
 116
169.6k
366
-
by hazuitokage 4th Nov 2009 at 2:09pm
 74
127.4k
115
-
by Hekate999 updated 14th Apr 2011 at 4:43am
 18
65k
164
-
3 Extended windows for thicker walls
by Lisen801 updated 9th Jun 2012 at 8:14am
 +1 packs
21 27.3k 56
 World Adventures
-
by Lisen801 7th Oct 2010 at 12:27pm
 17
56.6k
150
-
2 new windows for *Extended* walls
by Lisen801 updated 27th May 2012 at 5:44am
 +1 packs
19 59.3k 104
 Late Night
-
by hazuitokage updated 20th Sep 2009 at 12:50pm
[Edited 20-9-09] Fixed the Giraffes to show under 'misc', and not 'plants'. more...
 45
52.5k
71
-
by hazuitokage 16th Sep 2009 at 12:57am
There's this old medieval bell-tower (grosse cloche means "big bell") in old sim-town, also featuring a clock, with some cafés, more...
 41
81.3k
131
-
by hazuitokage 17th Oct 2009 at 3:02pm
So, you'll think I tend to repeat myself, but... It's a horse ! It's an elephant ! It's giraffes !! more...
 34
36.7k
69
-
by hazuitokage 11th Jul 2009 at 1:02am
An European style village house for your rural sims. more...
 10
15.6k
23
-
by hazuitokage 23rd Aug 2009 at 6:01am
Is your sim looking for a cheap but special place to start her/his life in the neighbourhood ? There's this more...
 8
14.7k
11
-
by hazuitokage 29th Jul 2009 at 9:17pm
Following a request for a bigger house on the same model, here is the Village House, expanded version ^^. more...
 12
10.6k
13
-
by hazuitokage 3rd Sep 2009 at 9:17pm
Hello ^^ With the first expansion coming, sims will be able to go to sim France and learn to make more...
 14
22.5k
22
-
by hazuitokage updated 18th Aug 2009 at 2:50am
Hello, here is one of those big old mansions you find in french villages or in town suburbs ^^. more...
 23
27.3k
33
-
by hazuitokage 27th Jun 2009 at 3:17am
Lot size : 30x30 Price empty : 46665 / Price furnished : 67585 2 bedrooms - 1 bath - 1 more...
 19
19.4k
27
19
19.4k
27
-
by hazuitokage 29th Jul 2009 at 9:17pm
Here is a sort of "pagoda" shaped house I found browsing around, and I tried to recreate it for my more...
 8
17.4k
30
About Me
The policy for my stuff is as follows :
It is ok to use my content in picts, to redistribute it (as long as it's clear it comes from me - in short give credit -), tinkering with it is encouraged, as long as you ask before and keep me posted on the results.
Please, DO NOT : upload my content as if it was your own or use it for donation or pay files.

 Sign in to Mod The Sims
 An Improved Thicker Transparent Wall

