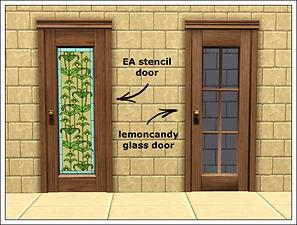
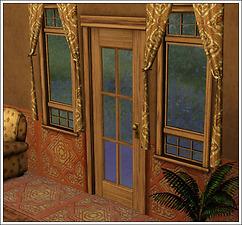
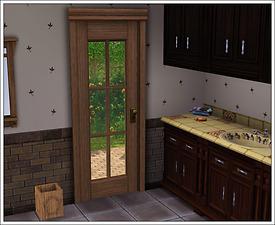
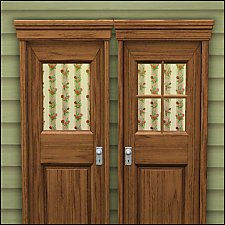
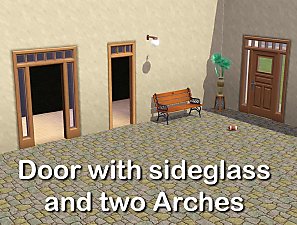
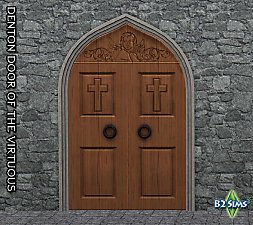
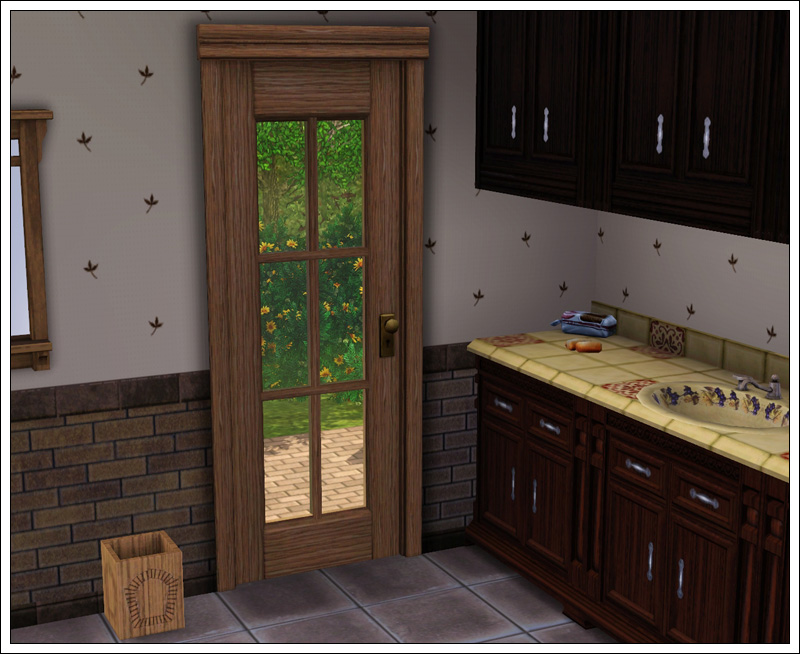
 Door with glass
 I placed wooden parts in the middle, and finally managed to make it work okay, I hope it will work for you.
Because it is cloned from a metal door, the defaults you will find with it will be metal, so you have to apply a wooden texture to it yourself. Choose horizontal textures, they look better for this door (I had to rotate the texturemap to fit the clone's map.)
Known issues: There are some odd shadowed parts that are visible in sunlight. It's because of the normals, I tried fixing them, this is the best I could do.
This door can be found in the catalog right next to "Mags' Door", it costs 270§.
Let me know if you have any problems with it.
Polygon Counts:
592 faces, 604 vertices.
Additional Credits:
S3PE, S3OC, ObjTool and plugins.
This is a new mesh, and means that it's a brand new self contained object that usually does not require a specific Pack (although this is possible depending on the type). It may have Recolours hosted on MTS - check below for more information.
|
Door_Glassy.rar
Download
Uploaded: 10th Oct 2009, 198.0 KB.
69,720 downloads.
|
||||||||
| For a detailed look at individual files, see the Information tab. | ||||||||
Install Instructions
1. Click the file listed on the Files tab to download the file to your computer.
2. Extract the zip, rar, or 7z file. Now you will have either a .package or a .sims3pack file.
For Package files:
1. Cut and paste the file into your Documents\Electronic Arts\The Sims 3\Mods\Packages folder. If you do not already have this folder, you should read the full guide to Package files first: Sims 3:Installing Package Fileswiki, so you can make sure your game is fully patched and you have the correct Resource.cfg file.
2. Run the game, and find your content where the creator said it would be (build mode, buy mode, Create-a-Sim, etc.).
For Sims3Pack files:
1. Cut and paste it into your Documents\Electronic Arts\The Sims 3\Downloads folder. If you do not have this folder yet, it is recommended that you open the game and then close it again so that this folder will be automatically created. Then you can place the .sims3pack into your Downloads folder.
2. Load the game's Launcher, and click on the Downloads tab. Find the item in the list and tick the box beside it. Then press the Install button below the list.
3. Wait for the installer to load, and it will install the content to the game. You will get a message letting you know when it's done.
4. Run the game, and find your content where the creator said it would be (build mode, buy mode, Create-a-Sim, etc.).
Extracting from RAR, ZIP, or 7z: You will need a special program for this. For Windows, we recommend 7-Zip and for Mac OSX, we recommend Keka. Both are free and safe to use.
Need more help?
If you need more info, see:
- For package files: Sims 3:Installing Package Fileswiki
- For Sims3pack files: Game Help:Installing TS3 Packswiki
Loading comments, please wait...
Uploaded: 10th Oct 2009 at 4:58 PM
Updated: 29th Dec 2009 at 7:47 PM
-
by hudy777DeSign updated 29th Oct 2010 at 12:13am
 172
405.8k
701
-
by Lisen801 7th Oct 2010 at 8:27pm
 17
56.6k
150
-
by Lisen801 10th Oct 2010 at 5:01pm
 34
76.1k
207
-
by Lisen801 updated 27th May 2012 at 2:06pm
 63
89.9k
253
-
by Lisen801 updated 29th May 2012 at 11:09am
 16
42.5k
142
-
by TheJim07 30th May 2012 at 4:49pm
 17
54.9k
102
-
by Brunnis-2 14th Sep 2018 at 12:25am
 12
29k
20
-
by lemoncandy 16th Jul 2009 at 1:24am
This is two kinds of patterns based on a three leaf clover shape. more...
 6
13.6k
17
-
by lemoncandy 1st Oct 2009 at 9:20pm
EDIT 28/11/2009. These objects became broken with the patch 1.6.6 and the expansion and caused the "blue lot syndrome". more...
 44
94.7k
202
-
by lemoncandy 25th Sep 2009 at 7:26pm
This time I made some candle variations because one is really not enough, is it? I added flames on more...
 34
68k
114
-
by lemoncandy 1st Jul 2009 at 10:28pm
Here is another starter house (price under 16000), designed for a single, but it can accomodate two if you change more...
 4
13.3k
14
-
by lemoncandy 3rd Sep 2009 at 6:18pm
This is a continuation of my effort to increase the number of tabletop plants. more...
 43
82.5k
129
-
by lemoncandy 15th Jun 2009 at 6:50pm
Your pretty sim has just rolled out of the creator screen and is looking for a place to live. more...
 6
10.1k
4
-
by lemoncandy 18th Aug 2009 at 6:06pm
To answer public demand, I present one more set of clutter objects. You even get a trash pile this time! more...
 91
121.9k
194
-
by lemoncandy 21st Sep 2009 at 6:50pm
Here's my next set of room-type-category clutter. This time it's for kids! more...
 75
120.6k
245
-
3 more plants [Updated for WA]
by lemoncandy 14th Sep 2009 at 9:00pm
EDIT 29/11/2009. These objects became broken with the patch 1.6.6 and the expansion and caused the "blue lot syndrome". more...
 43
106.7k
161
About Me
IMPORTANT
I haven't touched any of this work for over a year, so please consider it all as unsupported. I guess most of it won't be working with the game's new expansions and patches. Sorry.

 Sign in to Mod The Sims
 Door with glass

