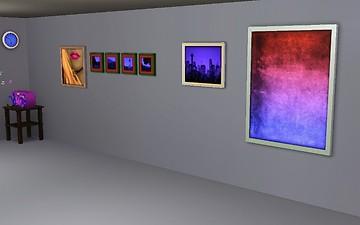
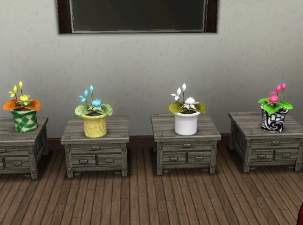
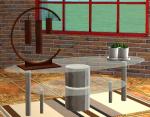
 More channels to various objects, now fully recolorable! Default Replacement, or Non Default Replacement!

Screenshot.jpg - width=800 height=500

ScreenshotQ.jpg - width=800 height=500
This is now unlike my older extra channels to things, a default replacement! Something that I've been dying to learn how to do with adding channels, I already knew how to make default replacement meshes, but recolors always eluded me until now. I've tested the default replacements thoroughly in game and they are working fine, only issue with them is that thumbnails in my game at least still shows the old EA default colors, but they are fully recolorable and fully functional! I didn't do the alarm clock because I've already done that and shared here on mts. You can find the extra channels to the alarm clock in the related pages under creator recommendations.
I've packaged base game and HELS separately depending on which you own. So if you only have base game, download the base game one, if you have HELS download the High End Loft Stuff one.
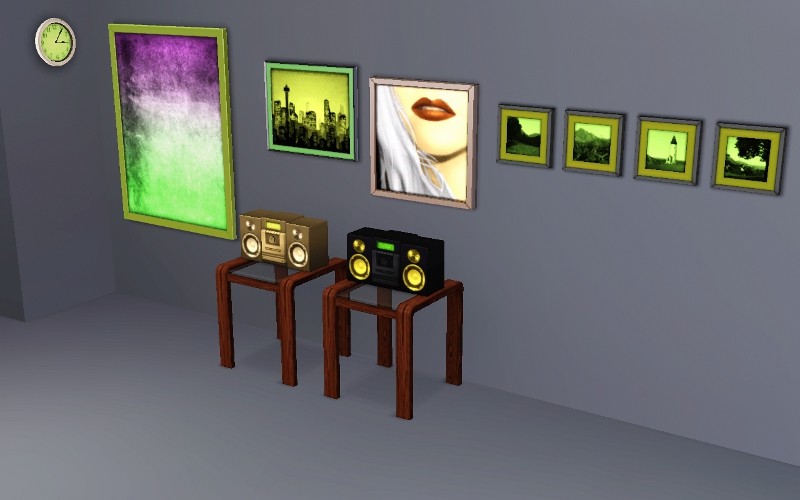
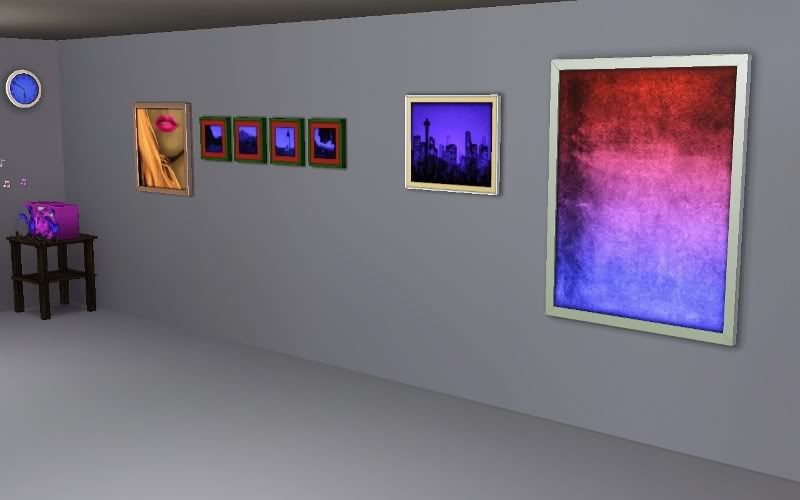
Okay, so here's the new areas of recolorablity:
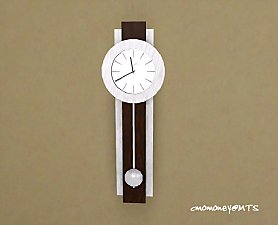
Wall Clock:
1st channel is the inside of the clock, second channel is the outside
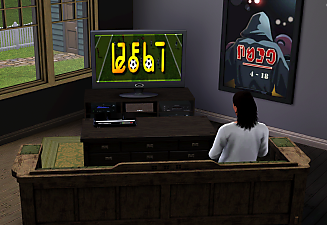
HELS Painting:
1st and 2nd channels are the inside of the painting, they have a gradient (blending) effect. Third channel is the frame
Cityscapes Painting:
First channel is the inside of the painting, second channel is the inner frame, third channel is the outer frame.
Lips Painting:
1st channel is the girl's hair, second channel are the girl's lips, third channel is the girl's skin tone. The frame, and the girl's teeth are not recolorable.
Photo Series:
1st channel is the inside of the painting, second channel is the inner trim of the frame, third channel is the outer frame.
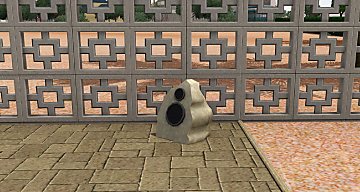
Boom Box:
1st channel is the box, second channel is the small rectangular display, third channel are the speakers.
Such fun adding channels for me and you both! hope you enjoy.
|
DefaultReplacement_3_Channel_High_End_Loft_Painting_jimTNW.zip
Download
Uploaded: 11th Apr 2010, 208.6 KB.
1,804 downloads.
|
||||||||
|
DefaultReplacement_Base_Game_Objects_jimTNW.zip
Download
Uploaded: 11th Apr 2010, 527.3 KB.
2,099 downloads.
|
||||||||
|
High_End_Loft_Recolorable_Painting_jimTNW.zip
Download
Uploaded: 11th Apr 2010, 185.2 KB.
1,843 downloads.
|
||||||||
|
BaseGame_Recolorable_Objects_jimTNW.zip
Download
Uploaded: 11th Apr 2010, 527.1 KB.
2,342 downloads.
|
||||||||
| For a detailed look at individual files, see the Information tab. | ||||||||
Install Instructions
1. Click the file listed on the Files tab to download the file to your computer.
2. Extract the zip, rar, or 7z file. Now you will have either a .package or a .sims3pack file.
For Package files:
1. Cut and paste the file into your Documents\Electronic Arts\The Sims 3\Mods\Packages folder. If you do not already have this folder, you should read the full guide to Package files first: Sims 3:Installing Package Fileswiki, so you can make sure your game is fully patched and you have the correct Resource.cfg file.
2. Run the game, and find your content where the creator said it would be (build mode, buy mode, Create-a-Sim, etc.).
For Sims3Pack files:
1. Cut and paste it into your Documents\Electronic Arts\The Sims 3\Downloads folder. If you do not have this folder yet, it is recommended that you open the game and then close it again so that this folder will be automatically created. Then you can place the .sims3pack into your Downloads folder.
2. Load the game's Launcher, and click on the Downloads tab. Find the item in the list and tick the box beside it. Then press the Install button below the list.
3. Wait for the installer to load, and it will install the content to the game. You will get a message letting you know when it's done.
4. Run the game, and find your content where the creator said it would be (build mode, buy mode, Create-a-Sim, etc.).
Extracting from RAR, ZIP, or 7z: You will need a special program for this. For Windows, we recommend 7-Zip and for Mac OSX, we recommend Keka. Both are free and safe to use.
Need more help?
If you need more info, see:
- For package files: Sims 3:Installing Package Fileswiki
- For Sims3pack files: Game Help:Installing TS3 Packswiki
Loading comments, please wait...
Uploaded: 11th Apr 2010 at 3:05 PM
-
Painting Pandemonium! 15 non-default paintings for your sims! [Minor Update Aug. 6th]
by QBUILDERZ 6th Aug 2009 at 11:44am
 75
121.7k
132
-
by cmomoney 1st Feb 2010 at 6:20pm
 19
66.2k
161
-
I Wanna Be Your TeddyBear - Gleaming default replacement eyes
by Arisuka 18th Feb 2010 at 11:58pm
-
Default Replacement For Ventana Windows (TS2 Style) *Added Non Default Version*
by Elias943 2nd Apr 2010 at 7:30pm
 30
43.5k
93
-
TV Channels Default Replacement
by Twinsimming updated 6th Apr 2025 at 10:15am
-
The Sims 2 Grim Reaper Default Replacement
by VirtualHugs 1st Feb 2025 at 9:21am
-
Religious Books for all major world religions, New Pie Menus
by joninmobile 22nd Jul 2010 at 6:55pm
You got to have faith! more...
 +1 packs
34 34.4k 25
 Free Time
-
"Practice" changed to "Play Chess" on all Maxis chessboards
by joninmobile 5th Mar 2010 at 1:02am
I always thought just plain ole "Practice" was kind of vague and impersonal for chess, I mean what is your more...
 14
21.3k
37
-
by joninmobile 6th Jun 2009 at 11:03am
With this mod, your teens now have more money available to them for their college scholarships. more...
 +1 packs
17 57.1k 149
 University
-
by joninmobile 15th Feb 2008 at 7:31pm
Here is a modern art mural called "Blue Licht".It is a reclor of the "Two Dogs and an Olive" painting more...
 +1 packs
4 12k 14
 Nightlife
-
Scaled Down Lotus From World Adventures with More Options
by joninmobile 5th Mar 2010 at 7:02pm
I've made two major changes to the lotus plant that comes with World Adventures EP. more...
 +1 packs
13 18.3k 44
 World Adventures
-
5 Natural Stone floors in neutral colors
by joninmobile updated 2nd Apr 2009 at 3:38am
Here are five stone floors in nuetral colors.These are sims2pack files. more...
 9
18.3k
17
-
Simple, Elegant, Modern Coffee Table
by joninmobile 5th Nov 2009 at 2:29am
I've made a nice, lovely, modern coffee table for you to enjoy! more...
 +1 packs
11 15.8k 11
 Pets
Pets
-
4 Service Car Replacements (Maid, Gardener, Taxi, Grocery Delivery)
by joninmobile 13th Aug 2009 at 5:56pm
These will replace your service cars for: Maid, Taxi, Gardener, and Delivery Truck. more...
 17
44.1k
41
-
Dolphin Painting recolor of lady on red with blue frame
by joninmobile updated 17th Dec 2007 at 11:51pm
Here is a recolor of the "lady on red" painting from the base game.Instead of silver, it has a metallic more...
 8
17.4k
17
-
Arlington Park Apartments with gym and pool (no CC)
by joninmobile 12th Jan 2009 at 9:25pm
I present Arlington Park apartments.They are nice, sweet place to live,tucked away more...
 +15 packs
7.4k 1
 Family Fun
 University
 Glamour Life
 Nightlife
 Celebration
 Open for Business
 Pets
Pets
 H&M Fashion
 Teen Style
 Seasons
 Kitchen & Bath
 Bon Voyage
 Free Time
 Apartment Life
 Mansion and Garden
About Me
I hope you enjoy all the downloads I've brought to you over the years. It's been fun. Being a part of The Sims community has had it's ups and downs for me, but I keep on truckin' nonetheless. Lots and lots of drama, lots of pain and sorrow, but lots of laughs, and good times too. Made so many new friends over the years, and it all started by uploading to MTS way back in 2006. Have fun with my creations, that's what they're here for!
~ Jon

 Sign in to Mod The Sims
 More channels to various objects, now fully recolorable! Default Replacement, or Non Default Replacement!
