Sign in to Mod The Sims
 Higher trees - default replacements + non default [update 1.5.]
 Higher trees - default replacements + non default [update 1.5.]


trunks1.jpg - width=800 height=499
trunks5.jpg - width=1280 height=711
trunks6.jpg - width=1280 height=840
trunks7.jpg - width=1161 height=768
chestnut.jpg - width=800 height=632
I thought you might like them, too.
Added the chestnut from WA

You could request more trees.
Overall info
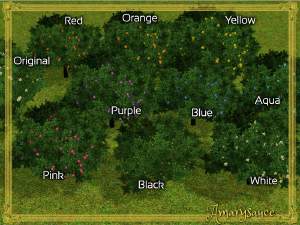
I made 2 versions - default replacements and non defaults.
They are fully compatible with seasons (leaves change color and fall).
You could use them in caw - the nondefaults have the same names like the original trees in the search bar (if you use supercaw you find them under "higher oak" for example. And they will group like other trees.
Like every other plant or tree they´re not CAStable.
EP requirements:
willow + oak - basegame
chinese elm / chestnut - WA
maple - UL
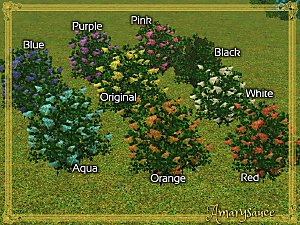
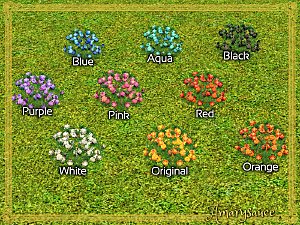
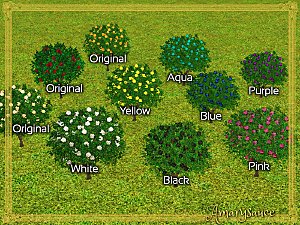
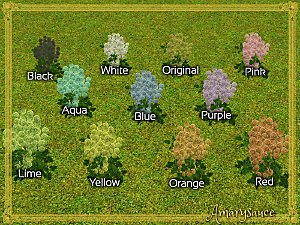
Catalogue appearance
they appear in Build/trees, costs like the original trees and the non defaults are named with a "higher" prefix.
Polygon count
~800 - 1500 (like the original trees)
Additional Credits: S3PE
|
biggerchestnut_wa_nondefault.zip
Download
Uploaded: 1st May 2015, 5.9 KB.
3,157 downloads.
|
||||||||
|
biggerchestnut_default.zip
Download
Uploaded: 1st May 2015, 4.7 KB.
2,857 downloads.
|
||||||||
|
highertreetrunks_nondefault.zip
Download
Uploaded: 18th Apr 2015, 25.6 KB.
3,473 downloads.
|
||||||||
|
highertreetrunk_default.zip
Download
Uploaded: 18th Apr 2015, 28.5 KB.
3,760 downloads.
|
||||||||
| For a detailed look at individual files, see the Information tab. | ||||||||
Install Instructions
1. Click the download button, or the filename, to download the file to your computer.
2. Extract the zip, rar, or 7z file. Now you will have either a .package or a .sims3pack file.
For Package files:
1. Cut and paste the file into your Documents\Electronic Arts\The Sims 3\Mods\Packages folder. If you do not already have this folder, you should read the full guide to Package files first: Sims 3:Installing Package Fileswiki, so you can make sure your game is fully patched and you have the correct Resource.cfg file.
2. Run the game, and find your content where the creator said it would be (build mode, buy mode, Create-a-Sim, etc.).
For Sims3Pack files:
1. Cut and paste it into your Documents\Electronic Arts\The Sims 3\Downloads folder. If you do not have this folder yet, it is recommended that you open the game and then close it again so that this folder will be automatically created. Then you can place the .sims3pack into your Downloads folder.
2. Load the game's Launcher, and click on the Downloads tab. Find the item in the list and tick the box beside it. Then press the Install button below the list.
3. Wait for the installer to load, and it will install the content to the game. You will get a message letting you know when it's done.
4. Run the game, and find your content where the creator said it would be (build mode, buy mode, Create-a-Sim, etc.).
Extracting from RAR, ZIP, or 7z: You will need a special program for this. For Windows, we recommend 7-Zip and for Mac OSX, we recommend Keka. Both are free and safe to use.
Need more help?
If you need more info, see:
- For package files: Sims 3:Installing Package Fileswiki
- For Sims3pack files: Game Help:Installing TS3 Packswiki
Loading comments, please wait...
-
by Amarysauce 11th Dec 2015 at 12:26pm
 16
12.7k
62
16
12.7k
62
-
by Amarysauce 11th Dec 2015 at 12:26pm
22
14.5k
70
-
by Amarysauce 17th Dec 2015 at 7:57pm
2
8.2k
39
-
by Amarysauce 17th Dec 2015 at 11:15pm
6
9.3k
50
-
by Amarysauce 18th Dec 2015 at 10:15am
8
12.3k
59
-
by Amarysauce 18th Dec 2015 at 10:36am
+1 packs
4 7.2k 35 World Adventures
-
by Amarysauce 18th Dec 2015 at 10:44am
+1 packs
8 11.2k 49 World Adventures
-
by Amarysauce 18th Dec 2015 at 1:56pm
4
12.6k
54
-
-
by Amarysauce 18th Dec 2015 at 6:06pm
7
10.9k
36