Sign in to Mod The Sims
 Documents Override (Windows only)
 Documents Override (Windows only)

Documents Override.png - width=800 height=600
This tool can override the Documents path used by the game. You can also create multiple profiles, each using a different path. This is useful if you want to keep your mods on a drive with more space or if you want a separate profile for some challenge.
Short instructions
- Extract files to the same folder as the game exe.
- Edit "documents.ini".
- Add "-profile=profile_name" to the shortcut's target where "profile_name" matches the section in the ".ini" file.
Detailed instructions
- Download the archive.
- Extract it. There are 4 files in the archive.
- First open your game folder. By default:
- EA app installs the game to "C:\Program Files\EA Games\The Sims 4"
- Steam installs the game to "C:\Program Files (x86)\Steam\steamapps\common\The Sims 4"
- Move the 4 extracted files to where your game exe is.
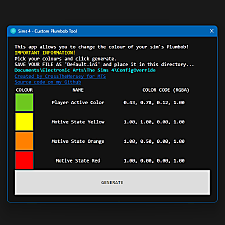
- Edit "documents.ini" file to your liking:
- if you want to change the default folder uncomment (remove ";") line 4 (see the screenshot below) and set it to desired path
- if you want to use another profile edit the existing ones or add a new one:
Code:Don't use spaces in the profile name![profile_name] Documents=folder path
- Right click on the game exe ("TS4_Launcher_x64.exe"), select "Send to" and then "Desktop (create shortcut)". If you're on Windows 11 - hold Shift key when clicking the right mouse button to open the full menu.
- Go to desktop.
- Right click on the new shortcut, select Properties.
- At the end of the "Target" field add a space and then "-profile=profile_name", where "profile_name" is the name of the profile you added to the "documents.ini". See the green underlines on the screenshot below.
How to force DirectX 9 mode
At the moment of writing this the game has 3 exe files: "TS4_Launcher_x64.exe", "TS4_DX9_x64.exe" and "TS4_x64.exe". When you run the game from EA app or Steam - they run the launcher exe, which decides if you can run the DirectX 11 version or not. If you can, it runs "TS4_x64.exe". And if you can't, it runs "TS4_DX9_x64.exe" (DirectX 9 version). This can be changed in the game settings, you can force the game to run the DirectX 9 version. There's one issue - this tool properly overrides the Documents location for both DirectX 9 and 11 exe files, but not for the launcher exe! That means when you change options in game to force DirectX 9 mode - it will be saved to the folder of your choice. And the launcher will read the option from the default location. So if you want to force the DirectX 9 mode - open "Documents\Electronic Arts\The Sims 4\Options.ini", search for "forcedx9" and set the value from 0 to 1.
How does it work?
First of all my tool needs to be somehow loaded into the game. For this I use Ultimate ASI Loader, version 4.59 (archived link in case the previous one goes down). That's where "wininet.dll" comes from. "wininet.ini" is a config file for ASI Loader.
"documents.ini" is a config file for my tool. And the main brains is of course the last file, "documents.asi". It's a normal DLL file with extension renamed to ".asi" (that's what ASI Loader looks for). The game uses "SHGetFolderPathW" function to find the Documents path. My tool hooks to that function and spoofs the response. That's pretty much it.
Changelog
2025-01-20 - v1.0.1, rename both "version" files to "wininet" (EA app doesn't like "version.dll"), remove 32-bit version (Legacy Edition is no longer supported), update description (add install location from EA app, change exe name, add section about launcher and DX version)
2021-08-15 - v1.0.0, initial upload
| Filename | Type | Size |
|---|---|---|
| Documents Override v1.0.1.zip | zip | |
| documents.asi | asi | 46080 |
| documents.ini | ini | 742 |
| wininet.dll | dll | 236544 |
| wininet.ini | ini | 35 |
|
Documents Override v1.0.1.zip
Download
Uploaded: 20th Jan 2025, 124.5 KB.
739 downloads.
|
||||||||
| For a detailed look at individual files, see the Information tab. | ||||||||
Install Instructions
1. Download: Click the File tab to see the download link. Click the link to save the .rar or .zip file(s) to your computer.
2. Extract: Use 7zip (Windows) to extract the file(s) from the .rar or .zip file(s).
3. Cut and paste the file(s) into your Mods folder
Need more information?
- My Documents\Electronic Arts\The Sims 4\Mods\
- Anyone can use both .rar and .zip files easily! On Windows, use 7zip!
- If you don't have a Mods folder, just make one.
Loading comments, please wait...
Uploaded: 15th Aug 2021 at 6:10 PM
Updated: 20th Jan 2025 at 11:17 AM by anadius
-
TS4 MOD Simple Manage(Game Launcher)04/14/2015Updated to v2.2
by Sakura4 updated 13th Apr 2015 at 6:02pm
 128
172k
372
128
172k
372
-
-
TS4 Tuning Description Browser (Windows Only)
by scumbumbo updated 20th Sep 2018 at 11:13am
19
54.2k
53
-

-
by denton47 updated 15th Feb 2026 at 7:37am
297
69k
79
-
TS4 Skin Converter V2.3, enable CC skintones in CAS
by CmarNYC updated 11th Dec 2020 at 12:25am
152
94.9k
158
-
by MatroSka updated 13th Dec 2021 at 12:16pm
-
by SashaT1804 updated 9th Feb 2026 at 11:37am
64
81.2k
96
-
-


-

-

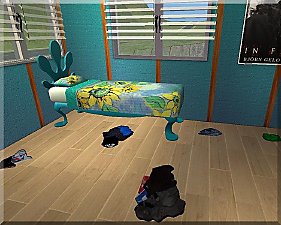
by pancake101 8th Mar 2020 at 7:17am
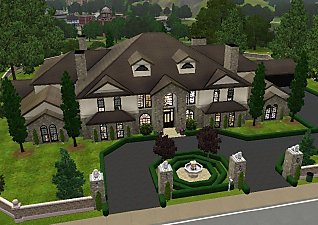
A lavish 5 bedroom and 6 bathroom mansion built for any large families looking for a new place to settle! more...
 +19 packs
6 21.8k 58
+19 packs
6 21.8k 58 World Adventures
 High-End Loft Stuff
 Ambitions
 Fast Lane Stuff
 Late Night
 Outdoor Living Stuff
 Generations
 Town Life Stuff
 Master Suite Stuff
 Pets
Pets
 Showtime
 Diesel Stuff
 Supernatural
 70s, 80s and 90s Stuff
 Seasons
 Movie Stuff
 University Life
 Island Paradise
 Into the Future
-

-
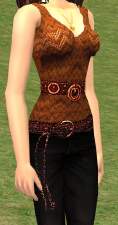
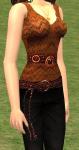
The Mummy Returns Clothes by request
by whiteshadows 17th Oct 2005 at 6:25am
---ATTENTION--- I've just uploaded the correct file, as the previous one was not working. more...
-

-
-


-

-
.jpg)
-
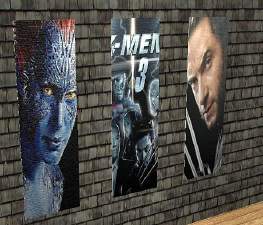

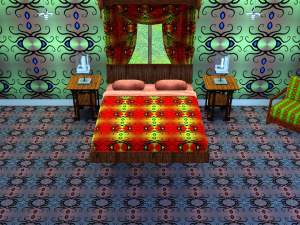
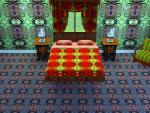
by OpenHouseJack 18th Mar 2006 at 1:08am
three posters of movie Xmen3 get mesh from "Set Nestor" page3 bedroom at it is the "mango-nestor-queen-poster-mesh" more...
 1
3.4k
1
3.4k