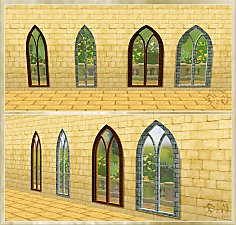
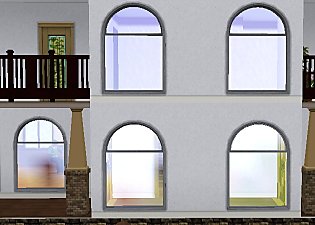
 Reflective Windows
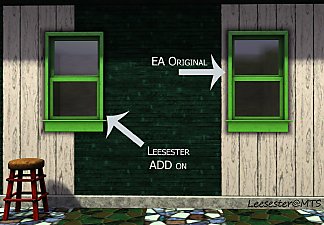
TS3 still lacks the public tools to freely control every aspect of the object, so these were made as a supplement for existing windows and not as integral objects.
The good news? It doesn't add a bazillion files to the game, just two – one straight and one diagonal tile to cling to your windows from the reflective side.
Works on all "single glass" windows – the ones where the glass is in the same depth. That is any window beside these:
The bad? Much like all mirrors, these too refuse to hide when the walls go down.
Once again – very restricted access to object data.
Oh, well.
Can be found under the Window category in Build Mode for 500$ a tile.
Polygon Counts:
Straight: 4
Diagonal: 4
Additional Credits:
Pythagoras for helping accurately calculate the width of the diagonal piece.
This is a new mesh, and means that it's a brand new self contained object that usually does not require a specific Pack (although this is possible depending on the type). It may have Recolours hosted on MTS - check below for more information.
|
Window Reflection.rar
Download
Uploaded: 12th Jun 2010, 311.5 KB.
12,658 downloads.
|
||||||||
| For a detailed look at individual files, see the Information tab. | ||||||||
Install Instructions
1. Click the file listed on the Files tab to download the file to your computer.
2. Extract the zip, rar, or 7z file. Now you will have either a .package or a .sims3pack file.
For Package files:
1. Cut and paste the file into your Documents\Electronic Arts\The Sims 3\Mods\Packages folder. If you do not already have this folder, you should read the full guide to Package files first: Sims 3:Installing Package Fileswiki, so you can make sure your game is fully patched and you have the correct Resource.cfg file.
2. Run the game, and find your content where the creator said it would be (build mode, buy mode, Create-a-Sim, etc.).
For Sims3Pack files:
1. Cut and paste it into your Documents\Electronic Arts\The Sims 3\Downloads folder. If you do not have this folder yet, it is recommended that you open the game and then close it again so that this folder will be automatically created. Then you can place the .sims3pack into your Downloads folder.
2. Load the game's Launcher, and click on the Downloads tab. Find the item in the list and tick the box beside it. Then press the Install button below the list.
3. Wait for the installer to load, and it will install the content to the game. You will get a message letting you know when it's done.
4. Run the game, and find your content where the creator said it would be (build mode, buy mode, Create-a-Sim, etc.).
Extracting from RAR, ZIP, or 7z: You will need a special program for this. For Windows, we recommend 7-Zip and for Mac OSX, we recommend Keka. Both are free and safe to use.
Need more help?
If you need more info, see:
- For package files: Sims 3:Installing Package Fileswiki
- For Sims3pack files: Game Help:Installing TS3 Packswiki
Loading comments, please wait...
Uploaded: 12th Jun 2010 at 4:03 PM
Updated: 12th Jun 2010 at 5:21 PM
#reflective, #window, #mirror, #modern
-
by leefish 16th Oct 2009 at 4:56pm
 38
43.5k
68
-
by hudy777DeSign updated 29th Oct 2010 at 12:13am
 172
405.8k
701
-
by -Maylin- 6th Apr 2010 at 10:25pm
 17
49.5k
91
-
by HugeLunatic 15th Jun 2010 at 7:20pm
 60
99k
253
-
by Hekate999 updated 14th Apr 2011 at 12:43pm
 18
65k
164
-
by Lisen801 18th Jul 2010 at 11:53pm
 27
45.2k
96
-
by AdonisPluto 24th Aug 2010 at 1:18am
 10
29.6k
47
-
2 new windows for *Extended* walls
by Lisen801 updated 27th May 2012 at 1:44pm
 +1 packs
19 59.3k 104
 Late Night
-
What Starter Homes are All About
by JRW 26th Apr 2009 at 10:23pm
Start from scratch, living in a railway trailer. more...
 +4 packs
20 21k 29
 Nightlife
 Pets
Pets
 H&M Fashion
 Seasons
-
Paintings for The Sims from within The Sims
by JRW 30th Jan 2006 at 1:56pm
I took some cool snapshots within the game and turned them into wall hangings. They came out looking quite awesome. more...
 20
12.3k
9

 Sign in to Mod The Sims
 Reflective Windows

