 Sign in to Mod The Sims
 Cloud UI Recolour Tool
 Cloud UI Recolour Tool


IMG_9676.jpeg - width=1920 height=1080
2.jpg - width=1920 height=1080
3.jpg - width=1920 height=1080
4.jpg - width=1920 height=1080
5.jpg - width=1920 height=1080
Cloud UI Recolour Tool is a small program for The Sims 3 that lets you customise the colours (and opacity to some extent) of Cloud UI and generate your own package files to drop into your Mods folder. It works by replacing colour values in the original recolourable files used to create Cloud Pink UI.
You can select a preset theme (Light, Colourful or Dark mode) and a main colour to go along with it and see a preview of what it will look like in game. You can also customise individual colours even further in the Detailed Customisation section to tweak it exactly how you want it.
Once you’re happy with how it’s looking you can generate:
- The main UI package file
- Language logo package files (used for the startup loading screen if your game is not in English)
- Patches for various mods
Requirements & Setup
- Windows only, sorry
- You need Inkscape installed for this to work (it’s free and used for exporting the recoloured images)
- Download and unzip the Cloud UI Recolour Tool folder and the Base UI folders. Place the Base UI folder inside the Cloud UI Recolour Tool folder. I recommend placing the Cloud UI Recolour Tool folder on your desktop.
- Download refpack_pipe.exe (URL updated 2025-11-07) and place it in the Cloud UI Recolour Tool folder. This is optional but highly recommended - it compresses the generated package file sizes significantly.
The Cloud UI Recolour Tool folder contains:
- Cloud UI Recolour Tool.exe: The program itself
- PinkPlumbob.ico: The icon used for the program
- UI_Preview.svg: The tool uses this to generate a preview of the UI using the currently selected colours
- Credits - For Sharing.txt: Containing credits for this tool & the UI, helpful if you're uploading and sharing your custom UI
How to use
Inkscape setup
1. Double click on Cloud UI Recolour Tool.exe to open the program
2. The first time you load it up you might see a window asking for the location of inkscape.exe. This will only appear if the tool was unable to locate it automatically. You will need to install Inkscape if you haven’t already, or click the ‘Browse…’ button to locate it on your computer. It is usually in C:/Program Files/Inkscape/bin/inkscape.exe, but this will vary depending on your computer.
3. Once Inkscape is located you will be taken to the main app window where you can start playing around with the UI colours.
Main recolour window
Section 1
Enter a name for your custom UI. This will be used to name your .package files when you click ‘Create UI’.
Section 2
Select a preset (Light, Colourful or Dark) and a main accent colour. These will be used to generate a colour palette for your UI, and you can change them as many times as you want.
Section 3
This step is optional, but if you want more control over specific parts of the UI you can click the ‘Show Detailed Controls’ button to see additional colours that you can edit. There is also an Opacity control at the bottom.
- Main Font: The main text colour in the UI
- Darkest Accent, Dark Accent, Main Accent, Light Accent: Accent colours used throughout the UI (e.g. the Pink shades used in Cloud Pink UI), I recommend keeping this in a Dark to Light colour gradient, but you can experiment with any colours
- Background Light & Background Dark: Colours used for the loading screens. Use the same colour in each if you don’t want a gradient effect.
- HUD Background 1: The background colour of the main sections of the UI, like the bottom left panel, dialog boxes etc.
- HUD Background 2: The puck colour (the control panel at the bottom left where the map view, walls up/down etc buttons are)
- HUD Accent Light: Generally used in places where text or images appear on top, e.g. wishes panel, notification text area.
- HUD Accent Dark: Generally used for buttons that are not selected, e.g. if you are in Live mode, the Build & Buy buttons will be this colour.
- MISC: Used for deselected tabs and other small miscellaneous items
- Opacity: Controls how transparent certain sections appear. Usually works in the same places as HUD Background 1, but not always.
Section 4
The ‘Show Preview’ button generates an image preview of the UI using your currently selected colours. The image will appear on the right hand side of the tool. You can change colours and click ‘Show Preview’ as many times as you like.
Once you’ve settled on colours you can check or uncheck the checkboxes above ‘Create UI’.
- If ‘Generate language logos’ is checked, the tool will generate package files for each available language so that games not in english will show the recoloured The Sims 3 logo when the game is starting.
- If ‘Generate patches’ is selected, the tool will recolour any available patches in the Base UI/Patches folder. You will be able to pick and choose which ones to install once they’re created.
- If ‘Delete processing files’ is selected, the tool will automatically remove any temporary files used to create the UI. Only leave this unchecked if you want to make manual adjustments to the recoloured UI.
When you’re ready you can click ‘Create UI’ to generate your custom recoloured UI!
Please note that once ‘Create UI’ is clicked, the tool will freeze while it generates the UI. This is normal, and you will see a window pop up when it is finished. It takes around ~2 minutes on my higher-end PC, and ~12 minutes on my older PC - it may take longer or shorter depending on your computer, please be patient 🙂
How to install your custom UI mods
When the tool is finished running, you will see a folder with your UI name on it inside Cloud UI Recolour Tool > Creations. This contains:
- {Your UI Name}_CloudUIv1.3.0.package: Your main UI mod, this can go straight into your Mods folder (either Packages or Overrides is fine).
- Colour_Selections.txt: A reference file with the colours you chose for the UI so you can re-create it later or send to someone else.
- A folder called Non English Logo Packages (if you checked the Generate language logos checkbox): If your game is not in English, locate the file with your language code on the end and put it in your Mods folder
- A folder called Patches (if you checked the ‘Generate patches’ checkbox): Locate the patches you want in your game and copy the package files into your Overrides folder. Please check the Read me.txt files for each mod before installing - some patches have special instructions, and some patches require the original mod for the patch to work. Information and links to the original mod is included in the Read me file. Not all patches are compatible with each other!
Known/Potential Issues
- The tool might be flagged by antivirus or Microsoft Defender. If this is the case you will need to add an exception and/or adjust your settings to allow the tool to run. If a popup comes up that says "Windows protected your PC", click the "More info" text and then "Run anyway".
- Some packages are not generating. There is a file path character limit in Windows that can cause issues for this tool, because the UI elements for TS3 have very long names. Try moving the entire Cloud UI Recolour Tool folder to your Desktop - if you’re still missing packages after this then the issue is likely caused by something else.
- The UIs exported are not perfect! I have tried my best to resolve as many issues as I could with the exported UIs, but this tool lets you choose any colours you like, and some colours might work better than others. There are also many many files to replace, so there are probably going to be mistakes in my original edits. Feel free to reach out if you find something particularly annoying! I will be occasionally updating the Base UI files when I make improvements or fix issues, so make sure you keep your Colour_Selections.txt file for your favourite generated UIs if you want to be able to update it later!
Information for modders/developers
I will be writing up some info/tutorials when I get a chance, but if you’re a mod creator and would like to make a recolourable patch for your mod that works with this tool, feel free to reach out! I’m also happy to give you some details if you’re interested in building your own recolourable UI as well

Link to the code on GitHub
Credits
- p182 for sending me the code in dbpf_writer_lib.py used in this project, and for building refpack_pipe.exe which compresses the package files. Thank you so much p182, I couldn't have done this without you!
- David_mtv, coregirl, momomomomoi, sidereus23 and sims3loveforlife for translations used in the loading screen text
- Arro, Butterbot, Cmar, xFairyExterminatorx, LazyDuchess and gamefreak130 for creating the original mods used to create the Patches in this tool
- emelie.ikj for the loading screen text base files
- Thank you everyone who tested this tool (hopefully I didn't miss anyone!!): Bioniczombie, Bicaubica73, Bellakenobi, Aktasakplays, Astycat13, Simplyharryyy, Chaos, Desiree-uk, MihaiA10, Mspoodle1, simphoraa, Kalque, nishasims, Ohrudi, Alanna-goth, Winterbrumous, veigasims, toadifylackoffantasy, Sdmsims
- Special thanks to everyone who used the previous iterations of Cloud UI and sent feedback. This really just started with me wanting to build myself a cute pink UI, but you all inspired me to keep it going 💕
Final Notes
You are welcome to upload and share your creations from the tool (and tag me if you want to - I’d love to see what you make!), but please don’t stick it behind a paywall, and remember to credit those whose work has gone into this tool. There is a Credits file inside the Cloud UI Recolour Tool folder that you can copy and paste
Changelog
2025-11-07
- Updated old refpack_pipe.exe link to a new one as p182's github account has been experiencing issues.
| Filename | Type | Size |
|---|---|---|
| Base UI v1.4.0.zip | zip | |
| CLOUD UI VERSION.txt | txt | 6 |
| S3_025C95B6_00000000_1805668A035BF17D_CABBasicsSheet%%+LAYO.layout | layout | 111789 |
| S3_025C95B6_00000000_1B395F0D16576855_CABArmsSheet%%+LAYO.layout | layout | 14279 |
| S3_025C95B6_00000000_2999B4708111A036_CABPartCategory%%+LAYO.layout | layout | 48156 |
| S3_025C95B6_00000000_2F2E0AB4EC45A595_CABBotSheet%%+LAYO.layout | layout | 82463 |
| S3_025C95B6_00000000_5F0ECCDF071F3F90_CABHeadSheet%%+LAYO.layout | layout | 14279 |
| S3_025C95B6_00000000_76C8AC0A766F592B_CABLegsSheet%%+LAYO.layout | layout | 29788 |
| S3_025C95B6_00000000_7E495C1E7AD68026_CABBodySheet%%+LAYO.layout | layout | 14279 |
| S3_025C95B6_00000000_AB72337EBB07F48A_CABRequiredItemsDialog%%+LAYO.layout | layout | 59711 |
| S3_025C95B6_00000000_ABF00722FC61DD47_CABLoadRobot%%+LAYO.layout | layout | 148797 |
| S3_025C95B6_00000000_B9673852DC913482_CABPuck%%+LAYO.layout | layout | 832912 |
| S3_025C95B6_00000000_BE89CAB9DEBCF5EE_CABCompositor%%+LAYO.layout | layout | 603753 |
| S3_025C95B6_00000000_D69CB8D825C00101_CreateTraitChipDialog%%+LAYO.layout | layout | 72517 |
| S3_2F7D0004_00000000_02CFA2BAAE19746A_ATLAS_CABLegsSheet_00%%+IMAG.svg | svg | 506370 |
| S3_2F7D0004_00000000_039BE8ECD319B3CC_ATLAS_CABArmsSheet_00%%+IMAG.svg | svg | 246366 |
| S3_2F7D0004_00000000_27FBF0C8ED203332_ATLAS_CompositorDragCursorCAB_01%%+IMAG.svg | svg | 33941 |
| S3_2F7D0004_00000000_27FBF0C8ED203333_ATLAS_CompositorDragCursorCAB_00%%+IMAG.svg | svg | 396286 |
| S3_2F7D0004_00000000_2A5E0120171E042D_ATLAS_CABRequiredItemsDialog_00%%+IMAG.svg | svg | 364648 |
| S3_2F7D0004_00000000_2ED55C2FFCF4A411_ATLAS_CABPartCategory_00%%+IMAG.svg | svg | 78737 |
| S3_2F7D0004_00000000_5C3CFB1B5725217C_ATLAS_CABBotSheet_00%%+IMAG.svg | svg | 224594 |
| S3_2F7D0004_00000000_774F7DB47ADB6DF9_ATLAS_CABBodySheet_00%%+IMAG.svg | svg | 246366 |
| S3_2F7D0004_00000000_8EB0DDABA97AA43B_ATLAS_CABHeadSheet_00%%+IMAG.svg | svg | 246373 |
| S3_2F7D0004_00000000_91D4440B88EBA729_miniLoadCASB_icon%%+IMAG.svg | svg | 10989 |
| S3_2F7D0004_00000000_96944C7329D477EC_ATLAS_CABPuck_01%%+IMAG.svg | svg | 85548 |
| S3_2F7D0004_00000000_96944C7329D477ED_ATLAS_CABPuck_00%%+IMAG.svg | svg | 2354937 |
| S3_2F7D0004_00000000_B60BE40A9D2E613E_ATLAS_CABClothingRow_00%%+IMAG.svg | svg | 193675 |
| S3_2F7D0004_00000000_D7344E3D59B68978_ATLAS_CreateTraitChipDialog_00%%+IMAG.svg | svg | 602802 |
| S3_2F7D0004_00000000_EC491E1CAAABED94_ATLAS_CreateTraitChipTableThumbAndText_00%%+IMAG.svg | svg | 15920 |
| S3_2F7D0004_00000000_F1234D75EA3F7B38_ATLAS_CABCompositor_01%%+IMAG.svg | svg | 112831 |
| S3_2F7D0004_00000000_F1234D75EA3F7B39_ATLAS_CABCompositor_00%%+IMAG.svg | svg | 5558102 |
| S3_2F7D0004_00000000_F3E268BD439A05DE_ATLAS_CreateTraitChipTableThreeThumb_00%%+IMAG.svg | svg | 15918 |
| S3_2F7D0004_00000000_F980DB7D0444C566_ATLAS_CABLoadRobot_00%%+IMAG.svg | svg | 682229 |
| S3_2F7D0004_00000000_FFA3038CA65AA33C_ATLAS_CABBasicsSheet_00%%+IMAG.svg | svg | 553559 |
| S3_025C95B6_00000000_1270B6BEC6725C18_CAPCCMBasic%%+LAYO.layout | layout | 96120 |
| S3_025C95B6_00000000_2080F02E969A166B_CAPSmallSingleColorPickerDialog%%+LAYO.layout | layout | 97688 |
| S3_025C95B6_00000000_259DD16211EDD293_CAPFBDAdvanced%%+LAYO.layout | layout | 397391 |
| S3_025C95B6_00000000_2F2FCDE7E95F4D31_CAPEyes%%+LAYO.layout | layout | 51420 |
| S3_025C95B6_00000000_333A8DB8F20ADCCA_CAPSmallMultiColorPickerDialog%%+LAYO.layout | layout | 515339 |
| S3_025C95B6_00000000_4668B33D086AD318_CAPCCMAdvanced%%+LAYO.layout | layout | 728438 |
| S3_025C95B6_00000000_4FC686630640E284_CAPFurShapes%%+LAYO.layout | layout | 21316 |
| S3_025C95B6_00000000_50C90ED558965B93_CAPColoringTMH%%+LAYO.layout | layout | 52537 |
| S3_025C95B6_00000000_5670F274D06F0EF6_CAPBasics%%+LAYO.layout | layout | 138408 |
| S3_025C95B6_00000000_603581C59A1BDE00_CAPSnout%%+LAYO.layout | layout | 61994 |
| S3_025C95B6_00000000_61B2D7E80591A2AE_CAPCoat%%+LAYO.layout | layout | 75788 |
| S3_025C95B6_00000000_72E0D2713610407F_CAPAccessories%%+LAYO.layout | layout | 40265 |
| S3_025C95B6_00000000_AB07218BC1F1D048_CAPCharacter%%+LAYO.layout | layout | 143431 |
| S3_025C95B6_00000000_B2274CBA6F3F5A95_CAPFBDBasic%%+LAYO.layout | layout | 143442 |
| S3_025C95B6_00000000_BCDF8374ABEE8315_CAPUnicorn%%+LAYO.layout | layout | 75571 |
| S3_025C95B6_00000000_C81F2EE378F72CB0_CAPTackCollarSheet%%+LAYO.layout | layout | 65017 |
| S3_025C95B6_00000000_DA0A56C12BB7F7FB_CAPPetSheet%%+LAYO.layout | layout | 184030 |
| S3_025C95B6_00000000_F3C5952E9845A8E0_CAPFaceBody%%+LAYO.layout | layout | 29706 |
| S3_025C95B6_00000000_FB2B3B04E77CC33A_CAPBreeds%%+LAYO.layout | layout | 37187 |
| S3_2F7D0004_00000000_0214766B41A991A9_ATLAS_CAPFaceBody_02%%+IMAG.svg | svg | 3696 |
| S3_2F7D0004_00000000_0214766B41A991AA_ATLAS_CAPFaceBody_01%%+IMAG.svg | svg | 28326 |
| S3_2F7D0004_00000000_0214766B41A991AB_ATLAS_CAPFaceBody_00%%+IMAG.svg | svg | 129354 |
| S3_2F7D0004_00000000_0F88C1508E3ACA49_ATLAS_CAPFurBlendItem_00%%+IMAG.svg | svg | 29257 |
| S3_2F7D0004_00000000_1FF1AF3D07AC3B4B_ATLAS_CAPCharacter_00%%+IMAG.svg | svg | 200016 |
| S3_2F7D0004_00000000_217DE1E7DCAB076C_ATLAS_CAPSmallMultiColorPickerDialog_01%%+IMAG.svg | svg | 125822 |
| S3_2F7D0004_00000000_217DE1E7DCAB076D_ATLAS_CAPSmallMultiColorPickerDialog_00%%+IMAG.svg | svg | 571194 |
| S3_2F7D0004_00000000_217DE1E7DCAB076F_ATLAS_CAPSmallMultiColorPickerDialog_02%%+IMAG.svg | svg | 30538 |
| S3_2F7D0004_00000000_2CB87006481B0B82_ATLAS_CAPCCMCursors_00%%+IMAG.svg | svg | 231842 |
| S3_2F7D0004_00000000_2CB87006481B0B83_ATLAS_CAPCCMCursors_01%%+IMAG.svg | svg | 25805 |
| S3_2F7D0004_00000000_30B9B498BF53841E_ATLAS_CAPPeltLayerItem_01%%+IMAG.svg | svg | 16859 |
| S3_2F7D0004_00000000_30B9B498BF53841F_ATLAS_CAPPeltLayerItem_00%%+IMAG.svg | svg | 130423 |
| S3_2F7D0004_00000000_34CC9B94847677DA_ATLAS_CAPTackCollarSheet_01%%+IMAG.svg | svg | 219678 |
| S3_2F7D0004_00000000_34CC9B94847677DB_ATLAS_CAPTackCollarSheet_00%%+IMAG.svg | svg | 101972 |
| S3_2F7D0004_00000000_35EEB21544EE92CA_ATLAS_CAPCCMAdvanced_01%%+IMAG.svg | svg | 40016 |
| S3_2F7D0004_00000000_35EEB21544EE92CB_ATLAS_CAPCCMAdvanced_00%%+IMAG.svg | svg | 573807 |
| S3_2F7D0004_00000000_4535FED115D2F194_ATLAS_CAPFBDBasic_00%%+IMAG.svg | svg | 119244 |
| S3_2F7D0004_00000000_5274580D80681448_ATLAS_CAPBasics_01%%+IMAG.svg | svg | 44011 |
| S3_2F7D0004_00000000_5274580D80681449_ATLAS_CAPBasics_00%%+IMAG.svg | svg | 126918 |
| S3_2F7D0004_00000000_6D768CB95095F6BC_ATLAS_CAPUnicorn_00%%+IMAG.svg | svg | 48142 |
| S3_2F7D0004_00000000_70C883F5613BEF63_ATLAS_CAPSnout_00%%+IMAG.svg | svg | 288655 |
| S3_2F7D0004_00000000_7E60DCF0E265A9CC_ATLAS_CAPBasePeltLayerItem_00%%+IMAG.svg | svg | 113961 |
| S3_2F7D0004_00000000_7E60DCF0E265A9CD_ATLAS_CAPBasePeltLayerItem_01%%+IMAG.svg | svg | 3490 |
| S3_2F7D0004_00000000_7E7988A2E9295A40_ATLAS_CAPCoat_01%%+IMAG.svg | svg | 15736 |
| S3_2F7D0004_00000000_7E7988A2E9295A41_ATLAS_CAPCoat_00%%+IMAG.svg | svg | 72898 |
| S3_2F7D0004_00000000_8316A5943DED7E4A_ATLAS_CAPSmallSingleColorPickerDialog_00%%+IMAG.svg | svg | 160066 |
| S3_2F7D0004_00000000_8316A5943DED7E4B_ATLAS_CAPSmallSingleColorPickerDialog_01%%+IMAG.svg | svg | 32218 |
| S3_2F7D0004_00000000_93307340488ABAD5_ATLAS_CAPBreeds_00%%+IMAG.svg | svg | 117680 |
| S3_2F7D0004_00000000_A1FB1F5D18A7EE60_ATLAS_CAPEyes_00%%+IMAG.svg | svg | 211113 |
| S3_2F7D0004_00000000_A1FB1F5D18A7EE61_ATLAS_CAPEyes_01%%+IMAG.svg | svg | 33135 |
| S3_2F7D0004_00000000_A5B6BA535E2B145A_ATLAS_CAPFBDAdvanced_00%%+IMAG.svg | svg | 188129 |
| S3_2F7D0004_00000000_ADF8A505A3B2233B_ATLAS_CAPCCMBasic_00%%+IMAG.svg | svg | 205763 |
| S3_2F7D0004_00000000_C65CEA9A3C55D91A_ATLAS_CAPPetSheet_00%%+IMAG.svg | svg | 749885 |
| S3_2F7D0004_00000000_C65CEA9A3C55D91B_ATLAS_CAPPetSheet_01%%+IMAG.svg | svg | 46638 |
| S3_2F7D0004_00000000_C97D44388CCD11CA_ATLAS_CAPColoringTMH_00%%+IMAG.svg | svg | 21821 |
| S3_2F7D0004_00000000_CD1BE68F589F0ECE_ATLAS_CAPFurShapes_01%%+IMAG.svg | svg | 3698 |
| S3_2F7D0004_00000000_CD1BE68F589F0ECF_ATLAS_CAPFurShapes_00%%+IMAG.svg | svg | 44991 |
| S3_2F7D0004_00000000_E940A60C5A1A5A16_ATLAS_CAPAccessories_00%%+IMAG.svg | svg | 108115 |
| S3_2F7D0004_00000000_F53F0FE09AF2D22B_miniLoadCASP_icon%%+IMAG.svg | svg | 10012 |
| S3_025C95B6_00000000_0648870A46003DFC_CASTraitEntry%%+LAYO.layout | layout | 12212 |
| S3_025C95B6_00000000_19F752CFEA755B63_CASPuck%%+LAYO.layout | layout | 832896 |
| S3_025C95B6_00000000_26F672241CDBACDD_CASMermaid%%+LAYO.layout | layout | 28468 |
| S3_025C95B6_00000000_29AB289DD85C99F7_CASStylistSheet%%+LAYO.layout | layout | 38089 |
| S3_025C95B6_00000000_339AEA10734E4431_CASMakeup%%+LAYO.layout | layout | 146190 |
| S3_025C95B6_00000000_34E741D8D96E3A6A_CASMultiColorPickerDialog%%+LAYO.layout | layout | 693435 |
| S3_025C95B6_00000000_35A437370926FC44_CASLoadScreen%%+LAYO.layout | layout | 95930 |
| S3_025C95B6_00000000_38449CE2217F60BB_CASPhysical%%+LAYO.layout | layout | 43554 |
| S3_025C95B6_00000000_3988DA83C5405A65_CASDresserSheet%%+LAYO.layout | layout | 161902 |
| S3_025C95B6_00000000_3991095738CFC056_CASFacialDetails%%+LAYO.layout | layout | 110691 |
| S3_025C95B6_00000000_43240644540454F4_CASExitLoadScreen%%+LAYO.layout | layout | 94114 |
| S3_025C95B6_00000000_57F7058D7D7AACA5_CASLoadSim%%+LAYO.layout | layout | 306393 |
| S3_025C95B6_00000000_63BFBDE0133EA1DE_CASBeard%%+LAYO.layout | layout | 60353 |
| S3_025C95B6_00000000_654F0EC9E64A217D_CASMirror%%+LAYO.layout | layout | 43462 |
| S3_025C95B6_00000000_6A133B0C09AD406A_CASCharacterSheet%%+LAYO.layout | layout | 93239 |
| S3_025C95B6_00000000_718F8EECC5685E6E_CASMermaidSheet%%+LAYO.layout | layout | 25842 |
| S3_025C95B6_00000000_762D1919AECAC616_CASHairAdvanced%%+LAYO.layout | layout | 117594 |
| S3_025C95B6_00000000_7913E9BDA46B7E7F_CASPlasticSurgeryFaceSheet%%+LAYO.layout | layout | 17957 |
| S3_025C95B6_00000000_8383C130D3F928E1_CASRequiredItemsDialog%%+LAYO.layout | layout | 256987 |
| S3_025C95B6_00000000_864B7DDF93A7A860_CASDresserClothing%%+LAYO.layout | layout | 66144 |
| S3_025C95B6_00000000_89DB4DD029A1CBA2_CASEyes%%+LAYO.layout | layout | 120513 |
| S3_025C95B6_00000000_97DB9E9DDA2D2671_CASBasics%%+LAYO.layout | layout | 390079 |
| S3_025C95B6_00000000_A2E2D8A12DC3E9D0_CASGenetics%%+LAYO.layout | layout | 487495 |
| S3_025C95B6_00000000_B4C060E5026E010C_CASTraitsTooltip%%+LAYO.layout | layout | 23665 |
| S3_025C95B6_00000000_B535F837191CFA5D_CASHeadEars%%+LAYO.layout | layout | 92055 |
| S3_025C95B6_00000000_CBCD0CD5D1DBB58B_CASSingleColorPickerDialog%%+LAYO.layout | layout | 50787 |
| S3_025C95B6_00000000_CCA646F354561099_CASCharacter%%+LAYO.layout | layout | 459176 |
| S3_025C95B6_00000000_CDD35C752C51A58E_CASMirrorSheet%%+LAYO.layout | layout | 52950 |
| S3_025C95B6_00000000_D3BBAD3447CCE457_CASBodySlider%%+LAYO.layout | layout | 8495 |
| S3_025C95B6_00000000_D6B52B0EF7372F30_CASClothingCategory%%+LAYO.layout | layout | 115485 |
| S3_025C95B6_00000000_D8D5C1186BA97FC9_CAF%%+LAYO.layout | layout | 68595 |
| S3_025C95B6_00000000_D908B8D056D26D85_CASNose%%+LAYO.layout | layout | 79646 |
| S3_025C95B6_00000000_DB80D3F8DACBF185_CASMouth%%+LAYO.layout | layout | 73535 |
| S3_025C95B6_00000000_DB98CEF8DAE07B3C_CASMoles%%+LAYO.layout | layout | 40805 |
| S3_025C95B6_00000000_DF5C5173597305B4_CASBodyHair%%+LAYO.layout | layout | 163640 |
| S3_025C95B6_00000000_E7FF0CD05EA0F600_CASHair%%+LAYO.layout | layout | 138521 |
| S3_025C95B6_00000000_E92E356742809668_CASClothing%%+LAYO.layout | layout | 63474 |
| S3_025C95B6_00000000_EBA889D6614BBF71_CASPlasticSurgeryBody%%+LAYO.layout | layout | 61301 |
| S3_025C95B6_00000000_F2D661E40C4A404B_CASTattoo%%+LAYO.layout | layout | 348752 |
| S3_025C95B6_00000000_F6AC9B44E420695C_CASTattooSheet%%+LAYO.layout | layout | 17942 |
| S3_025C95B6_00000000_F9DCF300AA1D4314_CASEyebrows%%+LAYO.layout | layout | 74411 |
| S3_025C95B6_00000000_FC3C01217DFAD202_CASPlasticSurgeryBodySheet%%+LAYO.layout | layout | 17957 |
| S3_2F7D0004_00000000_0069A945CEB0898E_ATLAS_CASEyebrows_01%%+IMAG.svg | svg | 20130 |
| S3_2F7D0004_00000000_0069A945CEB0898F_ATLAS_CASEyebrows_00%%+IMAG.svg | svg | 71553 |
| S3_2F7D0004_00000000_0516B01CF271F850_ATLAS_CASDresserSheet_04%%+IMAG.svg | svg | 14074 |
| S3_2F7D0004_00000000_0516B01CF271F851_ATLAS_CASDresserSheet_05%%+IMAG.svg | svg | 16158 |
| S3_2F7D0004_00000000_0516B01CF271F854_ATLAS_CASDresserSheet_00%%+IMAG.svg | svg | 450543 |
| S3_2F7D0004_00000000_0516B01CF271F855_ATLAS_CASDresserSheet_01%%+IMAG.svg | svg | 78390 |
| S3_2F7D0004_00000000_0516B01CF271F856_ATLAS_CASDresserSheet_02%%+IMAG.svg | svg | 15972 |
| S3_2F7D0004_00000000_0516B01CF271F857_ATLAS_CASDresserSheet_03%%+IMAG.svg | svg | 15709 |
| S3_2F7D0004_00000000_05B257EB36F0268D_ATLAS_CASPlasticSurgeryBodySheet_00%%+IMAG.svg | svg | 192705 |
| S3_2F7D0004_00000000_05C136110130EEE0_ATLAS_CASFacialDetails_01%%+IMAG.svg | svg | 43475 |
| S3_2F7D0004_00000000_05C136110130EEE1_ATLAS_CASFacialDetails_00%%+IMAG.svg | svg | 125573 |
| S3_2F7D0004_00000000_097F13CB1DD08AC8_ATLAS_CASPlasticSurgeryBody_00%%+IMAG.svg | svg | 122783 |
| S3_2F7D0004_00000000_0C4CCCCA49F87402_ATLAS_CASClothingCategory_01%%+IMAG.svg | svg | 26795 |
| S3_2F7D0004_00000000_0C4CCCCA49F87403_ATLAS_CASClothingCategory_00%%+IMAG.svg | svg | 116213 |
| S3_2F7D0004_00000000_0DC9300445DF7B31_ATLAS_CAFThumbItem_00%%+IMAG.svg | svg | 29944 |
| S3_2F7D0004_00000000_11919EC582C944B8_ATLAS_CASMermaidSheet_01%%+IMAG.svg | svg | 30816 |
| S3_2F7D0004_00000000_11919EC582C944B9_ATLAS_CASMermaidSheet_00%%+IMAG.svg | svg | 109270 |
| S3_2F7D0004_00000000_18773D679DD47C49_ATLAS_CASBeard_00%%+IMAG.svg | svg | 47723 |
| S3_2F7D0004_00000000_1E2407899DDCEF9C_ATLAS_CASMultiColorPickerDialog_01%%+IMAG.svg | svg | 107485 |
| S3_2F7D0004_00000000_1E2407899DDCEF9D_ATLAS_CASMultiColorPickerDialog_00%%+IMAG.svg | svg | 606124 |
| S3_2F7D0004_00000000_1E2407899DDCEF9F_ATLAS_CASMultiColorPickerDialog_02%%+IMAG.svg | svg | 4969 |
| S3_2F7D0004_00000000_2F9B92582A3D1862_ATLAS_CASFamilyScreen_01%%+IMAG.svg | svg | 33165 |
| S3_2F7D0004_00000000_2F9B92582A3D1863_ATLAS_CASFamilyScreen_00%%+IMAG.svg | svg | 303304 |
| S3_2F7D0004_00000000_33CDA80038E5C4FF_ATLAS_CASTattooSheet_00%%+IMAG.svg | svg | 191076 |
| S3_2F7D0004_00000000_35928E5E44AFAC5B_cas_glb_thumb_ac_r2%%+IMAG.svg | svg | 12320 |
| S3_2F7D0004_00000000_3DF08F024FF4D9C5_ATLAS_MolesFrecklesEntry_00%%+IMAG.svg | svg | 16689 |
| S3_2F7D0004_00000000_405F5011A431FD53_ATLAS_CASGenetics_00%%+IMAG.svg | svg | 1867772 |
| S3_2F7D0004_00000000_40A65292EC2FE26C_ATLAS_CASMouth_00%%+IMAG.svg | svg | 153515 |
| S3_2F7D0004_00000000_416A68ED45D83D80_cas_glb_thumb_r2%%+IMAG.svg | svg | 3873 |
| S3_2F7D0004_00000000_4699AD64DC6EDAA1_ATLAS_GenericCasItem_00%%+IMAG.svg | svg | 186136 |
| S3_2F7D0004_00000000_4C7D152399C70574_ATLAS_GenericSupernaturalItem_00%%+IMAG.svg | svg | 13846 |
| S3_2F7D0004_00000000_4EDE14AB06A16260_ATLAS_CASCharacter_00%%+IMAG.svg | svg | 600743 |
| S3_2F7D0004_00000000_4EDE14AB06A16261_ATLAS_CASCharacter_01%%+IMAG.svg | svg | 88185 |
| S3_2F7D0004_00000000_4FACEC217D0198B8_ATLAS_CASMakeup_00%%+IMAG.svg | svg | 183042 |
| S3_2F7D0004_00000000_5860C9F0081E10EF_ATLAS_CASMoles_00%%+IMAG.svg | svg | 13601 |
| S3_2F7D0004_00000000_5878701C241CBF20_ATLAS_CASPuck_02%%+IMAG.svg | svg | 12347 |
| S3_2F7D0004_00000000_5878701C241CBF22_ATLAS_CASPuck_00%%+IMAG.svg | svg | 2183852 |
| S3_2F7D0004_00000000_5878701C241CBF23_ATLAS_CASPuck_01%%+IMAG.svg | svg | 361334 |
| S3_2F7D0004_00000000_594297386D929505_ATLAS_CASCharacterSheet_00%%+IMAG.svg | svg | 498685 |
| S3_2F7D0004_00000000_5BB8348D50F49A47_ATLAS_CASTraitsTooltip_00%%+IMAG.svg | svg | 33361 |
| S3_2F7D0004_00000000_5D5EE9124A2D5BBA_ATLAS_CASSingleColorPickerDialog_00%%+IMAG.svg | svg | 152647 |
| S3_2F7D0004_00000000_5D5EE9124A2D5BBB_ATLAS_CASSingleColorPickerDialog_01%%+IMAG.svg | svg | 32963 |
| S3_2F7D0004_00000000_61A0C4BE25CB1529_miniLoadCAS_icon%%+IMAG.svg | svg | 14805 |
| S3_2F7D0004_00000000_6263C501DABC0440_ATLAS_CASMirrorSheet_01%%+IMAG.svg | svg | 185735 |
| S3_2F7D0004_00000000_6263C501DABC0441_ATLAS_CASMirrorSheet_00%%+IMAG.svg | svg | 202561 |
| S3_2F7D0004_00000000_62D82060D75EB57C_ATLAS_CASLoadSim_00%%+IMAG.svg | svg | 396754 |
| S3_2F7D0004_00000000_6625B32BF6775DA0_miniLoadTown_icon%%+IMAG.svg | svg | 8205 |
| S3_2F7D0004_00000000_75963C2839BE7FAE_ATLAS_CASStylistSheet_00%%+IMAG.svg | svg | 106322 |
| S3_2F7D0004_00000000_75963C2839BE7FAF_ATLAS_CASStylistSheet_01%%+IMAG.svg | svg | 62958 |
| S3_2F7D0004_00000000_7CB17A423254C2C7_ATLAS_CASLoadSimGridItem_00%%+IMAG.svg | svg | 124103 |
| S3_2F7D0004_00000000_7D5768BFE9CB7DA3_ATLAS_CASDresserClothing_00%%+IMAG.svg | svg | 107620 |
| S3_2F7D0004_00000000_7E34A4BB8DDC5B64_ATLAS_CASCharacterTraitsDialog_01%%+IMAG.svg | svg | 41418 |
| S3_2F7D0004_00000000_7E34A4BB8DDC5B65_ATLAS_CASCharacterTraitsDialog_00%%+IMAG.svg | svg | 88255 |
| S3_2F7D0004_00000000_7FE8A6A83F63F4E0_ATLAS_CASHairAdvanced_01%%+IMAG.svg | svg | 50949 |
| S3_2F7D0004_00000000_7FE8A6A83F63F4E1_ATLAS_CASHairAdvanced_00%%+IMAG.svg | svg | 579826 |
| S3_2F7D0004_00000000_8073455940562F14_ATLAS_CASMermaid_00%%+IMAG.svg | svg | 105981 |
| S3_2F7D0004_00000000_807B72C8BE4E17F0_ATLAS_CASHeadEars_04%%+IMAG.svg | svg | 3333 |
| S3_2F7D0004_00000000_807B72C8BE4E17F4_ATLAS_CASHeadEars_00%%+IMAG.svg | svg | 71364 |
| S3_2F7D0004_00000000_807B72C8BE4E17F5_ATLAS_CASHeadEars_01%%+IMAG.svg | svg | 3394 |
| S3_2F7D0004_00000000_807B72C8BE4E17F6_ATLAS_CASHeadEars_02%%+IMAG.svg | svg | 3442 |
| S3_2F7D0004_00000000_807B72C8BE4E17F7_ATLAS_CASHeadEars_03%%+IMAG.svg | svg | 3104 |
| S3_2F7D0004_00000000_81967429FDA74F10_ATLAS_CASRequiredItemsDialog_00%%+IMAG.svg | svg | 461932 |
| S3_2F7D0004_00000000_81967429FDA74F11_ATLAS_CASRequiredItemsDialog_01%%+IMAG.svg | svg | 45186 |
| S3_2F7D0004_00000000_832C484E5FBCBFC3_ATLAS_CASMakeupColorGridItem_01%%+IMAG.svg | svg | 27434 |
| S3_2F7D0004_00000000_8F9CD244FFA133BF_ATLAS_CASClothingRow_00%%+IMAG.svg | svg | 194972 |
| S3_2F7D0004_00000000_938698DBB7A02DA9_ATLAS_CASSkinTonePreset_00%%+IMAG.svg | svg | 21973 |
| S3_2F7D0004_00000000_9CD09083A42C2BA4_ATLAS_CASBodySlider_02%%+IMAG.svg | svg | 7504 |
| S3_2F7D0004_00000000_9CD09083A42C2BA7_ATLAS_CASBodySlider_01%%+IMAG.svg | svg | 5461 |
| S3_2F7D0004_00000000_9D1C04CB6C944B1E_ATLAS_CASBodyHair_01%%+IMAG.svg | svg | 16683 |
| S3_2F7D0004_00000000_9D1C04CB6C944B1F_ATLAS_CASBodyHair_00%%+IMAG.svg | svg | 117530 |
| S3_2F7D0004_00000000_A2603119EA17C275_ATLAS_CASEyes_00%%+IMAG.svg | svg | 177226 |
| S3_2F7D0004_00000000_A467D0394222BEE0_ATLAS_CASBasics_00%%+IMAG.svg | svg | 525952 |
| S3_2F7D0004_00000000_A467D0394222BEE1_ATLAS_CASBasics_01%%+IMAG.svg | svg | 98833 |
| S3_2F7D0004_00000000_B34198DE6C0A33DD_ATLAS_CASLoadScreen_02%%+IMAG.svg | svg | 753385 |
| S3_2F7D0004_00000000_B34198DE6C0A33DE_ATLAS_CASLoadScreen_01%%+IMAG.svg | svg | 1394014 |
| S3_2F7D0004_00000000_B34198DE6C0A33DF_ATLAS_CASLoadScreen_00%%+IMAG.svg | svg | 3764862 |
| S3_2F7D0004_00000000_C3202287675DCEF6_ATLAS_GenericCasItemGrow_00%%+IMAG.svg | svg | 22888 |
| S3_2F7D0004_00000000_CCA18700F768DE7B_ATLAS_CASClothing_00%%+IMAG.svg | svg | 113772 |
| S3_2F7D0004_00000000_D1DF6CAB65A728CD_ATLAS_CASExitLoadScreen_02%%+IMAG.svg | svg | 753384 |
| S3_2F7D0004_00000000_D1DF6CAB65A728CE_ATLAS_CASExitLoadScreen_01%%+IMAG.svg | svg | 1394019 |
| S3_2F7D0004_00000000_D1DF6CAB65A728CF_ATLAS_CASExitLoadScreen_00%%+IMAG.svg | svg | 3764866 |
| S3_2F7D0004_00000000_E6A14D2A5F5EEAFF_ATLAS_CASTraitEntry_00%%+IMAG.svg | svg | 6013 |
| S3_2F7D0004_00000000_E72F1E3FC68C2FFA_ATLAS_CASTattoo_00%%+IMAG.svg | svg | 487189 |
| S3_2F7D0004_00000000_E72F1E3FC68C2FFB_ATLAS_CASTattoo_01%%+IMAG.svg | svg | 139754 |
| S3_2F7D0004_00000000_E93DDBF2310F3BB0_ATLAS_GenericCasItemGrow_landscape_00%%+IMAG.svg | svg | 147797 |
| S3_2F7D0004_00000000_F177FE4E33C45508_ATLAS_CASNose_04%%+IMAG.svg | svg | 3321 |
| S3_2F7D0004_00000000_F177FE4E33C4550C_ATLAS_CASNose_00%%+IMAG.svg | svg | 58125 |
| S3_2F7D0004_00000000_F177FE4E33C4550D_ATLAS_CASNose_01%%+IMAG.svg | svg | 3381 |
| S3_2F7D0004_00000000_F177FE4E33C4550E_ATLAS_CASNose_02%%+IMAG.svg | svg | 3427 |
| S3_2F7D0004_00000000_F177FE4E33C4550F_ATLAS_CASNose_03%%+IMAG.svg | svg | 3093 |
| S3_2F7D0004_00000000_F379A4AB0E2EFE6E_ATLAS_CASPlasticSurgeryFaceSheet_00%%+IMAG.svg | svg | 185482 |
| S3_2F7D0004_00000000_FA9F4F99FAF54B57_cas_glb_thumb_hl_r2%%+IMAG.svg | svg | 4015 |
| S3_2F7D0004_00000000_FBAC1DD1C314D548_ATLAS_CASTattooColorGridItem_00%%+IMAG.svg | svg | 20849 |
| S3_2F7D0004_00000000_FC337601340DFEAB_ATLAS_CASHair_00%%+IMAG.svg | svg | 376551 |
| S3_2F7D0004_00000000_FCB88C2D93726730_ATLAS_CAF_00%%+IMAG.svg | svg | 2674469 |
| S3_2F7D0004_00000000_FCB88C2D93726731_ATLAS_CAF_01%%+IMAG.svg | svg | 1117577 |
| S3_2F7D0004_00000000_FCB88C2D93726732_ATLAS_CAF_02%%+IMAG.svg | svg | 4083 |
| S3_2F7D0004_00000000_FE9F2B059C54DDCA_ATLAS_CASPhysical_00%%+IMAG.svg | svg | 119972 |
| S3_2F7D0004_00000000_FE9F2B059C54DDCB_ATLAS_CASPhysical_01%%+IMAG.svg | svg | 43476 |
| S3_025C95B6_00000000_0A18231C4DBB9177_CASCompositor%%+LAYO.layout | layout | 603002 |
| S3_2F7D0004_00000000_1C21CFECB7FB8427_ATLAS_ColorPicker_00%%+IMAG.svg | svg | 150039 |
| S3_2F7D0004_00000000_3AC52A020CB0B756_ATLAS_CASCompositor_00%%+IMAG.svg | svg | 8563799 |
| S3_2F7D0004_00000000_3AC52A020CB0B757_ATLAS_CASCompositor_01%%+IMAG.svg | svg | 166105 |
| S3_2F7D0004_00000000_9F6ECFA93C2985ED_ATLAS_CompositorDragCursor_00%%+IMAG.svg | svg | 167209 |
| S3_025C95B6_00000000_919FD98CE123A07E_Blueprint%%+LAYO.layout | layout | 546585 |
| S3_2F7D0004_00000000_17792BD6D0066381_ATLAS_BlueprintCatalogItem_00%%+IMAG.svg | svg | 24330 |
| S3_2F7D0004_00000000_AEF3D39F866E6C58_ATLAS_Blueprint_01%%+IMAG.svg | svg | 253223 |
| S3_2F7D0004_00000000_AEF3D39F866E6C59_ATLAS_Blueprint_00%%+IMAG.svg | svg | 1483470 |
| S3_2F7D0004_00000000_AEF3D39F866E6C5B_ATLAS_Blueprint_02%%+IMAG.svg | svg | 57911 |
| S3_025C95B6_00000000_199B49BE84BECAB7_Build%%+LAYO.layout | layout | 2085101 |
| S3_2F7D0004_00000000_038CECFC0C56A1C4_ATLAS_Build_02%%+IMAG.svg | svg | 190460 |
| S3_2F7D0004_00000000_038CECFC0C56A1C6_ATLAS_Build_00%%+IMAG.svg | svg | 2393147 |
| S3_2F7D0004_00000000_038CECFC0C56A1C7_ATLAS_Build_01%%+IMAG.svg | svg | 1692280 |
| S3_2F7D0004_00000000_548D7D7A17944FF3_ATLAS_BuildCatalogTerrainPaintItem_00%%+IMAG.svg | svg | 8904 |
| S3_2F7D0004_00000000_9EC52D7D061DE377_ATLAS_BuildExpandableCatalogGrid_00%%+IMAG.svg | svg | 55791 |
| S3_2F7D0004_00000000_BF420C231EAF2E24_ATLAS_BuildCatalogItem_00%%+IMAG.svg | svg | 26369 |
| S3_2F7D0004_00000000_EEE4BCA75CC6A81A_ATLAS_BuildCatalogPatternItem_00%%+IMAG.svg | svg | 8907 |
| S3_025C95B6_00000000_1EAF828D497A2809_EditCollection%%+LAYO.layout | layout | 53100 |
| S3_025C95B6_00000000_5EFCCD1B991CC7A9_OrganizeCollections%%+LAYO.layout | layout | 37226 |
| S3_025C95B6_00000000_9D3C87E082A16199_TabControl%%+LAYO.layout | layout | 5942 |
| S3_025C95B6_00000000_9E62DF13DA920738_EditCollections%%+LAYO.layout | layout | 48014 |
| S3_025C95B6_00000000_D8D9B1186BAD4D2F_Buy%%+LAYO.layout | layout | 1654456 |
| S3_2F7D0004_00000000_161202269A867260_ATLAS_EditCollection_00%%+IMAG.svg | svg | 178153 |
| S3_2F7D0004_00000000_3C280016FF596399_ATLAS_OrganizeCollectionEntry_00%%+IMAG.svg | svg | 16094 |
| S3_2F7D0004_00000000_63C64D36581730E0_ATLAS_OrganizeCollections_00%%+IMAG.svg | svg | 156364 |
| S3_2F7D0004_00000000_72F727047B955E20_ATLAS_TabControl_00%%+IMAG.svg | svg | 17402 |
| S3_2F7D0004_00000000_7764C315F854ED3F_ATLAS_BuyExpandableCatalogGrid_00%%+IMAG.svg | svg | 473805 |
| S3_2F7D0004_00000000_7FDE0C3B6B41A364_ATLAS_CatalogProductFilterCell_00%%+IMAG.svg | svg | 22317 |
| S3_2F7D0004_00000000_84B195996AC48353_ATLAS_EditCollections_00%%+IMAG.svg | svg | 163791 |
| S3_2F7D0004_00000000_8F47346BDB2EA12C_ATLAS_BuyCatalogItem_00%%+IMAG.svg | svg | 41096 |
| S3_2F7D0004_00000000_A7FD2FCCB23241FD_ATLAS_OrganizeCollectionsCursors_00%%+IMAG.svg | svg | 30771 |
| S3_2F7D0004_00000000_B527A31490A57FF7_ATLAS_BuildBuyMoneyTooltip_00%%+IMAG.svg | svg | 4352 |
| S3_2F7D0004_00000000_C140B31DF4AD1F37_ATLAS_OrganizeCollectionContentsEntry_00%%+IMAG.svg | svg | 16103 |
| S3_2F7D0004_00000000_D2A579CC662F681A_ATLAS_Buy_04%%+IMAG.svg | svg | 2320 |
| S3_2F7D0004_00000000_D2A579CC662F681C_ATLAS_Buy_02%%+IMAG.svg | svg | 3259663 |
| S3_2F7D0004_00000000_D2A579CC662F681D_ATLAS_Buy_03%%+IMAG.svg | svg | 186577 |
| S3_2F7D0004_00000000_D2A579CC662F681E_ATLAS_Buy_00%%+IMAG.svg | svg | 2627006 |
| S3_2F7D0004_00000000_D2A579CC662F681F_ATLAS_Buy_01%%+IMAG.svg | svg | 4755134 |
| S3_2F7D0004_00000000_DB23DCE000CD7335_ATLAS_CatalogPreviewPresetItem_00%%+IMAG.svg | svg | 25354 |
| S3_2F7D0004_00000000_F4BE0FC2E4E81545_ATLAS_CollectionsPickerEntry_00%%+IMAG.svg | svg | 37489 |
| S3_025C95B6_00000000_04CCC417982AC40A_EditTownPuck%%+LAYO.layout | layout | 165025 |
| S3_025C95B6_00000000_0F7100B8D0118A1C_PlayFlowBinPanel%%+LAYO.layout | layout | 53323 |
| S3_025C95B6_00000000_2090E2759473493F_ZoomPuck%%+LAYO.layout | layout | 100672 |
| S3_025C95B6_00000000_2ED89C234197472D_PlayFlowConfirmPurchaseLot%%+LAYO.layout | layout | 103716 |
| S3_025C95B6_00000000_328AAD955F9784F0_PlayFlowMenuPanel%%+LAYO.layout | layout | 31914 |
| S3_025C95B6_00000000_369F088AD19D5C09_MapTagPickerDialog%%+LAYO.layout | layout | 121325 |
| S3_025C95B6_00000000_42176B7A9BF426CF_PlayFlowBinTooltip%%+LAYO.layout | layout | 16610 |
| S3_025C95B6_00000000_510B794F1E31E304_PlayFlowInstructions%%+LAYO.layout | layout | 275843 |
| S3_025C95B6_00000000_5702AC619C528760_EditTownLibraryPanel%%+LAYO.layout | layout | 62551 |
| S3_025C95B6_00000000_5CFCC54D5AE8AD4F_PlayFlowInfoPanel%%+LAYO.layout | layout | 166901 |
| S3_025C95B6_00000000_9320114EAAE6C37A_ChangeLotType%%+LAYO.layout | layout | 62685 |
| S3_025C95B6_00000000_97D59EE947E588F7_EditTownConfirmPurchaseLot%%+LAYO.layout | layout | 77354 |
| S3_025C95B6_00000000_A407C2124172994A_EditTownPlaceDialog%%+LAYO.layout | layout | 126049 |
| S3_025C95B6_00000000_A4A2C330F778A42F_EditTownNeighborhoodPloppablesPanel%%+LAYO.layout | layout | 42718 |
| S3_025C95B6_00000000_B14C32615254B034_PlayFlowUniversityRentPanel%%+LAYO.layout | layout | 67453 |
| S3_025C95B6_00000000_B64D685CBF8C9B14_PlayFlowPuck%%+LAYO.layout | layout | 58607 |
| S3_025C95B6_00000000_BEE78AF45D8CCF6D_PlayFlowConfirmMergePetHousehold%%+LAYO.layout | layout | 109291 |
| S3_025C95B6_00000000_C6058E9E20ABC4D1_EditTownInfoPanel%%+LAYO.layout | layout | 263878 |
| S3_025C95B6_00000000_EF6F0E1BC3348C0E_EditTownInstructions%%+LAYO.layout | layout | 7187 |
| S3_025C95B6_00000000_F558123058FB5F30_PlayFlowHouseholdPanel%%+LAYO.layout | layout | 40742 |
| S3_2F7D0004_00000000_039845E7B4400264_ATLAS_EditTownPuck_01%%+IMAG.svg | svg | 41577 |
| S3_2F7D0004_00000000_039845E7B4400265_ATLAS_EditTownPuck_00%%+IMAG.svg | svg | 1860014 |
| S3_2F7D0004_00000000_061C770D38AF29B3_ATLAS_PlayFlowHouseholdPanel_00%%+IMAG.svg | svg | 320318 |
| S3_2F7D0004_00000000_12E4A5AF760DC703_puck_modes_mapview_active_r2%%+IMAG.svg | svg | 9289 |
| S3_2F7D0004_00000000_1E34CBB9A2BF61DE_ATLAS_PlayFlowBinGridItem_00%%+IMAG.svg | svg | 16620 |
| S3_2F7D0004_00000000_21A02CCF010B2584_ATLAS_PlayFlowConfirmPurchaseLot_00%%+IMAG.svg | svg | 222457 |
| S3_2F7D0004_00000000_21A02CCF010B2585_ATLAS_PlayFlowConfirmPurchaseLot_01%%+IMAG.svg | svg | 10965 |
| S3_2F7D0004_00000000_3C91A0CF4F9CACCC_ATLAS_PlayFlowTutorialMenuPanel_01%%+IMAG.svg | svg | 13701 |
| S3_2F7D0004_00000000_3C91A0CF4F9CACCD_ATLAS_PlayFlowTutorialMenuPanel_00%%+IMAG.svg | svg | 181221 |
| S3_2F7D0004_00000000_4C54A13F3A879AF7_ATLAS_PlayFlowBinPanel_00%%+IMAG.svg | svg | 498741 |
| S3_2F7D0004_00000000_4D4400B84CD5EE26_ATLAS_PlayFlowPuck_01%%+IMAG.svg | svg | 41469 |
| S3_2F7D0004_00000000_4D4400B84CD5EE27_ATLAS_PlayFlowPuck_00%%+IMAG.svg | svg | 196006 |
| S3_2F7D0004_00000000_553BDAD6943EBDF8_ATLAS_LotContentsTooltip_00%%+IMAG.svg | svg | 18902 |
| S3_2F7D0004_00000000_64DD52A17B8F2CEB_ATLAS_EditTownLibraryPanel_00%%+IMAG.svg | svg | 514876 |
| S3_2F7D0004_00000000_6C374A2F00963D7C_ATLAS_ChangeLotType_01%%+IMAG.svg | svg | 21247 |
| S3_2F7D0004_00000000_6C374A2F00963D7D_ATLAS_ChangeLotType_00%%+IMAG.svg | svg | 208301 |
| S3_2F7D0004_00000000_6D6BAE0CE2A29920_ATLAS_MapTagLotTooltip_00%%+IMAG.svg | svg | 5223 |
| S3_2F7D0004_00000000_7026D2A7EF6C84EE_ATLAS_PlayFlowUniversityRentPanel_01%%+IMAG.svg | svg | 10955 |
| S3_2F7D0004_00000000_7026D2A7EF6C84EF_ATLAS_PlayFlowUniversityRentPanel_00%%+IMAG.svg | svg | 193426 |
| S3_2F7D0004_00000000_71B21C6B41293635_ATLAS_EditTownPlaceDialog_00%%+IMAG.svg | svg | 136014 |
| S3_2F7D0004_00000000_7C244C50C30DEAB4_ATLAS_EditTownConfirmPurchaseLot_02%%+IMAG.svg | svg | 10974 |
| S3_2F7D0004_00000000_7C244C50C30DEAB6_ATLAS_EditTownConfirmPurchaseLot_00%%+IMAG.svg | svg | 205169 |
| S3_2F7D0004_00000000_7C244C50C30DEAB7_ATLAS_EditTownConfirmPurchaseLot_01%%+IMAG.svg | svg | 11105 |
| S3_2F7D0004_00000000_802CE69A843ED6EC_ATLAS_PlayFlowConfirmMergePetHousehold_00%%+IMAG.svg | svg | 209231 |
| S3_2F7D0004_00000000_802CE69A843ED6ED_ATLAS_PlayFlowConfirmMergePetHousehold_01%%+IMAG.svg | svg | 10963 |
| S3_2F7D0004_00000000_82D3C76DE8066CA4_ATLAS_EditTownConfirmExport_00%%+IMAG.svg | svg | 104519 |
| S3_2F7D0004_00000000_8D5706A0DB23F94E_puck_modes_mapview_hi_r2%%+IMAG.svg | svg | 8131 |
| S3_2F7D0004_00000000_92B5CDEDBE4438CE_ATLAS_ZoomPuck_00%%+IMAG.svg | svg | 383004 |
| S3_2F7D0004_00000000_92B5CDEDBE4438CF_ATLAS_ZoomPuck_01%%+IMAG.svg | svg | 13633 |
| S3_2F7D0004_00000000_A15A1EB453063C7F_ATLAS_PlayFlowInstructions_00%%+IMAG.svg | svg | 1106522 |
| S3_2F7D0004_00000000_ACF9B705D1404CF2_puck_modes_mapview_di_r2%%+IMAG.svg | svg | 7141 |
| S3_2F7D0004_00000000_B06F80E9A7B29EB0_ATLAS_MapTagPickerDialog_00%%+IMAG.svg | svg | 549521 |
| S3_2F7D0004_00000000_B06F80E9A7B29EB1_ATLAS_MapTagPickerDialog_01%%+IMAG.svg | svg | 18563 |
| S3_2F7D0004_00000000_B78122A98C2FB436_ATLAS_PlayFlowBinTooltip_00%%+IMAG.svg | svg | 10009 |
| S3_2F7D0004_00000000_BCEB79DE1157B9AE_ATLAS_EditTownNeighborhoodPloppablesPanel_00%%+IMAG.svg | svg | 488287 |
| S3_2F7D0004_00000000_CFC9CE98386710D1_ATLAS_EditTownInstructions_00%%+IMAG.svg | svg | 21247 |
| S3_2F7D0004_00000000_D46C13E9B2C0EE0B_ATLAS_PlayFlowMenuPanel_00%%+IMAG.svg | svg | 285667 |
| S3_2F7D0004_00000000_DAA94B7D05E24532_puck_modes_mapview_normal_r2%%+IMAG.svg | svg | 8021 |
| S3_2F7D0004_00000000_E36946FC68C8B6F8_ATLAS_EditTownInfoPanel_00%%+IMAG.svg | svg | 535595 |
| S3_2F7D0004_00000000_E36946FC68C8B6F9_ATLAS_EditTownInfoPanel_01%%+IMAG.svg | svg | 40299 |
| S3_2F7D0004_00000000_E36946FC68C8B6FA_ATLAS_EditTownInfoPanel_02%%+IMAG.svg | svg | 31345 |
| S3_2F7D0004_00000000_EBE9340F6F8355F9_ATLAS_EditTownConfirmEvict_00%%+IMAG.svg | svg | 105676 |
| S3_2F7D0004_00000000_F674DA35A81F8FBE_ATLAS_PlayFlowInfoPanel_00%%+IMAG.svg | svg | 288007 |
| S3_2F7D0004_00000000_F674DA35A81F8FBF_ATLAS_PlayFlowInfoPanel_01%%+IMAG.svg | svg | 11520 |
| S3_025C95B6_00000000_1F79291EC666C66C_HUDInteractionQueueItem%%+LAYO.layout | layout | 96591 |
| S3_025C95B6_00000000_7CEBB42A33E13571_HUDInteractionQueue%%+LAYO.layout | layout | 1813 |
| S3_2F7D0004_00000000_07AE75F36D544B30_int_social_norm_pets%%+IMAG.svg | svg | 9354 |
| S3_2F7D0004_00000000_0D8D57FB10867DC6_int_relationship_bk_pets%%+IMAG.svg | svg | 12021 |
| S3_2F7D0004_00000000_0E968520DD3549AA_int_progress_hl_pets%%+IMAG.svg | svg | 7118 |
| S3_2F7D0004_00000000_119D001055CC8665_int_relationship_bk_hl_pets%%+IMAG.svg | svg | 11995 |
| S3_2F7D0004_00000000_27989469909A0117_int_stretch_norm%%+IMAG.svg | svg | 11415 |
| S3_2F7D0004_00000000_3A7897667467970D_int_norm%%+IMAG.svg | svg | 4629 |
| S3_2F7D0004_00000000_3DBC00352ADFBBFD_int_progress_hl%%+IMAG.svg | svg | 12204 |
| S3_2F7D0004_00000000_42510C65471DDA9D_int_tone_progress_norm_pets%%+IMAG.svg | svg | 7162 |
| S3_2F7D0004_00000000_4B8357F995FB76F8_int_tone_progress_norm%%+IMAG.svg | svg | 12863 |
| S3_2F7D0004_00000000_525C4F69EE3F620F_ATLAS_HUDInteractionQueueItem_00%%+IMAG.svg | svg | 222388 |
| S3_2F7D0004_00000000_5421285EF5BD530F_int_social_norm%%+IMAG.svg | svg | 7692 |
| S3_2F7D0004_00000000_58D249F9CD51878B_int_tone_hl_pets%%+IMAG.svg | svg | 6138 |
| S3_2F7D0004_00000000_621CD101C26E9390_combo_drop_bk_pets%%+IMAG.svg | svg | 9960 |
| S3_2F7D0004_00000000_63F068744DDD5D03_int_hl%%+IMAG.svg | svg | 4878 |
| S3_2F7D0004_00000000_68E4FFAA8995FA13_int_combo_ac_pets%%+IMAG.svg | svg | 6416 |
| S3_2F7D0004_00000000_6C60E48A3BA9ECF9_int_social_hl%%+IMAG.svg | svg | 8215 |
| S3_2F7D0004_00000000_74A640C152132DD9_int_relationship_bk%%+IMAG.svg | svg | 10409 |
| S3_2F7D0004_00000000_77BD40127E195F2B_int_combo_hl_pets%%+IMAG.svg | svg | 6331 |
| S3_2F7D0004_00000000_77C17D499F5C9242_int_tone_hl%%+IMAG.svg | svg | 10865 |
| S3_2F7D0004_00000000_7BAFD8C68DC6AE3C_int_stretch_progress_hl_pets%%+IMAG.svg | svg | 8216 |
| S3_2F7D0004_00000000_823D45D248F10944_int_tone_pets%%+IMAG.svg | svg | 5859 |
| S3_2F7D0004_00000000_838B50447260425A_int_norm_pets%%+IMAG.svg | svg | 5767 |
| S3_2F7D0004_00000000_93B1217D6E3E66F9_int_combo_norm_pets%%+IMAG.svg | svg | 6299 |
| S3_2F7D0004_00000000_96D99D969D919EA0_int_relationship_bk_hl%%+IMAG.svg | svg | 11384 |
| S3_2F7D0004_00000000_9A56574169DF0698_int_stretch_norm_pets%%+IMAG.svg | svg | 6276 |
| S3_2F7D0004_00000000_ABD1CB81191B7026_int_social_hl_pets%%+IMAG.svg | svg | 9533 |
| S3_2F7D0004_00000000_BADBE93EFED41315_int_stretch_progress_norm%%+IMAG.svg | svg | 14023 |
| S3_2F7D0004_00000000_BC8B085C29A5603F_int_tone_progress_hl_pets%%+IMAG.svg | svg | 7453 |
| S3_2F7D0004_00000000_CCDE6D2D743A8780_tooltip_special_xsm_pets%%+IMAG.svg | svg | 5653 |
| S3_2F7D0004_00000000_D8AC2B27FB48F35E_int_stretch_hl_pets%%+IMAG.svg | svg | 6481 |
| S3_2F7D0004_00000000_DC2322327782AF42_int_stretch_progress_norm_pets%%+IMAG.svg | svg | 8051 |
| S3_2F7D0004_00000000_E3CBF966434BB883_int_tone%%+IMAG.svg | svg | 10578 |
| S3_2F7D0004_00000000_E7F6224C249395AC_int_combo_di_pets%%+IMAG.svg | svg | 6265 |
| S3_2F7D0004_00000000_ED6438410F6F47F6_int_tone_progress_hl%%+IMAG.svg | svg | 13115 |
| S3_2F7D0004_00000000_F2A9AD3A897B545B_int_stretch_progress_hl%%+IMAG.svg | svg | 14232 |
| S3_2F7D0004_00000000_F4922A183ABAD764_int_progress_norm_pets%%+IMAG.svg | svg | 6965 |
| S3_2F7D0004_00000000_F690E5E4F0E0A6C4_int_hl_pets%%+IMAG.svg | svg | 5730 |
| S3_2F7D0004_00000000_F9A06995AEBEC451_int_stretch_hl%%+IMAG.svg | svg | 11699 |
| S3_2F7D0004_00000000_FF345747C10636E3_int_progress_norm%%+IMAG.svg | svg | 12233 |
| S3_025C95B6_00000000_4B3F668C083D9A6F_HUDMapviewSortEntry%%+LAYO.layout | layout | 4413 |
| S3_025C95B6_00000000_80D1B6FB50B2D911_HUDMapviewSort%%+LAYO.layout | layout | 23515 |
| S3_2F7D0004_00000000_3A808931E54E0998_ATLAS_HUDMapviewSort_00%%+IMAG.svg | svg | 39240 |
| S3_025C95B6_00000000_0A3DAF369B8967D8_HUDCareerPanelFactorsEntry%%+LAYO.layout | layout | 6172 |
| S3_025C95B6_00000000_14164A86FB6CBFCF_HUDJobTrackerTaskHeader%%+LAYO.layout | layout | 2693 |
| S3_025C95B6_00000000_427D5B25C434778C_HUDSkillsPanel%%+LAYO.layout | layout | 33676 |
| S3_025C95B6_00000000_430E530CF53E9CBD_HUDJobTrackerTaskItem%%+LAYO.layout | layout | 6337 |
| S3_025C95B6_00000000_45E4B5A163472038_MoodletTooltip%%+LAYO.layout | layout | 33949 |
| S3_025C95B6_00000000_47814B6514E44E5C_HUDCareerPanel%%+LAYO.layout | layout | 383951 |
| S3_025C95B6_00000000_51FA76E9696260D2_HUDInventoryPanel%%+LAYO.layout | layout | 390859 |
| S3_025C95B6_00000000_7C86E8D8D86071B7_HUDOpportunitiesPanel%%+LAYO.layout | layout | 95313 |
| S3_025C95B6_00000000_808F2D4C9DE5B95F_MotivesTooltip%%+LAYO.layout | layout | 19822 |
| S3_025C95B6_00000000_80A9EA843FD4828A_HUDCareerPanelFactorTooltip%%+LAYO.layout | layout | 31393 |
| S3_025C95B6_00000000_84D59995D4617648_HUDCareerPanelHistoryEntry%%+LAYO.layout | layout | 19134 |
| S3_025C95B6_00000000_884B95942D9F03B0_SkillsTooltip%%+LAYO.layout | layout | 30913 |
| S3_025C95B6_00000000_89062B1155190A24_HUDMoodletGridCell%%+LAYO.layout | layout | 23242 |
| S3_025C95B6_00000000_966DC8328BFA17B5_HUDInventoryItemWin%%+LAYO.layout | layout | 41560 |
| S3_025C95B6_00000000_A401A8290E13539C_HUDSmallSkillEntry%%+LAYO.layout | layout | 16067 |
| S3_025C95B6_00000000_A686C76399E58D6F_HUDSimologyFamilyTreeDialog%%+LAYO.layout | layout | 19884 |
| S3_025C95B6_00000000_A72BB6B7B4B9DD84_HUDRewardTraitsPanel%%+LAYO.layout | layout | 85008 |
| S3_025C95B6_00000000_B14444E44FE21155_HUDMotives%%+LAYO.layout | layout | 534621 |
| S3_025C95B6_00000000_BF6735EBE93BAF86_HUDRewardTraitsShopDialog%%+LAYO.layout | layout | 64447 |
| S3_025C95B6_00000000_C086AC09D045DA7A_HUDNavigation%%+LAYO.layout | layout | 75956 |
| S3_025C95B6_00000000_C9B908CDE8DAA609_HUDRelationshipsPanel%%+LAYO.layout | layout | 48065 |
| S3_025C95B6_00000000_DC50A5EAA11B6915_HUDJobTrackerTaskItemExtraInfo%%+LAYO.layout | layout | 2948 |
| S3_025C95B6_00000000_E3823762585EDA78_HUDDegreeHistoryEntry%%+LAYO.layout | layout | 26076 |
| S3_025C95B6_00000000_E39A768FF0830CB9_HUDSimologyPanelEntry%%+LAYO.layout | layout | 15181 |
| S3_025C95B6_00000000_FC3EE6B3157D192F_HUDSimologyPanel%%+LAYO.layout | layout | 114552 |
| S3_2F7D0004_00000000_00C1EDD8F709F268_ATLAS_HUDRelationshipsPanel_00%%+IMAG.svg | svg | 159714 |
| S3_2F7D0004_00000000_00C1EDD8F709F269_ATLAS_HUDRelationshipsPanel_01%%+IMAG.svg | svg | 32473 |
| S3_2F7D0004_00000000_09FCCD2C94D466B8_opp_generic_university3%%+IMAG.svg | svg | 10004 |
| S3_2F7D0004_00000000_09FCCD2C94D466B9_opp_generic_university2%%+IMAG.svg | svg | 10358 |
| S3_2F7D0004_00000000_09FCCD2C94D466BA_opp_generic_university1%%+IMAG.svg | svg | 10385 |
| S3_2F7D0004_00000000_0ADBF1CCEC1D3785_ATLAS_RelationshipPartyTooltip_00%%+IMAG.svg | svg | 27706 |
| S3_2F7D0004_00000000_120AA52DCD88DA8E_ATLAS_HUDOpportunitiesPanel_00%%+IMAG.svg | svg | 339001 |
| S3_2F7D0004_00000000_19B2522AB5B229C3_ATLAS_SkillsTooltip_00%%+IMAG.svg | svg | 35020 |
| S3_2F7D0004_00000000_2170A53EBF038D3E_ATLAS_HUDRelationshipsPanelEntry_00%%+IMAG.svg | svg | 242118 |
| S3_2F7D0004_00000000_418F6FB64A26BCBD_ATLAS_HUDNavigation_00%%+IMAG.svg | svg | 52843 |
| S3_2F7D0004_00000000_4365AA9C9CFCCE8E_ATLAS_HUDSimologyPanel_00%%+IMAG.svg | svg | 109397 |
| S3_2F7D0004_00000000_4365AA9C9CFCCE8F_ATLAS_HUDSimologyPanel_01%%+IMAG.svg | svg | 28149 |
| S3_2F7D0004_00000000_505816ED4B14F7B6_opp_generic%%+IMAG.svg | svg | 9037 |
| S3_2F7D0004_00000000_608ACDDA2A02230D_ATLAS_HUDInventoryPanel_00%%+IMAG.svg | svg | 2145116 |
| S3_2F7D0004_00000000_672D47853568125E_ATLAS_HUDSimologyFamilyTreeDialog_00%%+IMAG.svg | svg | 73095 |
| S3_2F7D0004_00000000_714583804C9889CF_ATLAS_HUDSmallSkillEntry_00%%+IMAG.svg | svg | 47049 |
| S3_2F7D0004_00000000_8666D68EB17A64AE_ATLAS_HUDSimologyPanelFavsEntry_00%%+IMAG.svg | svg | 17947 |
| S3_2F7D0004_00000000_8FB693951158A707_ATLAS_HUDRewardTraitsPanel_00%%+IMAG.svg | svg | 120562 |
| S3_2F7D0004_00000000_9D869E310B1A5DC1_moodlet_bg_neutral_up%%+IMAG.svg | svg | 3293 |
| S3_2F7D0004_00000000_A1B1D831CE2CF4A9_ATLAS_MoodletTooltip_02%%+IMAG.svg | svg | 3442 |
| S3_2F7D0004_00000000_A1B1D831CE2CF4AA_ATLAS_MoodletTooltip_01%%+IMAG.svg | svg | 4841 |
| S3_2F7D0004_00000000_A1B1D831CE2CF4AB_ATLAS_MoodletTooltip_00%%+IMAG.svg | svg | 21206 |
| S3_2F7D0004_00000000_A20BAEBA5F9F63E0_ATLAS_OpportunityTooltip_00%%+IMAG.svg | svg | 10003 |
| S3_2F7D0004_00000000_A28E57E8003DE3CC_moodlet_bg_neutral_over%%+IMAG.svg | svg | 3539 |
| S3_2F7D0004_00000000_AE43ACC5AFADCC5B_ATLAS_HUDSimologyFamilyTreeThumbItem_00%%+IMAG.svg | svg | 16015 |
| S3_2F7D0004_00000000_B803DDA42551BC37_ATLAS_HUDSkillsPanel_00%%+IMAG.svg | svg | 189753 |
| S3_2F7D0004_00000000_BA2FC1C166986E04_opp_generic_skill%%+IMAG.svg | svg | 9960 |
| S3_2F7D0004_00000000_C0094BF599919877_ATLAS_HUDCareerPanel_00%%+IMAG.svg | svg | 419461 |
| S3_2F7D0004_00000000_C62AF65D905A58E7_ATLAS_HUDMoodletGridCell_00%%+IMAG.svg | svg | 35799 |
| S3_2F7D0004_00000000_D23D5E01D28E456E_ATLAS_MotivesTooltip_00%%+IMAG.svg | svg | 17175 |
| S3_2F7D0004_00000000_D23D5E01D28E456F_ATLAS_MotivesTooltip_01%%+IMAG.svg | svg | 11215 |
| S3_2F7D0004_00000000_D38BD844E6E2AD48_ATLAS_HUDRewardTraitsShopDialog_01%%+IMAG.svg | svg | 22596 |
| S3_2F7D0004_00000000_D38BD844E6E2AD49_ATLAS_HUDRewardTraitsShopDialog_00%%+IMAG.svg | svg | 244373 |
| S3_2F7D0004_00000000_D8173FFD783D7B34_ATLAS_HUDMotives_00%%+IMAG.svg | svg | 253401 |
| S3_2F7D0004_00000000_D8173FFD783D7B35_ATLAS_HUDMotives_01%%+IMAG.svg | svg | 2075 |
| S3_2F7D0004_00000000_D8173FFD783D7B36_ATLAS_HUDMotives_02%%+IMAG.svg | svg | 3828 |
| S3_2F7D0004_00000000_DD38E77D4C949D01_ATLAS_BubbleMeter_00%%+IMAG.svg | svg | 18658 |
| S3_2F7D0004_00000000_E14294841323AF39_ATLAS_RelationshipBar_00%%+IMAG.svg | svg | 8333 |
| S3_2F7D0004_00000000_E458818C6CAD3650_ATLAS_HUDSimologyPanelEntry_00%%+IMAG.svg | svg | 33392 |
| S3_2F7D0004_00000000_EE1BF161323BDDDF_opp_generic_portal%%+IMAG.svg | svg | 10309 |
| S3_2F7D0004_00000000_F1CCC6E82D7CFFA2_moodlet_bg_neutral_down%%+IMAG.svg | svg | 3246 |
| S3_2F7D0004_00000000_F2D109A36F4BFD23_ATLAS_HUDDegreeHistoryEntry_00%%+IMAG.svg | svg | 10115 |
| S3_2F7D0004_00000000_F971A34421703D1C_ATLAS_HUDInventoryItemWin_00%%+IMAG.svg | svg | 88461 |
| S3_2F7D0004_78000000_071C33425D1D0326_glb_i_summerholiday%%+IMAG.svg | svg | 9614 |
| S3_2F7D0004_78000000_6BC162224DACDDDE_glb_i_fallholiday%%+IMAG .svg | svg | 9614 |
| S3_2F7D0004_78000000_9FC95A32486AB4A6_glb_i_springholiday%%+IMAG.svg | svg | 9614 |
| S3_2F7D0004_78000000_EA835F56983FE50A_glb_i_winterholiday%%+IMAG.svg | svg | 9614 |
| S3_025C95B6_00000000_5C592E9601DA95A5_NotificationManager%%+LAYO.layout | layout | 620627 |
| S3_2F7D0004_00000000_2DDCDEBD19C3741C_ATLAS_NotificationManager_00%%+IMAG.svg | svg | 266086 |
| S3_025C95B6_00000000_1977DA2933316232_HUDPieMenuReference%%+LAYO.layout | layout | 178051 |
| S3_2F7D0004_00000000_1E71E5FEFD7AA6B8_ATLAS_HUDPieMenu_02%%+IMAG.svg | svg | 9976 |
| S3_2F7D0004_00000000_1E71E5FEFD7AA6BA_ATLAS_HUDPieMenu_00%%+IMAG.svg | svg | 275435 |
| S3_2F7D0004_00000000_1E71E5FEFD7AA6BB_ATLAS_HUDPieMenu_01%%+IMAG.svg | svg | 109204 |
| S3_2F7D0004_00000000_E2A11977B3AE77DC_ATLAS_HUDPieMenuReference_01%%+IMAG.svg | svg | 62878 |
| S3_2F7D0004_00000000_E2A11977B3AE77DD_ATLAS_HUDPieMenuReference_00%%+IMAG.svg | svg | 741100 |
| S3_2F7D0004_00000000_E2A11977B3AE77DF_ATLAS_HUDPieMenuReference_02%%+IMAG.svg | svg | 13793 |
| S3_025C95B6_00000000_9A559D7F4B361E31_HUDSimDisplay%%+LAYO.layout | layout | 628072 |
| S3_025C95B6_00000000_FE17EDF468D0FDFB_HUDPuck%%+LAYO.layout | layout | 150044 |
| S3_2F7D0004_00000000_118DA284EA00A3BA_ATLAS_HUDPuck_00%%+IMAG.svg | svg | 1670464 |
| S3_2F7D0004_00000000_6A3BADD06734D1D8_ATLAS_HUDSimDisplay_00%%+IMAG.svg | svg | 3901165 |
| S3_2F7D0004_00000000_6A3BADD06734D1D9_ATLAS_HUDSimDisplay_01%%+IMAG.svg | svg | 490106 |
| S3_2F7D0004_00000000_6A3BADD06734D1DA_ATLAS_HUDSimDisplay_02%%+IMAG.svg | svg | 10989 |
| S3_2F7D0004_00000000_6A3BADD06734D1DB_ATLAS_HUDSimDisplay_03%%+IMAG.svg | svg | 7237 |
| S3_2F7D0004_00000000_C503E8D3870E2BC8_MoonPhase5%%+IMAG.svg | svg | 20865 |
| S3_2F7D0004_00000000_C503E8D3870E2BC9_MoonPhase4%%+IMAG.svg | svg | 18538 |
| S3_2F7D0004_00000000_C503E8D3870E2BCA_MoonPhase7%%+IMAG.svg | svg | 20116 |
| S3_2F7D0004_00000000_C503E8D3870E2BCB_MoonPhase6%%+IMAG.svg | svg | 20147 |
| S3_2F7D0004_00000000_C503E8D3870E2BCC_MoonPhase1%%+IMAG.svg | svg | 20103 |
| S3_2F7D0004_00000000_C503E8D3870E2BCD_MoonPhase0%%+IMAG.svg | svg | 20991 |
| S3_2F7D0004_00000000_C503E8D3870E2BCE_MoonPhase3%%+IMAG.svg | svg | 20954 |
| S3_2F7D0004_00000000_C503E8D3870E2BCF_MoonPhase2%%+IMAG.svg | svg | 20096 |
| S3_2F7D0004_00000000_1A99E3259540700A_ATLAS_HUDSkewer_00%%+IMAG.svg | svg | 239194 |
| S3_2F7D0004_00000000_1A99E3259540700B_ATLAS_HUDSkewer_01%%+IMAG.svg | svg | 64116 |
| S3_2F7D0004_00000000_19CBE772C4744F70_ATLAS_ScrollWindow_01%%+IMAG.svg | svg | 18955 |
| S3_2F7D0004_00000000_19CBE772C4744F71_ATLAS_ScrollWindow_00%%+IMAG.svg | svg | 83909 |
| S3_2F7D0004_00000000_1C859A7C348655B1_glb_hscroll_bk_r2%%+IMAG.svg | svg | 5077 |
| S3_2F7D0004_00000000_4437F896D6B4A4B9_glb_hscroll_thumb_big_r2%%+IMAG.svg | svg | 8713 |
| S3_2F7D0004_00000000_6BD5716508632BB2_ATLAS_ItemGrid_01%%+IMAG.svg | svg | 18949 |
| S3_2F7D0004_00000000_6BD5716508632BB3_ATLAS_ItemGrid_00%%+IMAG.svg | svg | 79300 |
| S3_2F7D0004_00000000_7A087B9DDC866166_glb_hscroll_big_bk_r2%%+IMAG.svg | svg | 8304 |
| S3_2F7D0004_00000000_F4E93B099F4828EC_glb_hscroll_thumb_r2%%+IMAG.svg | svg | 4417 |
| S3_025C95B6_00000000_066CA4B35BA222BB_TableBorderThumbAndTextWithButton%%+LAYO.layout | layout | 14716 |
| S3_025C95B6_00000000_078C91132BE56F6B_TableKillButton%%+LAYO.layout | layout | 5860 |
| S3_025C95B6_00000000_08D57F468B4148A7_TableThreeThumb%%+LAYO.layout | layout | 8341 |
| S3_025C95B6_00000000_0C3EC3B4FA7F89CD_TableThumbAndText2%%+LAYO.layout | layout | 6138 |
| S3_025C95B6_00000000_183FCA2EE8AB96E3_TableThumbAndTwoText%%+LAYO.layout | layout | 7914 |
| S3_025C95B6_00000000_2F91073A6DD99C9C_TableCheckbox%%+LAYO.layout | layout | 7448 |
| S3_025C95B6_00000000_38D831E3AB283706_TableThumbAndTextCenter%%+LAYO.layout | layout | 6140 |
| S3_025C95B6_00000000_3B17D94D82A2B885_TableThumbAndText%%+LAYO.layout | layout | 6139 |
| S3_025C95B6_00000000_3DDDA919EF8AF3C2_TableTextWithBackground%%+LAYO.layout | layout | 12883 |
| S3_025C95B6_00000000_4027A76BA18C3119_TableThumbAndTextRobotTrait%%+LAYO.layout | layout | 6139 |
| S3_025C95B6_00000000_44963F65936C74FC_TableContainer%%+LAYO.layout | layout | 16810 |
| S3_025C95B6_00000000_456236CAFDB4E57A_TableThumbTooltip%%+LAYO.layout | layout | 4723 |
| S3_025C95B6_00000000_476695B4732C992C_TableRating%%+LAYO.layout | layout | 16107 |
| S3_025C95B6_00000000_5FAAD532C3BA69FC_AlchemyTableThumbAndText%%+LAYO.layout | layout | 7764 |
| S3_025C95B6_00000000_605FEEBF57E0F78D_TableFourThumb%%+LAYO.layout | layout | 9404 |
| S3_025C95B6_00000000_62D3DF7376D7B6C0_TableTextRight%%+LAYO.layout | layout | 4001 |
| S3_025C95B6_00000000_7DE873D2C874E5AB_TableThumbNoFrame%%+LAYO.layout | layout | 3022 |
| S3_025C95B6_00000000_7F513F3C88262C35_TableRelationship%%+LAYO.layout | layout | 17504 |
| S3_025C95B6_00000000_86C5E7A16890C369_TableTextandMeterAlmanac%%+LAYO.layout | layout | 15846 |
| S3_025C95B6_00000000_8E49429228412384_TableThumbTextButton%%+LAYO.layout | layout | 9779 |
| S3_025C95B6_00000000_93129D83BDAB2D1D_TableTextCenter%%+LAYO.layout | layout | 4000 |
| S3_025C95B6_00000000_9FF50C181B25665D_TableThumbAndMiniAndText%%+LAYO.layout | layout | 6798 |
| S3_025C95B6_00000000_A6AE343DA9CF831B_TableBorderThumbAndText%%+LAYO.layout | layout | 7076 |
| S3_025C95B6_00000000_A7D96F42EC8364C2_TableIconAndText%%+LAYO.layout | layout | 5062 |
| S3_025C95B6_00000000_B8A194928A927515_TableThumbAndTextEP11Large%%+LAYO.layout | layout | 6140 |
| S3_025C95B6_00000000_BE441C1A9D93E0B8_TableExpenses%%+LAYO.layout | layout | 10854 |
| S3_025C95B6_00000000_BE9A5E707C3BA5ED_CreateTraitChipTableThumbAndText%%+LAYO.layout | layout | 7607 |
| S3_025C95B6_00000000_C3EF5CE639D03FE6_AlchemyTableThreeThumb%%+LAYO.layout | layout | 31201 |
| S3_025C95B6_00000000_C4BAE54DC9E2AE1F_CreateTraitChipTableThreeThumb%%+LAYO.layout | layout | 31203 |
| S3_025C95B6_00000000_D97D16001917ADDA_TableTextEdit%%+LAYO.layout | layout | 8937 |
| S3_025C95B6_00000000_DD4E0561C3E84D2D_TableThumbAndButtonVert%%+LAYO.layout | layout | 9753 |
| S3_025C95B6_00000000_E2C50E6B0FC47556_TableText%%+LAYO.layout | layout | 2925 |
| S3_025C95B6_00000000_EBC9621393CEE778_TableTextAndMeter%%+LAYO.layout | layout | 10103 |
| S3_025C95B6_00000000_EC82E78BF9A9FC43_AlchemyTableText%%+LAYO.layout | layout | 4001 |
| S3_025C95B6_00000000_F918607CCEA1E3A3_TableThreeThumbWithCounts%%+LAYO.layout | layout | 31201 |
| S3_025C95B6_00000000_FE3EB563B1885AFD_TableFiveThumb%%+LAYO.layout | layout | 12147 |
| S3_025C95B6_00000000_FFC74FEBBC8067B5_TableThumb%%+LAYO.layout | layout | 4945 |
| S3_2F7D0004_00000000_02FF9E1A4AB9C717_ATLAS_TableThumbTextButton_00%%+IMAG.svg | svg | 4194 |
| S3_2F7D0004_00000000_049FC17A5AD09F1F_num_entry_field%%+IMAG.svg | svg | 4400 |
| S3_2F7D0004_00000000_07BEEA261832DE47_glb_sortbar_middle_r2%%+IMAG.svg | svg | 2476 |
| S3_2F7D0004_00000000_0A6B72E93F1E408D_ATLAS_TableTextWithBackground_00%%+IMAG.svg | svg | 8522 |
| S3_2F7D0004_00000000_0C9961FEF1BAE9C1_ATLAS_ObjectPickerTabInstance_00%%+IMAG.svg | svg | 10993 |
| S3_2F7D0004_00000000_22C706CB0F5F5084_ATLAS_TableRelationship_00%%+IMAG.svg | svg | 5871 |
| S3_2F7D0004_00000000_341A2EE5B9A0936B_glb_sortbar_whole_r2%%+IMAG.svg | svg | 3803 |
| S3_2F7D0004_00000000_6640BD68365CEE26_glb_sortbar_right_r2%%+IMAG.svg | svg | 2821 |
| S3_2F7D0004_00000000_6C7CCBD6A9B879A3_shopping_table_left_right%%+IMAG.svg | svg | 2604 |
| S3_2F7D0004_00000000_72F7D659DC04A4FF_ATLAS_TableCheckbox_00%%+IMAG.svg | svg | 16611 |
| S3_2F7D0004_00000000_A15DA272823381AF_glb_sortbar_left_r2%%+IMAG.svg | svg | 2971 |
| S3_2F7D0004_00000000_ABF211B5BFDB2AE5_ATLAS_ColumnControl_00%%+IMAG.svg | svg | 4655 |
| S3_2F7D0004_00000000_E3713668AEC1755F_ATLAS_TableContainer_00%%+IMAG.svg | svg | 33452 |
| S3_025C95B6_00000000_7199AD0C551D04A7_FilterTabControl%%+LAYO.layout | layout | 6803 |
| S3_025C95B6_00000000_CEEF70090E928CC2_SkewerTabControl%%+LAYO.layout | layout | 5969 |
| S3_2F7D0004_00000000_0DC89149472E8DE5_ATLAS_SkewerTabControl_00%%+IMAG.svg | svg | 16645 |
| S3_2F7D0004_00000000_B535CA193B7062D6_ATLAS_FilterTabControl_00%%+IMAG.svg | svg | 20676 |
| S3_025C95B6_00000000_11032EFC3C0EFE56_CrossroadsShareGreetingCardDialog%%+LAYO.layout | layout | 80022 |
| S3_025C95B6_00000000_1FCC5658B512C2AE_CrossroadsFriendPickerDialog%%+LAYO.layout | layout | 361350 |
| S3_025C95B6_00000000_32E535978BA8B73B_ConnectedWizardDialog%%+LAYO.layout | layout | 525670 |
| S3_025C95B6_00000000_5111130E78A0AB1F_OnlineGiftingWizard%%+LAYO.layout | layout | 313321 |
| S3_025C95B6_00000000_5291CAC367205FA3_CommentPostItem%%+LAYO.layout | layout | 36558 |
| S3_025C95B6_00000000_5BAF01933E482B69_OnlineGiftAd%%+LAYO.layout | layout | 33588 |
| S3_025C95B6_00000000_8C36994015F03BAE_ShareToSocialNetworkDialog%%+LAYO.layout | layout | 41489 |
| S3_025C95B6_00000000_9A238F5239B8A36D_FriendSearchDialog%%+LAYO.layout | layout | 94278 |
| S3_025C95B6_00000000_B739C031EF18ABF2_PostThreadItem%%+LAYO.layout | layout | 108056 |
| S3_025C95B6_00000000_E49587E62514842A_InGameWall%%+LAYO.layout | layout | 1048347 |
| S3_2F7D0004_00000000_05133C697A2A843C_ATLAS_PostThreadItem_01%%+IMAG.svg | svg | 99605 |
| S3_2F7D0004_00000000_05133C697A2A843D_ATLAS_PostThreadItem_00%%+IMAG.svg | svg | 112242 |
| S3_2F7D0004_00000000_05133C697A2A843F_ATLAS_PostThreadItem_02%%+IMAG.svg | svg | 21900 |
| S3_2F7D0004_00000000_0E6C360ACE2104E2_SurprisePopupPackage%%+IMAG.svg | svg | 200019 |
| S3_2F7D0004_00000000_185010691656855A_ATLAS_ConnectedWizardDialog_00%%+IMAG.svg | svg | 1715426 |
| S3_2F7D0004_00000000_185010691656855B_ATLAS_ConnectedWizardDialog_01%%+IMAG.svg | svg | 385009 |
| S3_2F7D0004_00000000_1B2EE3B64C199E48_ATLAS_OnlineGiftAd_00%%+IMAG.svg | svg | 70839 |
| S3_2F7D0004_00000000_22E2B2BB6BFB5FA2_ATLAS_OnlineGiftingGiftIcon_00%%+IMAG.svg | svg | 8331 |
| S3_2F7D0004_00000000_22E2B2BB6BFB5FA3_ATLAS_OnlineGiftingGiftIcon_01%%+IMAG.svg | svg | 2878 |
| S3_2F7D0004_00000000_364F5CB54E115644_FlagPost_Disabled%%+IMAG.svg | svg | 8622 |
| S3_2F7D0004_00000000_430DF7E40557997D_FlagPost_Normal%%+IMAG.svg | svg | 8708 |
| S3_2F7D0004_00000000_6067A0F1E71D0746_ATLAS_OnlineGiftingWizard_00%%+IMAG.svg | svg | 660583 |
| S3_2F7D0004_00000000_8F210ECDF6C62FB9_ATLAS_CrossroadsFriendPickerDialog_00%%+IMAG.svg | svg | 274420 |
| S3_2F7D0004_00000000_9DB4EF65F97FD482_FlagPost_Active%%+IMAG.svg | svg | 8807 |
| S3_2F7D0004_00000000_B0FA0DB8F660C5E1_ATLAS_CrossroadsShareGreetingCardDialog_00%%+IMAG.svg | svg | 378888 |
| S3_2F7D0004_00000000_B113925B6945C07D_ATLAS_InGameWall_00%%+IMAG.svg | svg | 1580423 |
| S3_2F7D0004_00000000_C10525A604A5263C_ATLAS_FriendSearchDialog_00%%+IMAG.svg | svg | 277933 |
| S3_2F7D0004_00000000_C10525A604A5263D_ATLAS_FriendSearchDialog_01%%+IMAG.svg | svg | 61410 |
| S3_2F7D0004_00000000_C9614C76E0724F42_ATLAS_CommentPostItem_00%%+IMAG.svg | svg | 47173 |
| S3_2F7D0004_00000000_CC1282A4BAD01619_ATLAS_ShareToSocialNetworkDialog_00%%+IMAG.svg | svg | 199022 |
| S3_2F7D0004_00000000_DC905B6BDBD4B97F_FlagPost_Highlighted%%+IMAG.svg | svg | 8630 |
| S3_025C95B6_00000000_C8380B0E99098D40_PopupMenu%%+LAYO.layout | layout | 16430 |
| S3_025C95B6_00000000_DE759015002198F5_PopupMenuItem%%+LAYO.layout | layout | 9365 |
| S3_2F7D0004_00000000_2ADE921CC3D17A5C_ATLAS_PopupMenuItem_00%%+IMAG.svg | svg | 2100 |
| S3_2F7D0004_00000000_2ADE921CC3D17A5D_ATLAS_PopupMenuItem_01%%+IMAG.svg | svg | 2154 |
| S3_2F7D0004_00000000_2ADE921CC3D17A5E_ATLAS_PopupMenuItem_02%%+IMAG.svg | svg | 2075 |
| S3_2F7D0004_00000000_F50F742811CE7EAB_ATLAS_PopupMenu_00%%+IMAG.svg | svg | 17796 |
| S3_025C95B6_00000000_61F9DC6B1D1040A3_AcceptCancelDialog%%+LAYO.layout | layout | 26464 |
| S3_2F7D0004_00000000_88879EA831DE230A_ATLAS_AcceptCancelDialog_00%%+IMAG.svg | svg | 93422 |
| S3_025C95B6_00000000_54D0A9831E5754E7_HUDPetAdoptionDialog%%+LAYO.layout | layout | 41502 |
| S3_025C95B6_00000000_A37A0943CF2B805C_HUDPetAdoptionInfoTooltip%%+LAYO.layout | layout | 33527 |
| S3_025C95B6_00000000_AB9601CB0FFD1715_HUDPetAdoptionEntry%%+LAYO.layout | layout | 9365 |
| S3_2F7D0004_00000000_0BD1E7282C4E6584_ATLAS_HUDPetAdoptionEntry_00%%+IMAG.svg | svg | 10886 |
| S3_2F7D0004_00000000_485B41C2CE81526F_ATLAS_HUDPetAdoptionInfoTooltip_00%%+IMAG.svg | svg | 36240 |
| S3_2F7D0004_00000000_66A61AEFA1F2CECE_ATLAS_HUDPetAdoptionDialog_00%%+IMAG.svg | svg | 409530 |
| S3_025C95B6_00000000_3CB3C46A419FAD73_AdoptionPickerDialog%%+LAYO.layout | layout | 80574 |
| S3_2F7D0004_00000000_9A718535F64257B2_ATLAS_AdoptionPickerDialog_00%%+IMAG.svg | svg | 250736 |
| S3_025C95B6_00000000_B8F3A133C0402270_HUDAdventureRewardsShopDialog%%+LAYO.layout | layout | 56615 |
| S3_2F7D0004_00000000_E309EC03C15AD6B2_ATLAS_HUDAdventureRewardsShopDialog_01%%+IMAG.svg | svg | 7595 |
| S3_2F7D0004_00000000_E309EC03C15AD6B3_ATLAS_HUDAdventureRewardsShopDialog_00%%+IMAG.svg | svg | 237146 |
| S3_025C95B6_00000000_D0943A9EA9F792CD_AgeUpDialog%%+LAYO.layout | layout | 26716 |
| S3_2F7D0004_00000000_B6E74859B0858BB4_ATLAS_AgeUpDialog_00%%+IMAG.svg | svg | 164165 |
| S3_2F7D0004_00000000_B6E74859B0858BB5_ATLAS_AgeUpDialog_01%%+IMAG.svg | svg | 10964 |
| S3_025C95B6_00000000_CA36492B0656E61A_AlchemyDialog%%+LAYO.layout | layout | 72640 |
| S3_2F7D0004_00000000_CD71EF22D23FE9B5_ATLAS_AlchemyDialog_00%%+IMAG.svg | svg | 421863 |
| S3_025C95B6_00000000_49835C36195547A1_CheckMessagesDialogEntry%%+LAYO.layout | layout | 31888 |
| S3_025C95B6_00000000_4CF668DD39302A64_BrowseDatingProfilesDialog%%+LAYO.layout | layout | 188157 |
| S3_025C95B6_00000000_65DB5FD1DCDB3288_CreateProfileDialog%%+LAYO.layout | layout | 179277 |
| S3_025C95B6_00000000_9B93C2F8E63C7A40_BrowseDatingProfilesDialogEntry%%+LAYO.layout | layout | 7265 |
| S3_025C95B6_00000000_B6779E6A2DF1E547_CheckMessagesDialog%%+LAYO.layout | layout | 30194 |
| S3_2F7D0004_00000000_0FA4AAC6E191F6E6_ATLAS_CheckMessagesDialog_00%%+IMAG.svg | svg | 53111 |
| S3_2F7D0004_00000000_8B581B183D7E25DB_ATLAS_CreateProfileDialog_00%%+IMAG.svg | svg | 169245 |
| S3_2F7D0004_00000000_915A55A0A664CF38_ATLAS_CheckMessagesDialogEntry_00%%+IMAG.svg | svg | 57514 |
| S3_2F7D0004_00000000_C1BB2F3C2A159BFB_ATLAS_BrowseDatingProfilesDialogEntry_00%%+IMAG.svg | svg | 6290 |
| S3_2F7D0004_00000000_EE06B01D4BCB3EFF_ATLAS_BrowseDatingProfilesDialog_00%%+IMAG.svg | svg | 890904 |
| S3_025C95B6_00000000_B73E807A1250DC6F_HUDBuyHorseDialog%%+LAYO.layout | layout | 38068 |
| S3_2F7D0004_00000000_7B2B7B2FBF9CE30E_ATLAS_HUDBuyHorseDialog_00%%+IMAG.svg | svg | 204233 |
| S3_025C95B6_00000000_F90CEEA98FBA79F6_Service%%+LAYO.layout | layout | 45220 |
| S3_2F7D0004_00000000_FB5538C9015ECD61_ATLAS_Service_00%%+IMAG.svg | svg | 59922 |
| S3_025C95B6_00000000_6DF0AE92E4760796_CancelConsignDialog%%+LAYO.layout | layout | 108179 |
| S3_025C95B6_00000000_FF822705916F29A3_CancelConsignItem%%+LAYO.layout | layout | 12688 |
| S3_2F7D0004_00000000_8C4AA9341C74F390_ATLAS_CancelConsignDialog_01%%+IMAG.svg | svg | 50068 |
| S3_2F7D0004_00000000_8C4AA9341C74F391_ATLAS_CancelConsignDialog_00%%+IMAG.svg | svg | 164681 |
| S3_025C95B6_00000000_48079F5C49C191CF_CareerSelectDialog%%+LAYO.layout | layout | 117867 |
| S3_2F7D0004_00000000_C65AEF13C2057B4E_ATLAS_CareerSelectDialog_00%%+IMAG.svg | svg | 255876 |
| S3_2F7D0004_00000000_C65AEF13C2057B4F_ATLAS_CareerSelectDialog_01%%+IMAG.svg | svg | 4280 |
| S3_025C95B6_00000000_442EDD2292EE9300_ChangeFavoritesDialog%%+LAYO.layout | layout | 89887 |
| S3_2F7D0004_00000000_0AE62A81BE4FA53A_ATLAS_ChangeFavoritesDialog_01%%+IMAG.svg | svg | 41558 |
| S3_2F7D0004_00000000_0AE62A81BE4FA53B_ATLAS_ChangeFavoritesDialog_00%%+IMAG.svg | svg | 186793 |
| S3_2F7D0004_00000000_2C0BA10597B7B3C8_ATLAS_FavoritesGridItem_00%%+IMAG.svg | svg | 24094 |
| S3_025C95B6_00000000_2C69B9E38C6B33ED_ChangeHouseboatDialog%%+LAYO.layout | layout | 48121 |
| S3_2F7D0004_00000000_A4604E84CA3EFECC_ATLAS_ChangeHouseboatDialog_00%%+IMAG.svg | svg | 207833 |
| S3_2F7D0004_00000000_A4604E84CA3EFECD_ATLAS_ChangeHouseboatDialog_01%%+IMAG.svg | svg | 6793 |
| S3_2F7D0004_00000000_A4604E84CA3EFECE_ATLAS_ChangeHouseboatDialog_02%%+IMAG.svg | svg | 4580 |
| S3_025C95B6_00000000_B03DDB21CBC0C779_ChangeWeatherDialogDayElement%%+LAYO.layout | layout | 26711 |
| S3_025C95B6_00000000_F4C43868C589EA31_CheckWeatherDialog%%+LAYO.layout | layout | 57957 |
| S3_2F7D0004_00000000_031C96CAF18D2C40_ATLAS_CheckWeatherDialog_00%%+IMAG.svg | svg | 57430 |
| S3_2F7D0004_00000000_B8C299A22E8DC490_ATLAS_ChangeWeatherDialogDayElement_00%%+IMAG.svg | svg | 3320 |
| S3_025C95B6_00000000_35DB664B1C807570_ClassSchedule%%+LAYO.layout | layout | 44845 |
| S3_2F7D0004_00000000_350E8F33118448BB_ATLAS_ClassSchedule_00%%+IMAG.svg | svg | 363900 |
| S3_025C95B6_00000000_57560E847AC1F2F1_HUDCollectionJournalDialog%%+LAYO.layout | layout | 72012 |
| S3_2F7D0004_00000000_8864A02B7E286A10_ATLAS_HUDCollectionJournalDialog_00%%+IMAG.svg | svg | 390149 |
| S3_025C95B6_00000000_C51FF16232CF1755_ComboSelectionDialog%%+LAYO.layout | layout | 37078 |
| S3_2F7D0004_00000000_EC179ED23336A944_ATLAS_ComboSelectionDialog_00%%+IMAG.svg | svg | 199628 |
| S3_2F7D0004_00000000_EC179ED23336A945_ATLAS_ComboSelectionDialog_01%%+IMAG.svg | svg | 4576 |
| S3_025C95B6_00000000_B9CBFD02A9BED997_CustomBabyDNA%%+LAYO.layout | layout | 158025 |
| S3_2F7D0004_00000000_AFFCF7CE90C1E4DE_ATLAS_CustomBabyDNA_00%%+IMAG.svg | svg | 194630 |
| S3_2F7D0004_00000000_AFFCF7CE90C1E4DF_ATLAS_CustomBabyDNA_01%%+IMAG.svg | svg | 13892 |
| S3_025C95B6_00000000_8D98B88CCCB0A524_DualPaneSimPicker%%+LAYO.layout | layout | 96536 |
| S3_2F7D0004_00000000_8CEDE463ABC64D16_ATLAS_DualPaneSimPicker_01%%+IMAG.svg | svg | 7571 |
| S3_2F7D0004_00000000_8CEDE463ABC64D17_ATLAS_DualPaneSimPicker_00%%+IMAG.svg | svg | 279447 |
| S3_025C95B6_00000000_E21A516FA3294BC5_Enrollment%%+LAYO.layout | layout | 214572 |
| S3_2F7D0004_00000000_994FF6D1A6378374_ATLAS_Enrollment_00%%+IMAG.svg | svg | 492159 |
| S3_025C95B6_00000000_8FF8C8F5F2820540_HUDFestivalTicketDialog%%+LAYO.layout | layout | 42164 |
| S3_2F7D0004_00000000_3C7B7E45E868B0BA_ATLAS_HUDFestivalTicketDialog_01%%+IMAG.svg | svg | 6561 |
| S3_2F7D0004_00000000_3C7B7E45E868B0BB_ATLAS_HUDFestivalTicketDialog_00%%+IMAG.svg | svg | 191055 |
| S3_025C95B6_00000000_D6616F7B16FE15C8_FriendsList%%+LAYO.layout | layout | 20000 |
| S3_2F7D0004_00000000_8022E58CF4EC69B3_ATLAS_FriendsList_00%%+IMAG.svg | svg | 181857 |
| S3_025C95B6_00000000_25447888649F4B91_GameEntryCreditsBody%%+LAYO.layout | layout | 1747 |
| S3_025C95B6_00000000_989592C6A8DD5A3D_GameEntryCreditsSubTitle%%+LAYO.layout | layout | 1947 |
| S3_025C95B6_00000000_A150C56F92969D59_GameEntryCreditsTitle%%+LAYO.layout | layout | 1947 |
| S3_025C95B6_00000000_ADE9324C1B5C6379_GameEntryCredits%%+LAYO.layout | layout | 30958 |
| S3_2F7D0004_00000000_7B1B1D9BCEE3B7E8_ATLAS_GameEntryCredits_00%%+IMAG.svg | svg | 229734 |
| S3_025C95B6_00000000_5348703CB7231449_HUDGenieWishSelectDialog%%+LAYO.layout | layout | 41326 |
| S3_2F7D0004_00000000_74F6DBC560CA74D8_ATLAS_HUDGenieWishSelectDialog_00%%+IMAG.svg | svg | 219998 |
| S3_2F7D0004_00000000_74F6DBC560CA74D9_ATLAS_HUDGenieWishSelectDialog_01%%+IMAG.svg | svg | 7586 |
| S3_025C95B6_00000000_E8DDBE12F98BFCFB_GigSchedule%%+LAYO.layout | layout | 44439 |
| S3_2F7D0004_00000000_1322BBE22CFB507A_ATLAS_GigSchedule_00%%+IMAG.svg | svg | 360212 |
| S3_025C95B6_00000000_B593232589FB72A9_Jukebox%%+LAYO.layout | layout | 113662 |
| S3_2F7D0004_00000000_45D4DA0D25E0B570_ATLAS_Jukebox_00%%+IMAG.svg | svg | 512035 |
| S3_025C95B6_00000000_E4CB49B7EFD45BF9_LifeEventDialog%%+LAYO.layout | layout | 117240 |
| S3_2F7D0004_00000000_16604925349CE518_ATLAS_LifeEventDialog_00%%+IMAG.svg | svg | 398843 |
| S3_025C95B6_00000000_2E2663B09BF8B091_LifetimeWishSelectionDialog%%+LAYO.layout | layout | 113642 |
| S3_2F7D0004_00000000_92B7A45C5B739958_ATLAS_LifetimeWishSelectionDialog_00%%+IMAG.svg | svg | 462306 |
| S3_025C95B6_00000000_B0921C6862041C8C_LoginDialog%%+LAYO.layout | layout | 93847 |
| S3_2F7D0004_00000000_DB08BD65B389EB16_ATLAS_LoginDialog_01%%+IMAG.svg | svg | 17394 |
| S3_2F7D0004_00000000_DB08BD65B389EB17_ATLAS_LoginDialog_00%%+IMAG.svg | svg | 266629 |
| S3_025C95B6_00000000_0B5735D98400951B_ModInfoDialog%%+LAYO.layout | layout | 40798 |
| S3_2F7D0004_00000000_FD92AE088B784DC2_ATLAS_ModInfoDialog_00%%+IMAG.svg | svg | 248063 |
| S3_025C95B6_00000000_BD8616686C83937B_MoveToWorld%%+LAYO.layout | layout | 86003 |
| S3_2F7D0004_00000000_2EF5245D527D76A2_ATLAS_MoveToWorld_00%%+IMAG.svg | svg | 853408 |
| S3_025C95B6_00000000_4326DF0BA4537FA5_MovingConfirmDialog%%+LAYO.layout | layout | 37438 |
| S3_025C95B6_00000000_C4F0055A4CE85A67_MovingDialog%%+LAYO.layout | layout | 373010 |
| S3_2F7D0004_00000000_1CB7BA6C3354EA1C_ATLAS_MovingConfirmDialog_00%%+IMAG.svg | svg | 197390 |
| S3_2F7D0004_00000000_784708F39185405E_ATLAS_MovingDialog_00%%+IMAG.svg | svg | 322084 |
| S3_2F7D0004_00000000_784708F39185405F_ATLAS_MovingDialog_01%%+IMAG.svg | svg | 95366 |
| S3_025C95B6_00000000_BCDF5B893BDC2FCB_NewSimNameDialog%%+LAYO.layout | layout | 55476 |
| S3_2F7D0004_00000000_E9818F0FD2266202_ATLAS_NewSimNameDialog_00%%+IMAG.svg | svg | 262146 |
| S3_2F7D0004_00000000_E9818F0FD2266203_ATLAS_NewSimNameDialog_01%%+IMAG.svg | svg | 46113 |
| S3_025C95B6_00000000_20E4D814E46EF2F2_ObjectListPickerEntry%%+LAYO.layout | layout | 1601 |
| S3_025C95B6_00000000_953C2C941DA0681A_ObjectListPicker%%+LAYO.layout | layout | 37960 |
| S3_2F7D0004_00000000_B63E6A96C6607655_ATLAS_ObjectListPicker_00%%+IMAG.svg | svg | 119355 |
| S3_025C95B6_00000000_D6AACD48589F88E8_OpportunityConfirmDialog%%+LAYO.layout | layout | 82804 |
| S3_2F7D0004_00000000_A4784BB7AE41371B_ATLAS_OpportunityConfirmDialog_00%%+IMAG.svg | svg | 162236 |
| S3_025C95B6_00000000_BE899B75F7F9536D_OptionsDialog%%+LAYO.layout | layout | 1358962 |
| S3_2F7D0004_00000000_9CC0F16EB9AFC6EC_ATLAS_OptionsDialog_00%%+IMAG.svg | svg | 1410054 |
| S3_025C95B6_00000000_54C2BC10DD34433F_NpcPartyInvitationDialog%%+LAYO.layout | layout | 59388 |
| S3_025C95B6_00000000_BBFA8F53A61E1511_PartyPicker%%+LAYO.layout | layout | 215725 |
| S3_025C95B6_00000000_C0D3E459B754E0C2_RelationshipPartyTooltip%%+LAYO.layout | layout | 30243 |
| S3_025C95B6_00000000_E1B0F975582BC16B_NpcPartyTooltip%%+LAYO.layout | layout | 46535 |
| S3_2F7D0004_00000000_51D2338C187ACDBE_ATLAS_NpcPartyInvitationDialog_00%%+IMAG.svg | svg | 192781 |
| S3_2F7D0004_00000000_51D2338C187ACDBF_ATLAS_NpcPartyInvitationDialog_01%%+IMAG.svg | svg | 11875 |
| S3_2F7D0004_00000000_96D4160BFEBC89D0_ATLAS_PartyPicker_00%%+IMAG.svg | svg | 522960 |
| S3_2F7D0004_00000000_FD8C1C5CFF381CAA_ATLAS_NpcPartyTooltip_00%%+IMAG.svg | svg | 34332 |
| S3_025C95B6_00000000_DADEBF9E91A7FDB1_AnnounceProtestDialog%%+LAYO.layout | layout | 114399 |
| S3_2F7D0004_00000000_1BA71DC9C4262360_ATLAS_AnnounceProtestDialog_00%%+IMAG.svg | svg | 483089 |
| S3_025C95B6_00000000_432D24D02D9F5039_RealEstateDialog%%+LAYO.layout | layout | 122336 |
| S3_2F7D0004_00000000_EA0486EF912F79A0_ATLAS_RealEstateDialog_00%%+IMAG.svg | svg | 382534 |
| S3_025C95B6_00000000_F8C37F962D729B27_ResolutionRollback%%+LAYO.layout | layout | 32510 |
| S3_2F7D0004_00000000_A1CFAF2CE5F85EE6_ATLAS_ResolutionRollback_00%%+IMAG.svg | svg | 175626 |
| S3_025C95B6_00000000_2BFF7E5EE1EA2FA2_ResortReviewEntry%%+LAYO.layout | layout | 37267 |
| S3_025C95B6_00000000_59EE39FBA55324F2_ResortExpenseDialog%%+LAYO.layout | layout | 49498 |
| S3_025C95B6_00000000_79170E8E3E73C5DA_ResortReviewDialog%%+LAYO.layout | layout | 82038 |
| S3_025C95B6_00000000_84FB5C11165B8BE8_ManageResortCrewDialog%%+LAYO.layout | layout | 58090 |
| S3_2F7D0004_00000000_02A52D6E122F5083_ATLAS_ManageResortCrewDialog_00%%+IMAG.svg | svg | 98492 |
| S3_2F7D0004_00000000_53D0E05F7B96E51C_ATLAS_ResortExpenseDialog_01%%+IMAG.svg | svg | 6543 |
| S3_2F7D0004_00000000_53D0E05F7B96E51D_ATLAS_ResortExpenseDialog_00%%+IMAG.svg | svg | 197881 |
| S3_2F7D0004_00000000_7BD74FD5EF3B85EC_ATLAS_ResortReviewDialog_01%%+IMAG.svg | svg | 10943 |
| S3_2F7D0004_00000000_7BD74FD5EF3B85ED_ATLAS_ResortReviewDialog_00%%+IMAG.svg | svg | 251412 |
| S3_2F7D0004_00000000_7BD74FD5EF3B85EF_ATLAS_ResortReviewDialog_02%%+IMAG.svg | svg | 6551 |
| S3_2F7D0004_00000000_A7C784D269AD9105_ATLAS_ResortReviewEntry_00%%+IMAG.svg | svg | 12151 |
| S3_2F7D0004_00000000_B55F13DA10F38EE8_ATLAS_ResortRatingDialog_00%%+IMAG.svg | svg | 182593 |
| S3_2F7D0004_00000000_B55F13DA10F38EE9_ATLAS_ResortRatingDialog_01%%+IMAG.svg | svg | 6541 |
| S3_025C95B6_00000000_6205D8441D64A7E1_SaveHousehold%%+LAYO.layout | layout | 130480 |
| S3_2F7D0004_00000000_D7277234971F7C00_ATLAS_SaveHousehold_00%%+IMAG.svg | svg | 153049 |
| S3_025C95B6_00000000_1F6A7CAEE479BF4C_SetHoursDialog%%+LAYO.layout | layout | 52431 |
| S3_2F7D0004_00000000_54CAE592DEFC11AF_ATLAS_SetHoursDialog_00%%+IMAG.svg | svg | 106913 |
| S3_025C95B6_00000000_0EBF03A71F14E93A_ShopInventoryItem%%+LAYO.layout | layout | 9075 |
| S3_025C95B6_00000000_5ECD156C3D66E735_ShopCartLayout%%+LAYO.layout | layout | 11692 |
| S3_025C95B6_00000000_93104C7EA350E1E1_Shop%%+LAYO.layout | layout | 188820 |
| S3_025C95B6_00000000_D4F419CA46280C26_ShopInventoryPrice%%+LAYO.layout | layout | 8731 |
| S3_2F7D0004_00000000_91CA42E74E30EF70_ATLAS_Shop_00%%+IMAG.svg | svg | 170551 |
| S3_2F7D0004_00000000_91CA42E74E30EF71_ATLAS_Shop_01%%+IMAG.svg | svg | 48041 |
| S3_2F7D0004_00000000_E18D765D691D40BC_ATLAS_ShopInventoryItem_01%%+IMAG.svg | svg | 3475 |
| S3_025C95B6_00000000_9A292BAB18D5BBE4_SimpleMessageDialogPretty%%+LAYO.layout | layout | 24039 |
| S3_025C95B6_00000000_9C038F288CD8C2DD_SimpleMessageDialogSocialGroups%%+LAYO.layout | layout | 30659 |
| S3_025C95B6_00000000_CD07CDB9DD2EB0F5_SimpleMessageDialogCustom%%+LAYO.layout | layout | 24994 |
| S3_2F7D0004_00000000_6E8676D09A90343C_ATLAS_SimpleMessageDialogSocialGroups_00%%+IMAG.svg | svg | 178514 |
| S3_2F7D0004_00000000_DDD0BFC504584AFF_ATLAS_SimpleMessageDialogPretty_00%%+IMAG.svg | svg | 154849 |
| S3_2F7D0004_00000000_F2F3D19D2DBA6ADC_ATLAS_SimpleMessageDialogCustom_00%%+IMAG.svg | svg | 82367 |
| S3_025C95B6_00000000_8C74B4FF02652816_SimplePurchaseDialog%%+LAYO.layout | layout | 37009 |
| S3_2F7D0004_00000000_AA6BF0C532144678_ATLAS_SimplePurchaseDialog_01%%+IMAG.svg | svg | 7576 |
| S3_2F7D0004_00000000_AA6BF0C532144679_ATLAS_SimplePurchaseDialog_00%%+IMAG.svg | svg | 192371 |
| S3_025C95B6_00000000_D1DD61F81E00EAC7_HUDSkillsJournalDialog%%+LAYO.layout | layout | 70301 |
| S3_2F7D0004_00000000_82041F80A5B52436_ATLAS_HUDSkillsJournalDialog_00%%+IMAG.svg | svg | 372958 |
| S3_025C95B6_00000000_0406D2217C6D8993_SocialGroupTrait%%+LAYO.layout | layout | 54035 |
| S3_2F7D0004_00000000_97D8782AEA1AC86A_ATLAS_SocialGroupTrait_00%%+IMAG.svg | svg | 185667 |
| S3_025C95B6_00000000_2EB0633029C88EEC_ThreeStringInputDialog%%+LAYO.layout | layout | 62271 |
| S3_025C95B6_00000000_4ADABFEC08E7F172_TwoStringInputDialog%%+LAYO.layout | layout | 63213 |
| S3_025C95B6_00000000_5AFB161F28E06ABA_StringInputDialog%%+LAYO.layout | layout | 42951 |
| S3_025C95B6_00000000_81CFF1473162FB63_StringInputDialogRandom%%+LAYO.layout | layout | 49152 |
| S3_025C95B6_00000000_B5A9BF9CC11558AF_MultiLineStringInputDialog%%+LAYO.layout | layout | 54259 |
| S3_2F7D0004_00000000_3DCE70C3F5939B36_ATLAS_MultiLineStringInputDialog_00%%+IMAG.svg | svg | 273888 |
| S3_2F7D0004_00000000_5E22EB39A84A184A_ATLAS_StringInputDialogRandom_00%%+IMAG.svg | svg | 261817 |
| S3_2F7D0004_00000000_5E22EB39A84A184B_ATLAS_StringInputDialogRandom_01%%+IMAG.svg | svg | 4579 |
| S3_2F7D0004_00000000_857FBF65333B02F7_ATLAS_ThreeStringInputDialog_00%%+IMAG.svg | svg | 263897 |
| S3_2F7D0004_00000000_AC38B615B3D35034_ATLAS_TwoStringInputDialog_01%%+IMAG.svg | svg | 44073 |
| S3_2F7D0004_00000000_AC38B615B3D35035_ATLAS_TwoStringInputDialog_00%%+IMAG.svg | svg | 274810 |
| S3_2F7D0004_00000000_C68BEAA8571E647D_ATLAS_StringInputDialog_00%%+IMAG.svg | svg | 267062 |
| S3_025C95B6_00000000_F67392A35350D7CF_ThreeButtonDialog%%+LAYO.layout | layout | 30628 |
| S3_2F7D0004_00000000_CD2F96420F0EB606_ATLAS_ThreeButtonDialog_00%%+IMAG.svg | svg | 92134 |
| S3_025C95B6_00000000_119889CEBC30C6B0_TraitsPicker%%+LAYO.layout | layout | 205316 |
| S3_025C95B6_00000000_B9660E08261DF91C_AdjustTraitDialog%%+LAYO.layout | layout | 528664 |
| S3_2F7D0004_00000000_A6F6EAE549E6A57A_ATLAS_TraitsPicker_01%%+IMAG.svg | svg | 114087 |
| S3_2F7D0004_00000000_A6F6EAE549E6A57B_ATLAS_TraitsPicker_00%%+IMAG.svg | svg | 287176 |
| S3_025C95B6_00000000_345EC249C8C119B4_TripPlanner%%+LAYO.layout | layout | 204799 |
| S3_025C95B6_00000000_D329991B141E1540_TripPlannerDestinationEntry%%+LAYO.layout | layout | 4607 |
| S3_2F7D0004_00000000_303E5EEDFADDB213_ATLAS_TripPlannerDestinationEntry_00%%+IMAG.svg | svg | 44580 |
| S3_2F7D0004_00000000_728119AF82C03647_ATLAS_TripPlanner_00%%+IMAG.svg | svg | 569153 |
| S3_025C95B6_00000000_AB8CCA910535022D_TutorialetteDialog%%+LAYO.layout | layout | 43414 |
| S3_2F7D0004_00000000_EA197BFAC8D7D22C_ATLAS_TutorialetteDialog_00%%+IMAG.svg | svg | 775068 |
| S3_025C95B6_00000000_136D028F54481AA1_TwoButtonDialog%%+LAYO.layout | layout | 28198 |
| S3_025C95B6_00000000_C34BF502B4EE9641_TwoButtonDialogNoShowAgain%%+LAYO.layout | layout | 31575 |
| S3_2F7D0004_00000000_50D1D1E873B57260_ATLAS_TwoButtonDialog_00%%+IMAG.svg | svg | 93201 |
| S3_2F7D0004_00000000_D6318147387723E8_ATLAS_TwoButtonDialogNoShowAgain_00%%+IMAG.svg | svg | 210106 |
| S3_025C95B6_00000000_3C3B5CD9B1D4EC82_ObjectPicker%%+LAYO.layout | layout | 25617 |
| S3_025C95B6_00000000_48A0A4DF95AB8B88_UiObjectPicker%%+LAYO.layout | layout | 37908 |
| S3_2F7D0004_00000000_5BE142E2E2F81852_ATLAS_UiObjectPicker_01%%+IMAG.svg | svg | 52260 |
| S3_2F7D0004_00000000_5BE142E2E2F81853_ATLAS_UiObjectPicker_00%%+IMAG.svg | svg | 72156 |
| S3_025C95B6_00000000_ED90156723F055BE_WishPicker%%+LAYO.layout | layout | 49717 |
| S3_2F7D0004_00000000_CFEA29E58E48E868_ATLAS_WishPicker_01%%+IMAG.svg | svg | 31513 |
| S3_2F7D0004_00000000_CFEA29E58E48E869_ATLAS_WishPicker_00%%+IMAG.svg | svg | 83571 |
| S3_2F7D0004_00000000_D7B7DC6A3407A2CA_ATLAS_BookTooltip_00%%+IMAG.svg | svg | 23659 |
| S3_025C95B6_00000000_60070CF2C1CBF31C_BuildBuyMoneyTooltip%%+LAYO.layout | layout | 12574 |
| S3_2F7D0004_00000000_343AE22E211D0A76_ATLAS_BuildItemTooltip_00%%+IMAG.svg | svg | 9989 |
| S3_2F7D0004_00000000_343AE22E211D0A77_ATLAS_BuildItemTooltip_01%%+IMAG.svg | svg | 4526 |
| S3_025C95B6_00000000_97AD8DB402328D67_BuyItemTooltip%%+LAYO.layout | layout | 22741 |
| S3_2F7D0004_00000000_54E7250E65E25B5E_ATLAS_BuyItemTooltip_00%%+IMAG.svg | svg | 9985 |
| S3_2F7D0004_00000000_54E7250E65E25B5F_ATLAS_BuyItemTooltip_01%%+IMAG.svg | svg | 4522 |
| S3_025C95B6_00000000_80A9EA843FD4828A_HUDCareerPanelFactorTooltip%%+LAYO.layout | layout | 31393 |
| S3_2F7D0004_00000000_E294AD4099088B55_ATLAS_HUDCareerPanelFactorTooltip_00%%+IMAG.svg | svg | 52251 |
| S3_025C95B6_00000000_65EF48EC09D6DCBC_CASFeaturedItemTooltip%%+LAYO.layout | layout | 20845 |
| S3_025C95B6_00000000_E35F7768075811F3_CASFeaturedSetTooltip%%+LAYO.layout | layout | 32106 |
| S3_2F7D0004_00000000_2772F6CC14FA16DF_ATLAS_CASFeaturedItemTooltip_00%%+IMAG.svg | svg | 10010 |
| S3_2F7D0004_00000000_C50612326429CD52_ATLAS_CASFeaturedSetTooltip_00%%+IMAG.svg | svg | 29287 |
| S3_025C95B6_00000000_604206CDD96BD489_DaycareChildTooltip%%+LAYO.layout | layout | 23476 |
| S3_2F7D0004_00000000_76F1883112AA0DF0_ATLAS_DaycareChildTooltip_00%%+IMAG.svg | svg | 9995 |
| S3_2F7D0004_00000000_76F1883112AA0DF1_ATLAS_DaycareChildTooltip_01%%+IMAG.svg | svg | 4531 |
| S3_025C95B6_00000000_6423DFD1F45392B6_DrinkTooltip%%+LAYO.layout | layout | 24493 |
| S3_2F7D0004_00000000_1064163A4CAD1748_ATLAS_DrinkTooltip_01%%+IMAG.svg | svg | 4532 |
| S3_2F7D0004_00000000_1064163A4CAD1749_ATLAS_DrinkTooltip_00%%+IMAG.svg | svg | 9980 |
| S3_2F7D0004_00000000_2A84A7F427932656_ATLAS_ExportBinTooltip_00%%+IMAG.svg | svg | 66665 |
| S3_025C95B6_00000000_91F6B99074E6ED80_FishTooltip%%+LAYO.layout | layout | 28594 |
| S3_2F7D0004_00000000_335AC22B0610E07A_ATLAS_FishTooltip_01%%+IMAG.svg | svg | 4516 |
| S3_2F7D0004_00000000_335AC22B0610E07B_ATLAS_FishTooltip_00%%+IMAG.svg | svg | 9978 |
| S3_025C95B6_00000000_38836E5909FDCEA9_GreyedOutPieMenuTooltip%%+LAYO.layout | layout | 5217 |
| S3_2F7D0004_00000000_73C8350DFD1FFB50_ATLAS_GreyedOutPieMenuTooltip_00%%+IMAG.svg | svg | 4251 |
| S3_2F7D0004_00000000_4A9B0DD9ED32BED6_ATLAS_HouseholdContentsTooltip_00%%+IMAG.svg | svg | 65730 |
| S3_025C95B6_00000000_E50A406354CF9DD2_InsectTooltip%%+LAYO.layout | layout | 15068 |
| S3_2F7D0004_00000000_D70878B2D03C1D24_ATLAS_InsectTooltip_01%%+IMAG.svg | svg | 4520 |
| S3_2F7D0004_00000000_D70878B2D03C1D25_ATLAS_InsectTooltip_00%%+IMAG.svg | svg | 9983 |
| S3_025C95B6_00000000_13E2D10C233D508A_HUDKnownInfoTooltip%%+LAYO.layout | layout | 15525 |
| S3_025C95B6_00000000_51985B296C248C48_HUDKnownInfoItem%%+LAYO.layout | layout | 4568 |
| S3_025C95B6_00000000_8C6B06157E8B23D2_HUDKnownInfoHeader%%+LAYO.layout | layout | 5543 |
| S3_2F7D0004_00000000_070ABF5E8D370DE1_sign_aquarius_sm%%+IMAG.svg | svg | 6018 |
| S3_2F7D0004_00000000_18C7669FAF396139_sign_virgo_sm%%+IMAG.svg | svg | 7119 |
| S3_2F7D0004_00000000_19026B4F6194DB89_sign_pisces_sm%%+IMAG.svg | svg | 5427 |
| S3_2F7D0004_00000000_21B6D55FD0E6D6F7_sign_scorpio_sm%%+IMAG.svg | svg | 4136 |
| S3_2F7D0004_00000000_25E9F92071FA2275_sign_capricorn_sm%%+IMAG.svg | svg | 7003 |
| S3_2F7D0004_00000000_2BE7F4A825FA524C_sign_libra_sm%%+IMAG.svg | svg | 4004 |
| S3_2F7D0004_00000000_7718E8A9858987EC_sign_cancer_sm%%+IMAG.svg | svg | 5638 |
| S3_2F7D0004_00000000_814F5D8F7F38257D_ATLAS_HUDKnownInfoHeader_00%%+IMAG.svg | svg | 2030 |
| S3_2F7D0004_00000000_AA34CEEFAA50895F_sign_gemini_sm%%+IMAG.svg | svg | 5468 |
| S3_2F7D0004_00000000_AE44D3DA0D012BE3_w_simple_school_career_s%%+IMAG.svg | svg | 5182 |
| S3_2F7D0004_00000000_B576C56DDEACED16_sign_leo_sm%%+IMAG.svg | svg | 4083 |
| S3_2F7D0004_00000000_C000806EBF634CD8_sign_aries_sm%%+IMAG.svg | svg | 5612 |
| S3_2F7D0004_00000000_C1D62BA64B17BC54_sign_taurus_sm%%+IMAG.svg | svg | 5553 |
| S3_2F7D0004_00000000_C3AC228A79FAE85D_ATLAS_HUDKnownInfoTooltip_00%%+IMAG.svg | svg | 10342 |
| S3_2F7D0004_00000000_D52E394823BF086C_sign_sagittarius_sm%%+IMAG.svg | svg | 5628 |
| S3_025C95B6_00000000_6EEB572D8F980706_LifetimeWishTooltip%%+LAYO.layout | layout | 42467 |
| S3_2F7D0004_00000000_9D03E0FF2899D009_ATLAS_LifetimeWishTooltip_00%%+IMAG.svg | svg | 71894 |
| S3_025C95B6_00000000_84A8B0F12196B5E8_LocationHomeDeedTooltip%%+LAYO.layout | layout | 16418 |
| S3_2F7D0004_00000000_1CBEF62D3E57B97A_ATLAS_LocationHomeDeedTooltip_01%%+IMAG.svg | svg | 4538 |
| S3_2F7D0004_00000000_1CBEF62D3E57B97B_ATLAS_LocationHomeDeedTooltip_00%%+IMAG.svg | svg | 10003 |
| S3_025C95B6_00000000_0B6F0E6D5F37601E_MapTagRabbitholeTooltip%%+LAYO.layout | layout | 16637 |
| S3_025C95B6_00000000_2CB535B717531AE5_MapTagSimTooltip%%+LAYO.layout | layout | 4377 |
| S3_025C95B6_00000000_842E439CB085CD34_MapTagGameEntryTooltip%%+LAYO.layout | layout | 19239 |
| S3_025C95B6_00000000_8E4802151EED2221_MapTagLotTooltip%%+LAYO.layout | layout | 16140 |
| S3_025C95B6_00000000_9DFE9FE272DC59B4_MapTagCarTooltip%%+LAYO.layout | layout | 10835 |
| S3_2F7D0004_00000000_4B4987ECAABC65E4_ATLAS_MapTagSimTooltip_00%%+IMAG.svg | svg | 6200 |
| S3_2F7D0004_00000000_89CF11E3D6E803B2_ATLAS_MapTagTooltipSimItem_01%%+IMAG.svg | svg | 4534 |
| S3_2F7D0004_00000000_89CF11E3D6E803B3_ATLAS_MapTagTooltipSimItem_00%%+IMAG.svg | svg | 5525 |
| S3_2F7D0004_00000000_9DCC412DB739D667_ATLAS_MapTagCarTooltip_00%%+IMAG.svg | svg | 6202 |
| S3_2F7D0004_00000000_B11BD2FA9388A4A1_ATLAS_MapTagRabbitholeTooltip_00%%+IMAG.svg | svg | 6548 |
| S3_2F7D0004_00000000_FF31779C01B01267_ATLAS_MapTagGameEntryTooltip_00%%+IMAG.svg | svg | 6205 |
| S3_025C95B6_00000000_8F32FF648138C7DC_MoodMeterTooltip%%+LAYO.layout | layout | 19558 |
| S3_2F7D0004_00000000_D2C588AC02204FE6_ATLAS_MoodMeterTooltip_01%%+IMAG.svg | svg | 2390 |
| S3_2F7D0004_00000000_D2C588AC02204FE7_ATLAS_MoodMeterTooltip_00%%+IMAG.svg | svg | 10000 |
| S3_025C95B6_00000000_CD98F6D47457740B_NectarBottleTooltip%%+LAYO.layout | layout | 23979 |
| S3_2F7D0004_00000000_5C680600D0088CDA_ATLAS_NectarBottleTooltip_00%%+IMAG.svg | svg | 10010 |
| S3_2F7D0004_00000000_5C680600D0088CDB_ATLAS_NectarBottleTooltip_01%%+IMAG.svg | svg | 4547 |
| S3_025C95B6_00000000_287FCE3D31CA5261_PlantInfoTooltip%%+LAYO.layout | layout | 25943 |
| S3_2F7D0004_00000000_2E9722305EE065C0_ATLAS_PlantInfoTooltip_00%%+IMAG.svg | svg | 9989 |
| S3_2F7D0004_00000000_2E9722305EE065C1_ATLAS_PlantInfoTooltip_01%%+IMAG.svg | svg | 4526 |
| S3_025C95B6_00000000_54078B87D20486BA_PlantableObjectInfoTooltip%%+LAYO.layout | layout | 20223 |
| S3_2F7D0004_00000000_DEA940A213775314_ATLAS_PlantableObjectInfoTooltip_01%%+IMAG.svg | svg | 4554 |
| S3_2F7D0004_00000000_DEA940A213775315_ATLAS_PlantableObjectInfoTooltip_00%%+IMAG.svg | svg | 10025 |
| S3_025C95B6_00000000_CA58A62FDC697898_PreparedMealInfoTooltip%%+LAYO.layout | layout | 14735 |
| S3_2F7D0004_00000000_E759E413E325FEF2_ATLAS_PreparedMealInfoTooltip_01%%+IMAG.svg | svg | 4551 |
| S3_2F7D0004_00000000_E759E413E325FEF3_ATLAS_PreparedMealInfoTooltip_00%%+IMAG.svg | svg | 10016 |
| S3_025C95B6_00000000_8E23E5A53043C55C_RecipeTooltip%%+LAYO.layout | layout | 27115 |
| S3_2F7D0004_00000000_0D00B5650CF1CDBF_ATLAS_RecipeTooltip_00%%+IMAG.svg | svg | 14379 |
| S3_025C95B6_00000000_CD2E98BA85273F13_RelicTooltip%%+LAYO.layout | layout | 23995 |
| S3_2F7D0004_00000000_942932E1CC38EF8A_ATLAS_RelicTooltip_00%%+IMAG.svg | svg | 9981 |
| S3_2F7D0004_00000000_942932E1CC38EF8B_ATLAS_RelicTooltip_01%%+IMAG.svg | svg | 4518 |
| S3_025C95B6_00000000_4031AAA868186F32_RgmTooltip%%+LAYO.layout | layout | 16783 |
| S3_2F7D0004_00000000_2FE1CCD7B2C72A64_ATLAS_RgmTooltip_01%%+IMAG.svg | svg | 4514 |
| S3_2F7D0004_00000000_2FE1CCD7B2C72A65_ATLAS_RgmTooltip_00%%+IMAG.svg | svg | 9977 |
| S3_025C95B6_00000000_A7F9C49863FFC7F5_ScientificSampleTooltip%%+LAYO.layout | layout | 20107 |
| S3_2F7D0004_00000000_19FD99DB917AB094_ATLAS_ScientificSampleTooltip_00%%+IMAG.svg | svg | 10018 |
| S3_2F7D0004_00000000_19FD99DB917AB095_ATLAS_ScientificSampleTooltip_01%%+IMAG.svg | svg | 4555 |
| S3_025C95B6_00000000_FD7244AF76846CDB_SeasonTooltip%%+LAYO.layout | layout | 16366 |
| S3_2F7D0004_00000000_3DE61A792E5C26E2_ATLAS_SeasonTooltip_00%%+IMAG.svg | svg | 4338 |
| S3_025C95B6_00000000_36B815C619259095_ShopItemTooltip%%+LAYO.layout | layout | 12027 |
| S3_025C95B6_00000000_FF2D1889152279A3_ShopItemTooltipEntry%%+LAYO.layout | layout | 1631 |
| S3_2F7D0004_00000000_E3CE3EE15EF557DC_ATLAS_ShopItemTooltip_00%%+IMAG.svg | svg | 10976 |
| S3_025C95B6_00000000_6B0A0DF23475F547_SimpleTextTooltip%%+LAYO.layout | layout | 63457 |
| S3_2F7D0004_00000000_3B2C7BC575A091F6_ATLAS_SimpleTextTooltip_00%%+IMAG.svg | svg | 49539 |
| S3_025C95B6_00000000_96D1E388E3BEB39D_SkillJournalProgressTooltip%%+LAYO.layout | layout | 14926 |
| S3_2F7D0004_00000000_95EC1880045F3E2C_ATLAS_SkillJournalProgressTooltip_00%%+IMAG.svg | svg | 15347 |
| S3_2F7D0004_00000000_A2DBE9B0DE25D48C_hud_celebrity_tooltip_socialgroup3%%+IMAG.svg | svg | 8287 |
| S3_2F7D0004_00000000_A2DBE9B0DE25D48D_hud_celebrity_tooltip_socialgroup2%%+IMAG.svg | svg | 8287 |
| S3_2F7D0004_00000000_A2DBE9B0DE25D48E_hud_celebrity_tooltip_socialgroup1%%+IMAG.svg | svg | 8288 |
| S3_2F7D0004_00000000_B34E203D57D101FA_hud_celebrity_tooltip%%+IMAG.svg | svg | 7150 |
| S3_2F7D0004_00000000_E5062C1BF4E6B07D_tooltip_regular2_socialgroup1%%+IMAG.svg | svg | 8819 |
| S3_2F7D0004_00000000_E5062C1BF4E6B07E_tooltip_regular2_socialgroup2%%+IMAG.svg | svg | 8822 |
| S3_2F7D0004_00000000_E5062C1BF4E6B07F_tooltip_regular2_socialgroup3%%+IMAG.svg | svg | 7855 |
| S3_025C95B6_00000000_71866C9B35754B9E_TitleDescriptionTooltip%%+LAYO.layout | layout | 15722 |
| S3_2F7D0004_00000000_68559BEE288CC691_ATLAS_TitleDescriptionTooltip_00%%+IMAG.svg | svg | 11763 |
| S3_025C95B6_00000000_3648ACD3D6BC6DED_WishesTooltip%%+LAYO.layout | layout | 74727 |
| S3_2F7D0004_00000000_8F24AD0891E0ABE4_ATLAS_WishesTooltip_00%%+IMAG.svg | svg | 225434 |
| S3_2F7D0004_00000000_8F24AD0891E0ABE5_ATLAS_WishesTooltip_01%%+IMAG.svg | svg | 4245 |
| S3_2F7D0004_00000000_31AB80D33318037C_puck_cas_skewer_short_dresser_store%%+IMAG.svg | svg | 25518 |
| S3_2F7D0004_00000000_47A8A97B9AF5E7DC_puck_cas_bottom_skewer_store%%+IMAG.svg | svg | 40890 |
| S3_2F7D0004_00000000_677C4F0BB50C5991_puck_cas_skewer_short_store%%+IMAG.svg | svg | 19526 |
| S3_2F7D0004_00000000_C3B92932F19A2862_store_puck_bk%%+IMAG.svg | svg | 15890 |
| S3_2F7D0004_00000000_C7284E639F6F10D3_cas_nav_overlay%%+IMAG.svg | svg | 38218 |
| S3_2F7D0004_00000000_D2447225620FF9C2_puck_cas_store%%+IMAG.svg | svg | 15283 |
| S3_025C95B6_00000000_E24D8B39AFDFFC70_ProgressDialog%%+LAYO.layout | layout | 93669 |
| S3_2F7D0004_00000000_25F20E41EBDA283A_ATLAS_ProgressDialog_01%%+IMAG.svg | svg | 3831635 |
| S3_2F7D0004_00000000_25F20E41EBDA283B_ATLAS_ProgressDialog_00%%+IMAG.svg | svg | 1267737 |
| S3_025C95B6_00000000_0E7EF0D39A302EE9_GameLoadingScreen%%+LAYO.layout | layout | 42936 |
| S3_025C95B6_00000000_2B204503EA268129_NewGameLoadingScreen%%+LAYO.layout | layout | 28899 |
| S3_025C95B6_00000000_50CCA0334790C10B_TravelLoadingScreen%%+LAYO.layout | layout | 25726 |
| S3_025C95B6_00000000_617D2066E991D74C_GameEntryLoadItem%%+LAYO.layout | layout | 27271 |
| S3_025C95B6_00000000_DA0227DFD918ADF7_GameEntryMainMenu%%+LAYO.layout | layout | 515223 |
| S3_025C95B6_00000000_EA15A52A4ADC4C73_GameEntryTownSelectEntry%%+LAYO.layout | layout | 11985 |
| S3_2F7D0004_00000000_52D1758EF6EE584A_ATLAS_GameEntryTownSelectEntry_00%%+IMAG.svg | svg | 66720 |
| S3_2F7D0004_00000000_69A9BD04B622EED2_ATLAS_TravelLoadingScreen_00%%+IMAG.svg | svg | 1000534 |
| S3_2F7D0004_00000000_69A9BD04B622EED3_ATLAS_TravelLoadingScreen_01%%+IMAG.svg | svg | 101478 |
| S3_2F7D0004_00000000_6CA9FECAB55D8A27_ATLAS_GameEntryLoadItem_00%%+IMAG.svg | svg | 139599 |
| S3_2F7D0004_00000000_78B0A51665D3FCB0_ATLAS_GameLoadingScreen_00%%+IMAG.svg | svg | 1012994 |
| S3_2F7D0004_00000000_78B0A51665D3FCB1_ATLAS_GameLoadingScreen_01%%+IMAG.svg | svg | 104818 |
| S3_2F7D0004_00000000_78B0A51665D3FCB2_ATLAS_GameLoadingScreen_02%%+IMAG.svg | svg | 139976 |
| S3_2F7D0004_00000000_78B0A51665D3FCB3_ATLAS_GameLoadingScreen_03%%+IMAG.svg | svg | 144455 |
| S3_2F7D0004_00000000_78B0A51665D3FCB4_ATLAS_GameLoadingScreen_04%%+IMAG.svg | svg | 103852 |
| S3_2F7D0004_00000000_D4C492FE84FF892E_ATLAS_GameEntryMainMenu_00%%+IMAG.svg | svg | 10277273 |
| S3_2F7D0004_00000000_D4C492FE84FF892F_ATLAS_GameEntryMainMenu_01%%+IMAG.svg | svg | 671898 |
| S3_2F7D0004_00000000_E228A0CDF82243C0_ATLAS_NewGameLoadingScreen_00%%+IMAG.svg | svg | 1001001 |
| S3_2F7D0004_00000000_E228A0CDF82243C1_ATLAS_NewGameLoadingScreen_01%%+IMAG.svg | svg | 101478 |
| S3_2F7D0004_00000000_E228A0CDF82243C2_ATLAS_NewGameLoadingScreen_02%%+IMAG.svg | svg | 139982 |
| S3_2F7D0004_00000000_E228A0CDF82243C3_ATLAS_NewGameLoadingScreen_03%%+IMAG.svg | svg | 144461 |
| S3_2F7D0004_00000000_E228A0CDF82243C4_ATLAS_NewGameLoadingScreen_04%%+IMAG.svg | svg | 101477 |
| S3_2F7D0004_08000000_54CBD784C0156B99_world_loading_beijing%%+IMAG.svg | svg | 1082999 |
| S3_2F7D0004_08000000_D11D50C07C51175F_world_loading_cairo%%+IMAG.svg | svg | 724005 |
| S3_2F7D0004_08000000_F631DC614E3DC882_world_loading_paris%%+IMAG.svg | svg | 1012600 |
| S3_2F7D0004_88000000_F7D2868047E7E1C1_world_loading_university%%+IMAG.svg | svg | 2862022 |
| S3_2F7D0004_00000000_1CBF3FDDCD52F2CD_ATLAS_AppLoadingScreenEP10_00%%+IMAG.svg | svg | 143115 |
| S3_2F7D0004_00000000_472136B3BCE4D4C1_ATLAS_AppLoadingScreen_00%%+IMAG.svg | svg | 622786 |
| S3_2F7D0004_00000000_6224652677A65ADB_ATLAS_AppLoadingScreenSP9_00%%+IMAG.svg | svg | 1183168 |
| S3_2F7D0004_00000000_6972FC267B676AB0_ATLAS_AppLoadingScreenSP8_00%%+IMAG.svg | svg | 1659161 |
| S3_2F7D0004_00000000_82AA8CDE392E5091_ATLAS_AppLoadingScreenEP9_00%%+IMAG.svg | svg | 301708 |
| S3_2F7D0004_00000000_839F01268A47D28F_ATLAS_AppLoadingScreenSP5_00%%+IMAG.svg | svg | 733647 |
| S3_2F7D0004_00000000_89F9A3DE3CF03986_ATLAS_AppLoadingScreenEP8_00%%+IMAG.svg | svg | 880186 |
| S3_2F7D0004_00000000_8D7AB826903450C4_ATLAS_AppLoadingScreenSP4_00%%+IMAG.svg | svg | 603464 |
| S3_2F7D0004_00000000_94C94F2693F560B9_ATLAS_AppLoadingScreenSP7_00%%+IMAG.svg | svg | 1272702 |
| S3_2F7D0004_00000000_9F7E06269A99CF4E_ATLAS_AppLoadingScreenSP6_00%%+IMAG.svg | svg | 930517 |
| S3_2F7D0004_00000000_A7A69D269F1482E3_ATLAS_AppLoadingScreenSP1_00%%+IMAG.svg | svg | 622790 |
| S3_2F7D0004_00000000_B54F76DE557D560F_ATLAS_AppLoadingScreenEP3_00%%+IMAG.svg | svg | 1272959 |
| S3_2F7D0004_00000000_B8D08B26A8C16D4D_ATLAS_AppLoadingScreenSP3_00%%+IMAG.svg | svg | 425596 |
| S3_2F7D0004_00000000_BF2B2DDE5B69D444_ATLAS_AppLoadingScreenEP2_00%%+IMAG.svg | svg | 1094261 |
| S3_2F7D0004_00000000_C01FA226AC8356A2_ATLAS_AppLoadingScreenSP2_00%%+IMAG.svg | svg | 1476744 |
| S3_2F7D0004_00000000_C679C4DE5F2AE439_ATLAS_AppLoadingScreenEP1_00%%+IMAG.svg | svg | 271198 |
| S3_2F7D0004_00000000_D95712DE6A4A0663_ATLAS_AppLoadingScreenEP7_00%%+IMAG.svg | svg | 751570 |
| S3_2F7D0004_00000000_E0A5C9DE6E0B4C78_ATLAS_AppLoadingScreenEP6_00%%+IMAG.svg | svg | 151286 |
| S3_2F7D0004_00000000_EA8100DE73F6F0CD_ATLAS_AppLoadingScreenEP5_00%%+IMAG.svg | svg | 749621 |
| S3_2F7D0004_00000000_F1D017DE77B8DA22_ATLAS_AppLoadingScreenEP4_00%%+IMAG.svg | svg | 136895 |
| S3_2F7D0004_00000000_240E56DDD114DC22_ATLAS_AppLoadingScreenEP11_00%%+IMAG.svg | svg | 472276 |
| S3_2F7D0004_00000000_240E56DDD114DC23_ATLAS_AppLoadingScreenEP11_01%%+IMAG.svg | svg | 457870 |
| S3_2F7D0004_00000000_2EA56FD62EFBDE3D_ep11_loadscreen_icon_bg%%+IMAG.svg | svg | 12737 |
| S3_2F7D0004_00000000_A2E6CD8292292553_ep11_loadscreen_icon8%%+IMAG.svg | svg | 9912 |
| S3_2F7D0004_00000000_A2E6CD8292292558_ep11_loadscreen_icon3%%+IMAG.svg | svg | 9536 |
| S3_2F7D0004_00000000_A2E6CD8292292559_ep11_loadscreen_icon2%%+IMAG.svg | svg | 12071 |
| S3_2F7D0004_00000000_A2E6CD829229255A_ep11_loadscreen_icon1%%+IMAG.svg | svg | 11334 |
| S3_2F7D0004_00000000_A2E6CD829229255C_ep11_loadscreen_icon7%%+IMAG.svg | svg | 11443 |
| S3_2F7D0004_00000000_A2E6CD829229255D_ep11_loadscreen_icon6%%+IMAG.svg | svg | 9552 |
| S3_2F7D0004_00000000_A2E6CD829229255E_ep11_loadscreen_icon5%%+IMAG.svg | svg | 8628 |
| S3_2F7D0004_00000000_A2E6CD829229255F_ep11_loadscreen_icon4%%+IMAG.svg | svg | 14080 |
| S3_2F7D0004_00000000_D34984C57475BAD5_ge_cci_loadscreen_r2%%+IMAG.svg | svg | 157403 |
| S3_2F7D0004_00000000_E0878B0929292583_ep11_loadscreen_bg%%+IMAG.svg | svg | 365586 |
| S3_025C95B6_00000000_523308D4D38888A0_AppLoadingScreenSP9%%+LAYO.layout | layout | 96519 |
| S3_025C95B6_00000000_523308D4D38888A1_AppLoadingScreenSP8%%+LAYO.layout | layout | 96519 |
| S3_025C95B6_00000000_523308D4D38888A8_AppLoadingScreenSP1%%+LAYO.layout | layout | 96519 |
| S3_025C95B6_00000000_523308D4D38888AA_AppLoadingScreenSP3%%+LAYO.layout | layout | 96519 |
| S3_025C95B6_00000000_523308D4D38888AB_AppLoadingScreenSP2%%+LAYO.layout | layout | 96519 |
| S3_025C95B6_00000000_523308D4D38888AC_AppLoadingScreenSP5%%+LAYO.layout | layout | 96519 |
| S3_025C95B6_00000000_523308D4D38888AD_AppLoadingScreenSP4%%+LAYO.layout | layout | 96519 |
| S3_025C95B6_00000000_523308D4D38888AE_AppLoadingScreenSP7%%+LAYO.layout | layout | 96519 |
| S3_025C95B6_00000000_523308D4D38888AF_AppLoadingScreenSP6%%+LAYO.layout | layout | 96519 |
| S3_025C95B6_00000000_527E0CD4D3C87AE6_AppLoadingScreenEP9%%+LAYO.layout | layout | 96519 |
| S3_025C95B6_00000000_527E0CD4D3C87AE7_AppLoadingScreenEP8%%+LAYO.layout | layout | 96519 |
| S3_025C95B6_00000000_527E0CD4D3C87AE8_AppLoadingScreenEP7%%+LAYO.layout | layout | 96519 |
| S3_025C95B6_00000000_527E0CD4D3C87AE9_AppLoadingScreenEP6%%+LAYO.layout | layout | 96519 |
| S3_025C95B6_00000000_527E0CD4D3C87AEA_AppLoadingScreenEP5%%+LAYO.layout | layout | 96519 |
| S3_025C95B6_00000000_527E0CD4D3C87AEB_AppLoadingScreenEP4%%+LAYO.layout | layout | 96519 |
| S3_025C95B6_00000000_527E0CD4D3C87AEC_AppLoadingScreenEP3%%+LAYO.layout | layout | 96519 |
| S3_025C95B6_00000000_527E0CD4D3C87AED_AppLoadingScreenEP2%%+LAYO.layout | layout | 96519 |
| S3_025C95B6_00000000_527E0CD4D3C87AEE_AppLoadingScreenEP1%%+LAYO.layout | layout | 96519 |
| S3_025C95B6_00000000_9370A6CB45C3FE86_AppLoadingScreen%%+LAYO.layout | layout | 96519 |
| S3_025C95B6_00000000_F4AABBA3DDA8E25A_AppLoadingScreenEP10%%+LAYO.layout | layout | 96519 |
| S3_025C95B6_00000000_F4AABBA3DDA8E25B_AppLoadingScreenEP11%%+LAYO.layout | layout | 96519 |
| S3_0333406C_00000000_3D332A927FC91D86_LoadingText%%+_XML.xml | xml | 737 |
| S3_0333406C_00000000_A8732994A2B63DA0_LoadingTextSP9%%+_XML.xml | xml | 737 |
| S3_0333406C_00000000_A8732994A2B63DA1_LoadingTextSP8%%+_XML.xml | xml | 737 |
| S3_0333406C_00000000_A8732994A2B63DA8_LoadingTextSP1%%+_XML.xml | xml | 737 |
| S3_0333406C_00000000_A8732994A2B63DAA_LoadingTextSP3%%+_XML.xml | xml | 737 |
| S3_0333406C_00000000_A8732994A2B63DAB_LoadingTextSP2%%+_XML.xml | xml | 737 |
| S3_0333406C_00000000_A8732994A2B63DAC_LoadingTextSP5%%+_XML.xml | xml | 737 |
| S3_0333406C_00000000_A8732994A2B63DAD_LoadingTextSP4%%+_XML.xml | xml | 737 |
| S3_0333406C_00000000_A8732994A2B63DAE_LoadingTextSP7%%+_XML.xml | xml | 737 |
| S3_0333406C_00000000_A8732994A2B63DAF_LoadingTextSP6%%+_XML.xml | xml | 737 |
| S3_0333406C_00000000_A8BE2D94A2F62FE6_LoadingTextEP9%%+_XML.xml | xml | 737 |
| S3_0333406C_00000000_A8BE2D94A2F62FE7_LoadingTextEP8%%+_XML.xml | xml | 737 |
| S3_0333406C_00000000_A8BE2D94A2F62FE8_LoadingTextEP7%%+_XML.xml | xml | 737 |
| S3_0333406C_00000000_A8BE2D94A2F62FE9_LoadingTextEP6%%+_XML.xml | xml | 737 |
| S3_0333406C_00000000_A8BE2D94A2F62FEA_LoadingTextEP5%%+_XML.xml | xml | 737 |
| S3_0333406C_00000000_A8BE2D94A2F62FEB_LoadingTextEP4%%+_XML.xml | xml | 737 |
| S3_0333406C_00000000_A8BE2D94A2F62FEC_LoadingTextEP3%%+_XML.xml | xml | 737 |
| S3_0333406C_00000000_A8BE2D94A2F62FED_LoadingTextEP2%%+_XML.xml | xml | 737 |
| S3_0333406C_00000000_A8BE2D94A2F62FEE_LoadingTextEP1%%+_XML.xml | xml | 737 |
| S3_0333406C_00000000_B1576190E853715A_LoadingTextEP10%%+_XML.xml | xml | 737 |
| S3_0333406C_00000000_B1576190E853715B_LoadingTextEP11%%+_XML.xml | xml | 737 |
| S3_220557DA_00000000_00DE2EE9D1D5A711_Strings English%%+STBL.stbl | stbl | 641 |
| S3_220557DA_00000000_01DE2EE9D1D5A711_Strings Chinese%%+STBL.stbl | stbl | 641 |
| S3_220557DA_00000000_02DE2EE9D1D5A711_Strings Taiwanese%%+STBL.stbl | stbl | 641 |
| S3_220557DA_00000000_03DE2EE9D1D5A711_Strings Czech%%+STBL.stbl | stbl | 641 |
| S3_220557DA_00000000_04DE2EE9D1D5A711_Strings Danish%%+STBL.stbl | stbl | 641 |
| S3_220557DA_00000000_05DE2EE9D1D5A711_Strings Dutch%%+STBL.stbl | stbl | 641 |
| S3_220557DA_00000000_06DE2EE9D1D5A711_Strings Finnish%%+STBL.stbl | stbl | 641 |
| S3_220557DA_00000000_07DE2EE9D1D5A711_Strings French%%+STBL.stbl | stbl | 641 |
| S3_220557DA_00000000_08DE2EE9D1D5A711_Strings German%%+STBL.stbl | stbl | 931 |
| S3_220557DA_00000000_09DE2EE9D1D5A711_Strings Greek%%+STBL.stbl | stbl | 641 |
| S3_220557DA_00000000_0ADE2EE9D1D5A711_Strings Hungarian%%+STBL.stbl | stbl | 641 |
| S3_220557DA_00000000_0BDE2EE9D1D5A711_Strings Italian%%+STBL.stbl | stbl | 641 |
| S3_220557DA_00000000_0CDE2EE9D1D5A711_Strings Japanese%%+STBL.stbl | stbl | 641 |
| S3_220557DA_00000000_0DDE2EE9D1D5A711_Strings Korean%%+STBL.stbl | stbl | 641 |
| S3_220557DA_00000000_0EDE2EE9D1D5A711_Strings Norwegian%%+STBL.stbl | stbl | 641 |
| S3_220557DA_00000000_0FDE2EE9D1D5A711_Strings Polish%%+STBL.stbl | stbl | 699 |
| S3_220557DA_00000000_10DE2EE9D1D5A711_Strings PortugueseStandard%%+STBL.stbl | stbl | 823 |
| S3_220557DA_00000000_11DE2EE9D1D5A711_Strings PortugueseBrazilian%%+STBL.stbl | stbl | 829 |
| S3_220557DA_00000000_12DE2EE9D1D5A711_Strings Russian%%+STBL.stbl | stbl | 729 |
| S3_220557DA_00000000_13DE2EE9D1D5A711_Strings SpanishStandard%%+STBL.stbl | stbl | 641 |
| S3_220557DA_00000000_14DE2EE9D1D5A711_Strings SpanishMexican%%+STBL.stbl | stbl | 799 |
| S3_220557DA_00000000_15DE2EE9D1D5A711_Strings Swedish%%+STBL.stbl | stbl | 641 |
| S3_220557DA_00000000_16DE2EE9D1D5A711_Strings Thai%%+STBL.stbl | stbl | 641 |
| S3_2F7D0004_08000000_C82A14679CAEDDF2_logo_large_ep1_cs_cz%%+IMAG.png | png | 205910 |
| S3_2F7D0004_10000000_8C2078D800ADEC08_logo_large_sp1_cs_cz%%+IMAG.png | png | 177441 |
| S3_2F7D0004_18000000_93757C1645FA0CCD_logo_large_ep2_cs_cz%%+IMAG.png | png | 301466 |
| S3_2F7D0004_20000000_55586569E6C82BAF_logo_large_sp2_cs_cz%%+IMAG.png | png | 222347 |
| S3_2F7D0004_28000000_3263ADFF5036006C_logo_large_ep3_cs_cz%%+IMAG.png | png | 193568 |
| S3_2F7D0004_30000000_0B66CE08E4DEE4BE_logo_large_sp3_cs_cz%%+IMAG.png | png | 218485 |
| S3_2F7D0004_38000000_212D992EFE0AC10F_logo_large_ep4_cs_cz%%+IMAG.png | png | 225544 |
| S3_2F7D0004_40000000_1B5BB3177070D26D_logo_large_sp4_CS_CZ%%+IMAG.png | png | 153630 |
| S3_2F7D0004_48000000_2EAD970CA3D6AB9E_logo_large_ep5_cs_cz%%+IMAG.png | png | 219355 |
| S3_2F7D0004_50000000_B897E500793CE38C_logo_large_sp5_cs_cz%%+IMAG.png | png | 221938 |
| S3_2F7D0004_58000000_11CD40B32291A009_logo_large_ep6_cs_cz%%+IMAG.png | png | 182969 |
| S3_2F7D0004_60000000_289867102735B7A3_logo_large_sp6_cs_cz%%+IMAG.png | png | 401728 |
| S3_2F7D0004_68000000_FC54E0A2856C4792_logo_large_sp7_cs_cz%%+IMAG.png | png | 160695 |
| S3_2F7D0004_70000000_ADB441DBBE341F68_logo_large_ep7_cs_cz%%+IMAG.png | png | 179291 |
| S3_2F7D0004_78000000_8D06137DCF77B1AB_logo_large_ep8_cs_cz%%+IMAG.png | png | 183297 |
| S3_2F7D0004_80000000_D20DCE30DA31C791_logo_large_sp8_cs_cz%%+IMAG.png | png | 259610 |
| S3_2F7D0004_88000000_58E15566613F2D9A_logo_large_ep9_cs_cz%%+IMAG.png | png | 173905 |
| S3_2F7D0004_90000000_DA706A033476E7D4_logo_large_ep10_cs_cz%%+IMAG.png | png | 221545 |
| S3_2F7D0004_98000000_5940E0194544CD10_logo_large_sp9_cs_cz%%+IMAG.png | png | 226589 |
| S3_2F7D0004_A0000000_D5ECBA0E531C7415_logo_large_ep11_cs_cz%%+IMAG.png | png | 164943 |
| S3_2F7D0004_08000000_9BA24B6DCB63B507_logo_large_ep1_da_dk%%+IMAG.png | png | 185968 |
| S3_2F7D0004_10000000_582C880210ED55B1_logo_large_sp1_da_dk%%+IMAG.png | png | 181487 |
| S3_2F7D0004_18000000_85ED4D0F64C0C500_logo_large_ep2_da_dk%%+IMAG.png | png | 308573 |
| S3_2F7D0004_20000000_AAC7363FE92AADA6_logo_large_sp2_da_dk%%+IMAG.png | png | 210143 |
| S3_2F7D0004_28000000_132714E74B3D8EE5_logo_large_ep3_da_dk%%+IMAG.png | png | 222091 |
| S3_2F7D0004_30000000_099EBCCD9C13A7B3_logo_large_sp3_da_dk%%+IMAG.png | png | 224798 |
| S3_2F7D0004_38000000_769C6A05006D4306_logo_large_ep4_da_dk%%+IMAG.png | png | 227996 |
| S3_2F7D0004_40000000_6458840BA738DFA0_logo_large_sp4_DA_DK%%+IMAG.png | png | 148163 |
| S3_2F7D0004_48000000_2CE585D15B0B6E93_logo_large_ep5_da_dk%%+IMAG.png | png | 217012 |
| S3_2F7D0004_50000000_F1934BE38DB75B85_logo_large_sp5_da_dk%%+IMAG.png | png | 227085 |
| S3_2F7D0004_58000000_ED01B9EE5466AEBC_logo_large_ep6_da_dk%%+IMAG.png | png | 192085 |
| S3_2F7D0004_60000000_694FD0283ECFF9FA_logo_large_sp6_da_dk%%+IMAG.png | png | 398617 |
| S3_2F7D0004_68000000_CFCC17A8B41F6CA7_logo_large_sp7_da_dk%%+IMAG.png | png | 166927 |
| S3_2F7D0004_70000000_7B735105CFE51C91_logo_large_ep7_da_dk%%+IMAG.png | png | 197065 |
| S3_2F7D0004_78000000_B7B45C954958E742_logo_large_ep8_da_dk%%+IMAG.png | png | 187292 |
| S3_2F7D0004_80000000_C271676CA9063E84_logo_large_sp8_da_dk%%+IMAG.png | png | 261384 |
| S3_2F7D0004_88000000_45C7EC6D308EF48F_logo_large_ep9_da_dk%%+IMAG.png | png | 186977 |
| S3_2F7D0004_90000000_BCE690EB30EF9D8D_logo_large_ep10_da_dk%%+IMAG.png | png | 224453 |
| S3_2F7D0004_98000000_27D9AF4357AF0239_logo_large_sp9_da_dk%%+IMAG.png | png | 213564 |
| S3_2F7D0004_A0000000_DD93AB080EE295A8_logo_large_ep11_da_dk%%+IMAG.png | png | 170502 |
| S3_2F7D0004_08000000_2C060F74F6FE25D5_logo_large_ep1_el_gr%%+IMAG.png | png | 196784 |
| S3_2F7D0004_10000000_DBCF180C9AF27E8B_logo_large_sp1_el_gr%%+IMAG.png | png | 198246 |
| S3_2F7D0004_20000000_264A62355E6B6D10_logo_large_sp2_el_gr%%+IMAG.png | png | 201624 |
| S3_2F7D0004_28000000_DDFEECF1FE228F37_logo_large_ep3_el_gr%%+IMAG.png | png | 198489 |
| S3_2F7D0004_30000000_D54FC8D84FB0F1D9_logo_large_sp3_el_gr%%+IMAG.png | png | 209822 |
| S3_2F7D0004_38000000_F06D95FA743E21F0_logo_large_ep4_el_gr%%+IMAG.png | png | 311357 |
| S3_2F7D0004_40000000_B9AB0C058EE93046_logo_large_sp4_EL_GR%%+IMAG.png | png | 141969 |
| S3_2F7D0004_48000000_F89691DC0EA8B8B9_logo_large_ep5_el_gr%%+IMAG.png | png | 223525 |
| S3_2F7D0004_50000000_BAB823EE3F2AC857_logo_large_sp5_el_gr%%+IMAG.png | png | 186920 |
| S3_2F7D0004_58000000_688519E3C9A7C6BA_logo_large_ep6_el_gr%%+IMAG.png | png | 191136 |
| S3_2F7D0004_60000000_BCEE5422250CFBDC_logo_large_sp6_el_gr%%+IMAG.png | png | 401916 |
| S3_2F7D0004_68000000_0B5EDBB4C92BCFF5_logo_large_sp7_el_gr%%+IMAG.png | png | 163630 |
| S3_2F7D0004_70000000_FF15E11059EA466B_logo_large_ep7_el_gr%%+IMAG.png | png | 186853 |
| S3_2F7D0004_78000000_9657508F7E723964_logo_large_ep8_el_gr%%+IMAG.png | png | 187754 |
| S3_2F7D0004_80000000_32E6D7657E2417A2_logo_large_sp8_el_gr%%+IMAG.png | png | 274811 |
| S3_2F7D0004_88000000_C96AC077BA9491FD_logo_large_ep9_el_gr%%+IMAG.png | png | 172074 |
| S3_2F7D0004_90000000_12C358F632B1C79F_logo_large_ep10_el_gr%%+IMAG.png | png | 260602 |
| S3_2F7D0004_98000000_34CD2F4E2F1E0D33_logo_large_sp9_el_gr%%+IMAG.png | png | 219747 |
| S3_2F7D0004_A0000000_92B163010AB50D8E_logo_large_ep11_el_gr%%+IMAG.png | png | 171452 |
| desktop.ini | ini | 2762 |
| S3_2F7D0004_08000000_6481367485E6B154_logo_large_ep1_es_mx%%+IMAG.png | png | 196784 |
| S3_2F7D0004_10000000_D885E70D2A8445CE_logo_large_sp1_es_mx%%+IMAG.png | png | 198246 |
| S3_2F7D0004_20000000_4D9B6B34E3A6BCD5_logo_large_sp2_es_mx%%+IMAG.png | png | 201625 |
| S3_2F7D0004_28000000_92A653F2641AA432_logo_large_ep3_es_mx%%+IMAG.png | png | 198489 |
| S3_2F7D0004_30000000_687C97D8A30795D0_logo_large_sp3_es_mx%%+IMAG.png | png | 209822 |
| S3_2F7D0004_38000000_17BE9EF9F97970B5_logo_large_ep4_es_mx%%+IMAG.png | png | 271422 |
| S3_2F7D0004_40000000_A3843506135B3F67_logo_large_sp4_es_mx%%+IMAG.png | png | 141969 |
| S3_2F7D0004_48000000_8A1060DC608DC830_logo_large_ep5_es_mx%%+IMAG.png | png | 223496 |
| S3_2F7D0004_50000000_6F5F8AEEA522DD52_logo_large_sp5_es_mx%%+IMAG.png | png | 186920 |
| S3_2F7D0004_58000000_6F354AE33CFADC73_logo_large_ep6_es_mx%%+IMAG.png | png | 191136 |
| S3_2F7D0004_60000000_B5A00522214C6609_logo_large_sp6_es_mx%%+IMAG.png | png | 401916 |
| S3_2F7D0004_68000000_422702B456A2C6F4_logo_large_sp7_es_mx%%+IMAG.png | png | 163633 |
| S3_2F7D0004_70000000_FBCCB010E97C0CAE_logo_large_ep7_es_mx%%+IMAG.png | png | 186853 |
| S3_2F7D0004_78000000_04DD818F2C8D29E1_logo_large_ep8_es_mx%%+IMAG.png | png | 187754 |
| S3_2F7D0004_80000000_D8F0C865DC99932B_logo_large_sp8_es_mx%%+IMAG.png | png | 228354 |
| S3_2F7D0004_88000000_A219C77835595D0C_logo_large_ep9_es_mx%%+IMAG.png | png | 172074 |
| S3_2F7D0004_90000000_3E18FFF64B3E99CA_logo_large_ep10_es_mx%%+IMAG.png | png | 260602 |
| S3_2F7D0004_98000000_A7591E4E708C69E6_logo_large_sp9_es_mx%%+IMAG.png | png | 229935 |
| S3_2F7D0004_A0000000_F0AD2C013F92F7FF_logo_large_ep11_es_mx%%+IMAG.png | png | 177319 |
| desktop.ini | ini | 2906 |
| S3_2F7D0004_08000000_C0D3117F8AB119D5_logo_large_ep1_fi_fi%%+IMAG.png | png | 194030 |
| S3_2F7D0004_10000000_DC76C1F5399E9CE3_logo_large_sp1_fi_fi%%+IMAG.png | png | 179905 |
| S3_2F7D0004_18000000_00165AFE9095E93E_logo_large_ep2_fi_fi%%+IMAG.png | png | 306761 |
| S3_2F7D0004_20000000_CFF7B851A8779EF8_logo_large_sp2_fi_fi%%+IMAG.png | png | 213355 |
| S3_2F7D0004_28000000_EDF64ED58BF02A57_logo_large_ep3_fi_fi%%+IMAG.png | png | 186883 |
| S3_2F7D0004_30000000_2ECF82DF5B610C41_logo_large_sp3_fi_fi%%+IMAG.png | png | 226771 |
| S3_2F7D0004_38000000_F251EC11D7BB8958_logo_large_ep4_fi_fi%%+IMAG.png | png | 227414 |
| S3_2F7D0004_40000000_DE8291FAD30FB6DE_logo_large_sp4_FI_FI%%+IMAG.png | png | 143408 |
| S3_2F7D0004_48000000_52164BE31A58D321_logo_large_ep5_fi_fi%%+IMAG.png | png | 217391 |
| S3_2F7D0004_50000000_75DD85D6B668A2F7_logo_large_sp5_fi_fi%%+IMAG.png | png | 225957 |
| S3_2F7D0004_58000000_69B7B7DD8266EFBA_logo_large_ep6_fi_fi%%+IMAG.png | png | 182410 |
| S3_2F7D0004_60000000_16F9123A4AD03CBC_logo_large_sp6_fi_fi%%+IMAG.png | png | 398151 |
| S3_2F7D0004_68000000_F4FDDDBA736E8475_logo_large_sp7_fi_fi%%+IMAG.png | png | 164238 |
| S3_2F7D0004_70000000_56428AF41097B8C3_logo_large_ep7_fi_fi%%+IMAG.png | png | 193025 |
| S3_2F7D0004_78000000_DCE5EEA708A7A674_logo_large_ep8_fi_fi%%+IMAG.png | png | 184814 |
| S3_2F7D0004_80000000_9D3FD55AE9B77F92_logo_large_sp8_fi_fi%%+IMAG.png | png | 236863 |
| S3_2F7D0004_88000000_CAC5E27E0401E76D_logo_large_ep9_fi_fi%%+IMAG.png | png | 177799 |
| S3_2F7D0004_90000000_0F3E5AD924F1226F_logo_large_ep10_fi_fi%%+IMAG.png | png | 222116 |
| S3_2F7D0004_98000000_75F07931481206DB_logo_large_sp9_fi_fi%%+IMAG.png | png | 218841 |
| S3_2F7D0004_A0000000_B862E8F64F953856_logo_large_ep11_fi_fi%%+IMAG.png | png | 165749 |
| desktop.ini | ini | 2906 |
| S3_2F7D0004_08000000_A0E05B08EACC405D_logo_large_ep1_hu_hu%%+IMAG.png | png | 196386 |
| S3_2F7D0004_10000000_AB5AFFA1532E9DFB_logo_large_sp1_hu_hu%%+IMAG.png | png | 177550 |
| S3_2F7D0004_18000000_30187CEC713A8A0A_logo_large_ep2_hu_hu%%+IMAG.png | png | 311295 |
| S3_2F7D0004_20000000_BC6A3EA568315FEC_logo_large_sp2_hu_hu%%+IMAG.png | png | 213076 |
| S3_2F7D0004_28000000_56D14D4C56266F9F_logo_large_ep3_hu_hu%%+IMAG.png | png | 195861 |
| S3_2F7D0004_30000000_4815CCAEF38CAF39_logo_large_sp3_hu_hu%%+IMAG.png | png | 223162 |
| S3_2F7D0004_38000000_DEC572659776FD4C_logo_large_ep4_hu_hu%%+IMAG.png | png | 235291 |
| S3_2F7D0004_40000000_B64CB3ED9A416E2A_logo_large_sp4_HU_HU%%+IMAG.png | png | 152493 |
| S3_2F7D0004_48000000_6B5D95B2B2862919_logo_large_ep5_hu_hu%%+IMAG.png | png | 223529 |
| S3_2F7D0004_50000000_31D6844895BB613F_logo_large_sp5_hu_hu%%+IMAG.png | png | 223304 |
| S3_2F7D0004_58000000_B1EF9A0CFFCF0246_logo_large_ep6_hu_hu%%+IMAG.png | png | 194947 |
| S3_2F7D0004_60000000_D453B84BCF558FF0_logo_large_sp6_hu_hu%%+IMAG.png | png | 406835 |
| S3_2F7D0004_68000000_7CD32748BA16C17D_logo_large_sp7_hu_hu%%+IMAG.png | png | 167053 |
| S3_2F7D0004_70000000_2526C8A02A27B9DB_logo_large_ep7_hu_hu%%+IMAG.png | png | 199479 |
| S3_2F7D0004_78000000_B98D343065DF9CC8_logo_large_ep8_hu_hu%%+IMAG.png | png | 184676 |
| S3_2F7D0004_80000000_B0CD170729FD5FBE_logo_large_sp8_hu_hu%%+IMAG.png | png | 236195 |
| S3_2F7D0004_88000000_9D4FAC902586A955_logo_large_ep9_hu_hu%%+IMAG.png | png | 170622 |
| S3_2F7D0004_90000000_40E118CCAFD8ED77_logo_large_ep10_hu_hu%%+IMAG.png | png | 235184 |
| S3_2F7D0004_98000000_4D5A5766C0C4AFB3_logo_large_sp9_hu_hu%%+IMAG.png | png | 227694 |
| S3_2F7D0004_A0000000_DA08AB6CF0EBBAC2_logo_large_ep11_hu_hu%%+IMAG.png | png | 171792 |
| desktop.ini | ini | 2762 |
| S3_2F7D0004_08000000_A26215144D526191_logo_large_ep1_it_it%%+IMAG.png | png | 201989 |
| S3_2F7D0004_10000000_48E3F1A7F5243C47_logo_large_sp1_it_it%%+IMAG.png | png | 159521 |
| S3_2F7D0004_20000000_BA0F749A04F33198_logo_large_sp2_it_it%%+IMAG.png | png | 217785 |
| S3_2F7D0004_28000000_67A2CF52A7CE2A4B_logo_large_ep3_it_it%%+IMAG.png | png | 198489 |
| S3_2F7D0004_30000000_A01D96B56E15F44D_logo_large_sp3_it_it%%+IMAG.png | png | 209822 |
| S3_2F7D0004_38000000_85E4A85F1C35C7F8_logo_large_ep4_it_it%%+IMAG.png | png | 271422 |
| S3_2F7D0004_40000000_F89A31E25DB7E07E_logo_large_sp4_IT_IT%%+IMAG.png | png | 149344 |
| S3_2F7D0004_48000000_C1B15FB92B9C26AD_logo_large_ep5_it_it%%+IMAG.png | png | 225322 |
| S3_2F7D0004_50000000_EF8A0653D246A2EB_logo_large_sp5_it_it%%+IMAG.png | png | 186920 |
| S3_2F7D0004_58000000_2995C806FAD8CC5A_logo_large_ep6_it_it%%+IMAG.png | png | 191150 |
| S3_2F7D0004_60000000_D483FE406E3F4F3C_logo_large_sp6_it_it%%+IMAG.png | png | 418048 |
| S3_2F7D0004_68000000_D68CE14F360FCC31_logo_large_sp7_it_it%%+IMAG.png | png | 163633 |
| S3_2F7D0004_70000000_6C2BBAABB41DB627_logo_large_ep7_it_it%%+IMAG.png | png | 186853 |
| S3_2F7D0004_78000000_63395A29ECC98454_logo_large_ep8_it_it%%+IMAG.png | png | 188136 |
| S3_2F7D0004_80000000_1344050088078AB2_logo_large_sp8_it_it%%+IMAG.png | png | 274811 |
| S3_2F7D0004_88000000_F2C986969DE31D89_logo_large_ep9_it_it%%+IMAG.png | png | 183837 |
| S3_2F7D0004_90000000_51B27AD301807083_logo_large_ep10_it_it%%+IMAG.png | png | 237084 |
| S3_2F7D0004_98000000_D4DB496CC5032B1F_logo_large_sp9_it_it%%+IMAG.png | png | 219747 |
| S3_2F7D0004_A0000000_1C554961B460AFB6_logo_large_ep11_it_it%%+IMAG.png | png | 171452 |
| S3_2F7D0004_40000000_8A6BD4DC67A11DE4_logo_large_sp4_JP_JP%%+IMAG.png | png | 141969 |
| S3_2F7D0004_50000000_9CA6C336972AC409_logo_large_sp5_jp_jp%%+IMAG.png | png | 186920 |
| desktop.ini | ini | 2906 |
| S3_2F7D0004_08000000_AF92702176877B56_logo_large_ep1_ko_kr%%+IMAG.png | png | 178232 |
| S3_2F7D0004_10000000_7DA94495D7616D2C_logo_large_sp1_ko_kr%%+IMAG.png | png | 179580 |
| S3_2F7D0004_18000000_E23C9FD4E3465619_logo_large_ep2_ko_kr%%+IMAG.png | png | 311875 |
| S3_2F7D0004_20000000_A5EBE1AC349FC573_logo_large_sp2_ko_kr%%+IMAG.png | png | 201625 |
| S3_2F7D0004_28000000_4949224574ED2F18_logo_large_ep3_ko_kr%%+IMAG.png | png | 211546 |
| S3_2F7D0004_30000000_B69461C6936C4D7A_logo_large_sp3_ko_kr%%+IMAG.png | png | 209822 |
| S3_2F7D0004_38000000_71C115714BE25AD3_logo_large_ep4_ko_kr%%+IMAG.png | png | 236174 |
| S3_2F7D0004_40000000_BD41D6D122DB47B9_logo_large_sp4_KO_KR%%+IMAG.png | png | 141969 |
| S3_2F7D0004_48000000_DB8E2ACA53D5A8DA_logo_large_ep5_ko_kr%%+IMAG.png | png | 228571 |
| S3_2F7D0004_50000000_244E5941B48220B8_logo_large_sp5_ko_kr%%+IMAG.png | png | 186920 |
| S3_2F7D0004_58000000_625FECF57067D85D_logo_large_ep6_ko_kr%%+IMAG.png | png | 190591 |
| S3_2F7D0004_60000000_21068B51B2C945CF_logo_large_sp6_ko_kr%%+IMAG.png | png | 401916 |
| S3_2F7D0004_68000000_8EEB3C6148B52576_logo_large_sp7_ko_kr%%+IMAG.png | png | 163633 |
| S3_2F7D0004_70000000_A0F00D999659340C_logo_large_ep7_ko_kr%%+IMAG.png | png | 149464 |
| S3_2F7D0004_78000000_4F15B73C1C75FC77_logo_large_ep8_ko_kr%%+IMAG.png | png | 221484 |
| S3_2F7D0004_80000000_C2BC99EEB02BA565_logo_large_sp8_ko_kr%%+IMAG.png | png | 228354 |
| S3_2F7D0004_88000000_0D8031A7C6D60D5E_logo_large_ep9_ko_kr%%+IMAG.png | png | 172074 |
| S3_2F7D0004_90000000_132F5DC1340BBCA0_logo_large_ep10_ko_kr%%+IMAG.png | png | 260602 |
| S3_2F7D0004_98000000_96572C5AF78CC434_logo_large_sp9_ko_kr%%+IMAG.png | png | 219747 |
| S3_2F7D0004_A0000000_EB1E1E5476604161_logo_large_ep11_ko_kr%%+IMAG.png | png | 173113 |
| desktop.ini | ini | 2906 |
| S3_2F7D0004_08000000_87C16B3E6BBAB29D_logo_large_ep1_no_no%%+IMAG.png | png | 188836 |
| S3_2F7D0004_10000000_C18C67AE8195700B_logo_large_sp1_no_no%%+IMAG.png | png | 178804 |
| S3_2F7D0004_18000000_9CA584BC379F1912_logo_large_ep2_no_no%%+IMAG.png | png | 320857 |
| S3_2F7D0004_20000000_63BAA6938BDB7ADC_logo_large_sp2_no_no%%+IMAG.png | png | 202860 |
| S3_2F7D0004_28000000_18911D1BBC7CCE6F_logo_large_ep3_no_no%%+IMAG.png | png | 216101 |
| S3_2F7D0004_30000000_8790649CDC6F40D9_logo_large_sp3_no_no%%+IMAG.png | png | 222442 |
| S3_2F7D0004_38000000_2DDDDA58A1AE2EBC_logo_large_ep4_no_no%%+IMAG.png | png | 236790 |
| S3_2F7D0004_40000000_795EBBB878A75232_logo_large_sp4_NO_NO%%+IMAG.png | png | 137183 |
| S3_2F7D0004_48000000_AAD72DA09B6707B9_logo_large_ep5_no_no%%+IMAG.png | png | 222743 |
| S3_2F7D0004_50000000_F54A5417FD85068F_logo_large_sp5_no_no%%+IMAG.png | png | 220726 |
| S3_2F7D0004_58000000_95A3EA1F2B01B12E_logo_large_ep6_no_no%%+IMAG.png | png | 192033 |
| S3_2F7D0004_60000000_50E3A87B6A7E7940_logo_large_sp6_no_no%%+IMAG.png | png | 393065 |
| S3_2F7D0004_68000000_BD9F377955E9B1BD_logo_large_sp7_no_no%%+IMAG.png | png | 169328 |
| S3_2F7D0004_70000000_E68730B242007F6B_logo_large_ep7_no_no%%+IMAG.png | png | 196722 |
| S3_2F7D0004_78000000_7EF2B465D42AF978_logo_large_ep8_no_no%%+IMAG.png | png | 194967 |
| S3_2F7D0004_80000000_097CD719065388C6_logo_large_sp8_no_no%%+IMAG.png | png | 226333 |
| S3_2F7D0004_88000000_51636CC0710A3895_logo_large_ep9_no_no%%+IMAG.png | png | 180765 |
| S3_2F7D0004_90000000_F880989819549E47_logo_large_ep10_no_no%%+IMAG.png | png | 221766 |
| S3_2F7D0004_98000000_6E862F77ECC009C3_logo_large_sp9_no_no%%+IMAG.png | png | 207945 |
| S3_2F7D0004_A0000000_12EF2337812D092A_logo_large_ep11_no_no%%+IMAG.png | png | 170350 |
| desktop.ini | ini | 2906 |
| S3_2F7D0004_08000000_1CA5E4D2F93F9EF7_logo_large_ep1_pl_pl%%+IMAG.png | png | 205626 |
| S3_2F7D0004_10000000_6920A85B15EBE9ED_logo_large_sp1_pl_pl%%+IMAG.png | png | 181467 |
| S3_2F7D0004_18000000_A6D083AB24329580_logo_large_ep2_pl_pl%%+IMAG.png | png | 306823 |
| S3_2F7D0004_20000000_CBAA44DBA89C3A3A_logo_large_sp2_pl_pl%%+IMAG.png | png | 215237 |
| S3_2F7D0004_28000000_C82E85823C940A31_logo_large_ep3_pl_pl%%+IMAG.png | png | 225260 |
| S3_2F7D0004_30000000_A3B1F674676C6FF3_logo_large_sp3_pl_pl%%+IMAG.png | png | 227532 |
| S3_2F7D0004_38000000_95CC78A0BE6D3B1A_logo_large_ep4_pl_pl%%+IMAG.png | png | 222398 |
| S3_2F7D0004_40000000_8388BAA765391BA0_logo_large_sp4_PL_PL%%+IMAG.png | png | 149860 |
| S3_2F7D0004_48000000_C8ABBF7827D5CB53_logo_large_ep5_pl_pl%%+IMAG.png | png | 217747 |
| S3_2F7D0004_50000000_5015BC83670C82D1_logo_large_sp5_pl_pl%%+IMAG.png | png | 225564 |
| S3_2F7D0004_58000000_D327814EA1C60C5C_logo_large_ep6_pl_pl%%+IMAG.png | png | 186622 |
| S3_2F7D0004_60000000_5A412E81C253C5FE_logo_large_sp6_pl_pl%%+IMAG.png | png | 398443 |
| S3_2F7D0004_68000000_50CFB10DE1FB5597_logo_large_sp7_pl_pl%%+IMAG.png | png | 164410 |
| S3_2F7D0004_70000000_8AB4715ED3721C4D_logo_large_ep7_pl_pl%%+IMAG.png | png | 194950 |
| S3_2F7D0004_78000000_1CC82AEE7D483C56_logo_large_ep8_pl_pl%%+IMAG.png | png | 191601 |
| S3_2F7D0004_80000000_B2B87ED0F341FC54_logo_large_sp8_pl_pl%%+IMAG.png | png | 243839 |
| S3_2F7D0004_88000000_F97DB4C56EF4BFAF_logo_large_ep9_pl_pl%%+IMAG.png | png | 166533 |
| S3_2F7D0004_90000000_E9769185D5950249_logo_large_ep10_pl_pl%%+IMAG.png | png | 219906 |
| S3_2F7D0004_98000000_EA1F80A8A95C46C5_logo_large_sp9_pl_pl%%+IMAG.png | png | 215130 |
| S3_2F7D0004_A0000000_87F732AEE32F47F8_logo_large_ep11_pl_pl%%+IMAG.png | png | 173875 |
| S3_2F7D0004_00000000_5624ADDD3A21396E_logo_large_pt_br%%+IMAG.png | png | 190647 |
| S3_2F7D0004_08000000_EA9FBED36D5F337B_logo_large_ep1_pt_br%%+IMAG.png | png | 203973 |
| S3_2F7D0004_10000000_21EB5E5AED0C0EF1_logo_large_sp1_pt_br%%+IMAG.png | png | 185673 |
| S3_2F7D0004_18000000_63015DAAFE362168_logo_large_ep2_pt_br%%+IMAG.png | png | 314445 |
| S3_2F7D0004_20000000_8474FADB7FBC5F2A_logo_large_sp2_pt_br%%+IMAG.png | png | 251323 |
| S3_2F7D0004_28000000_FA34AB81C874759D_logo_large_ep3_pt_br%%+IMAG.png | png | 197394 |
| S3_2F7D0004_30000000_D5B72073F34B2E8F_logo_large_sp3_pt_br%%+IMAG.png | png | 224731 |
| S3_2F7D0004_38000000_504A2EA096FEF48A_logo_large_ep4_pt_br%%+IMAG.png | png | 235834 |
| S3_2F7D0004_40000000_3E0694A73DCB1208_logo_large_sp4_PT_BR%%+IMAG.png | png | 162820 |
| S3_2F7D0004_48000000_F74BE977B0D314EF_logo_large_ep5_pt_br%%+IMAG.png | png | 224043 |
| S3_2F7D0004_50000000_7EB5E282F009C53D_logo_large_sp5_pt_br%%+IMAG.png | png | 256152 |
| S3_2F7D0004_58000000_A3AE5B4F1810D8AC_logo_large_ep6_pt_br%%+IMAG.png | png | 194887 |
| S3_2F7D0004_60000000_88E154814B510856_logo_large_sp6_pt_br%%+IMAG.png | png | 393788 |
| S3_2F7D0004_68000000_1ECA8B0E561C9D1B_logo_large_sp7_pt_br%%+IMAG.png | png | 165063 |
| S3_2F7D0004_70000000_4532275EAC03D5D1_logo_large_ep7_pt_br%%+IMAG.png | png | 189849 |
| S3_2F7D0004_78000000_EE2800EEF44AF2AE_logo_large_ep8_pt_br%%+IMAG.png | png | 193905 |
| S3_2F7D0004_80000000_F83AC8D11AB042C4_logo_large_sp8_pt_br%%+IMAG.png | png | 271040 |
| S3_2F7D0004_88000000_3E261EC595A99893_logo_large_ep9_pt_br%%+IMAG.png | png | 179044 |
| S3_2F7D0004_90000000_B770878649B4C655_logo_large_ep10_pt_br%%+IMAG.png | png | 251946 |
| S3_2F7D0004_98000000_1C25C6A8353CE8E9_logo_large_sp9_pt_br%%+IMAG.png | png | 245378 |
| S3_2F7D0004_A0000000_B6973CAE6C2C5AE0_logo_large_ep11_pt_br%%+IMAG.png | png | 164814 |
| desktop.ini | ini | 2906 |
| S3_2F7D0004_08000000_1A8589E533518AAD_logo_large_ep1_ru_ru%%+IMAG.png | png | 199514 |
| S3_2F7D0004_10000000_B0E9E14E1C61094B_logo_large_sp1_ru_ru%%+IMAG.png | png | 174268 |
| S3_2F7D0004_18000000_EE723299118D4E5E_logo_large_ep2_ru_ru%%+IMAG.png | png | 288992 |
| S3_2F7D0004_20000000_D0F6B7ECC444F428_logo_large_sp2_ru_ru%%+IMAG.png | png | 218581 |
| S3_2F7D0004_28000000_11ABBE75447C71EF_logo_large_ep3_ru_ru%%+IMAG.png | png | 222117 |
| S3_2F7D0004_30000000_8B887B8603C54F09_logo_large_sp3_ru_ru%%+IMAG.png | png | 214855 |
| S3_2F7D0004_38000000_9CCBEBB1DB878988_logo_large_ep4_ru_ru%%+IMAG.png | png | 230454 |
| S3_2F7D0004_40000000_7659699A3C05C6FE_logo_large_sp4_RU_RU%%+IMAG.png | png | 187233 |
| S3_2F7D0004_48000000_B0834489C4305E69_logo_large_ep5_ru_ru%%+IMAG.png | png | 219108 |
| S3_2F7D0004_50000000_EE63F5718582F70F_logo_large_sp5_ru_ru%%+IMAG.png | png | 221329 |
| S3_2F7D0004_58000000_DC015042164BC33A_logo_large_ep6_ru_ru%%+IMAG.png | png | 189281 |
| S3_2F7D0004_60000000_EC4611932E4C169C_logo_large_sp6_ru_ru%%+IMAG.png | png | 399318 |
| S3_2F7D0004_68000000_4EB056201C0EF54D_logo_large_sp7_ru_ru%%+IMAG.png | png | 164680 |
| S3_2F7D0004_70000000_2AB5AA4CF35A252B_logo_large_ep7_ru_ru%%+IMAG.png | png | 195254 |
| S3_2F7D0004_78000000_3AAA9E0038D504F4_logo_large_ep8_ru_ru%%+IMAG.png | png | 210299 |
| S3_2F7D0004_80000000_9C40DDBFCDEA37B2_logo_large_sp8_ru_ru%%+IMAG.png | png | 228408 |
| S3_2F7D0004_88000000_6E0CC9D75B9D6D25_logo_large_ep9_ru_ru%%+IMAG.png | png | 175269 |
| S3_2F7D0004_90000000_BC445A792AE6A867_logo_large_ep10_ru_ru%%+IMAG.png | png | 264452 |
| S3_2F7D0004_98000000_FD6A299678F7E843_logo_large_sp9_ru_ru%%+IMAG.png | png | 225802 |
| S3_2F7D0004_A0000000_5A9E519D1F6802D6_logo_large_ep11_ru_ru%%+IMAG.png | png | 171420 |
| desktop.ini | ini | 2906 |
| S3_2F7D0004_08000000_B17CD9EB3FCA6792_logo_large_ep1_sv_se%%+IMAG.png | png | 194846 |
| S3_2F7D0004_10000000_F7C65D548D3B0D04_logo_large_sp1_sv_se%%+IMAG.png | png | 175696 |
| S3_2F7D0004_18000000_A795B692A0B34A6D_logo_large_ep2_sv_se%%+IMAG.png | png | 308089 |
| S3_2F7D0004_20000000_03CCD7E17F7F51EB_logo_large_sp2_sv_se%%+IMAG.png | png | 213236 |
| S3_2F7D0004_28000000_58883A7BB55675D8_logo_large_ep3_sv_se%%+IMAG.png | png | 224367 |
| S3_2F7D0004_30000000_5B3F5B914AB62AEE_logo_large_sp3_sv_se%%+IMAG.png | png | 222162 |
| S3_2F7D0004_38000000_D1550BA698337BCB_logo_large_ep4_sv_se%%+IMAG.png | png | 230957 |
| S3_2F7D0004_40000000_8601ED8EE32D170D_logo_large_sp4_SV_SE%%+IMAG.png | png | 138968 |
| S3_2F7D0004_48000000_D3582490203DB24E_logo_large_ep5_sv_se%%+IMAG.png | png | 223849 |
| S3_2F7D0004_50000000_35417177F65EAEF8_logo_large_sp5_sv_se%%+IMAG.png | png | 223230 |
| S3_2F7D0004_58000000_EBA8D436BD716149_logo_large_ep6_sv_se%%+IMAG.png | png | 183432 |
| S3_2F7D0004_60000000_3BDEC18C813587AF_logo_large_sp6_sv_se%%+IMAG.png | png | 396033 |
| S3_2F7D0004_68000000_E75AA62629F966B2_logo_large_sp7_sv_se%%+IMAG.png | png | 167060 |
| S3_2F7D0004_70000000_1B0E26584C3487E4_logo_large_ep7_sv_se%%+IMAG.png | png | 197719 |
| S3_2F7D0004_78000000_F7AB4DF542324447_logo_large_ep8_sv_se%%+IMAG.png | png | 189076 |
| S3_2F7D0004_80000000_556461B95D1033C1_logo_large_sp8_sv_se%%+IMAG.png | png | 219156 |
| S3_2F7D0004_88000000_1A3339DE0515B36A_logo_large_ep9_sv_se%%+IMAG.png | png | 185280 |
| S3_2F7D0004_90000000_0094D67F99972690_logo_large_ep10_sv_se%%+IMAG.png | png | 237568 |
| S3_2F7D0004_98000000_EDC1A5A1D1D0973C_logo_large_sp9_sv_se%%+IMAG.png | png | 212888 |
| S3_2F7D0004_A0000000_13C0D596AE8C4BE5_logo_large_ep11_sv_se%%+IMAG.png | png | 172462 |
| Logo_160x147.svg | svg | 257950 |
| Logo_429x560.svg | svg | 257944 |
| Logo_470x467.svg | svg | 257946 |
| Logo_496x553.svg | svg | 257953 |
| Logo_500x500.svg | svg | 257950 |
| Logo_505x502.svg | svg | 257958 |
| Logo_512x490.svg | svg | 257959 |
| Logo_532x490.svg | svg | 257966 |
| Logo_532x532.svg | svg | 257955 |
| Logo_550x550.svg | svg | 257948 |
| Logo_562x532.svg | svg | 257965 |
| Logo_580x580.svg | svg | 257958 |
| Logo_600x555.svg | svg | 257964 |
| Logo_600x600.svg | svg | 257965 |
| desktop.ini | ini | 3042 |
| S3_2F7D0004_00000000_FF0F75837D45B388_logo_large_de_de%%+IMAG.svg | svg | 281980 |
| S3_2F7D0004_08000000_7B00A76DB97A20A5_logo_large_ep1_de_de%%+IMAG.svg | svg | 282013 |
| S3_2F7D0004_10000000_7C341C0225B9F833_logo_large_sp1_de_de%%+IMAG.svg | svg | 282013 |
| S3_2F7D0004_18000000_A9F3F10F798BD072_logo_large_ep2_de_de%%+IMAG.svg | svg | 282014 |
| S3_2F7D0004_20000000_CB67CA3FFB12742C_logo_large_sp2_de_de%%+IMAG.svg | svg | 282013 |
| S3_2F7D0004_28000000_F28640E739555B37_logo_large_ep3_de_de%%+IMAG.svg | svg | 281992 |
| S3_2F7D0004_30000000_2CCC60CDB026C1A1_logo_large_sp3_de_de%%+IMAG.svg | svg | 282045 |
| S3_2F7D0004_38000000_973DFE051256BC8C_logo_large_ep4_de_de%%+IMAG.svg | svg | 281992 |
| S3_2F7D0004_40000000_84FA280BB9227412_logo_large_sp4_DE_DE%%+IMAG.svg | svg | 282038 |
| S3_2F7D0004_48000000_51C629D170901D01_logo_large_ep5_de_de%%+IMAG.svg | svg | 281992 |
| S3_2F7D0004_50000000_CD8B77E378EA4CD7_logo_large_sp5_de_de%%+IMAG.svg | svg | 281941 |
| S3_2F7D0004_58000000_CC6015EE427D1A4E_logo_large_ep6_de_de%%+IMAG.svg | svg | 281992 |
| S3_2F7D0004_60000000_446F3C28294B6630_logo_large_sp6_de_de%%+IMAG.svg | svg | 282038 |
| S3_2F7D0004_68000000_AF2B73A8A2378B45_logo_large_sp7_de_de%%+IMAG.svg | svg | 282057 |
| S3_2F7D0004_70000000_9F7AE505E4B1BF13_logo_large_ep7_de_de%%+IMAG.svg | svg | 281992 |
| S3_2F7D0004_78000000_93ACC895348C44C8_logo_large_ep8_de_de%%+IMAG.svg | svg | 281992 |
| S3_2F7D0004_80000000_A1CFC36C971CAA26_logo_large_sp8_de_de%%+IMAG.svg | svg | 282042 |
| S3_2F7D0004_88000000_20E7486D1B0A461D_logo_large_ep9_de_de%%+IMAG.svg | svg | 281992 |
| S3_2F7D0004_90000000_9C45FCEB1F07D70F_logo_large_ep10_de_de%%+IMAG.svg | svg | 282015 |
| S3_2F7D0004_98000000_487A8343699735EB_logo_large_sp9_de_de%%+IMAG.svg | svg | 282042 |
| S3_2F7D0004_A0000000_FE354F0820CC2A0A_logo_large_ep11_de_de%%+IMAG.svg | svg | 282044 |
| desktop.ini | ini | 3042 |
| S3_2F7D0004_00000000_C35F36788A64D202_logo_large_es_es%%+IMAG.svg | svg | 285161 |
| S3_2F7D0004_08000000_64813E7485E6BEB7_logo_large_ep1_es_es%%+IMAG.svg | svg | 285187 |
| S3_2F7D0004_10000000_D885EF0D2A84533D_logo_large_sp1_es_es%%+IMAG.svg | svg | 285187 |
| S3_2F7D0004_18000000_C5180609D0E17F24_logo_large_ep2_es_es%%+IMAG.svg | svg | 285194 |
| S3_2F7D0004_20000000_4D9B6334E3A6AF66_logo_large_sp2_es_es%%+IMAG.svg | svg | 285187 |
| S3_2F7D0004_28000000_92A64BF2641A96C1_logo_large_ep3_es_es%%+IMAG.svg | svg | 294747 |
| S3_2F7D0004_30000000_687C8FD8A3078863_logo_large_sp3_es_es%%+IMAG.svg | svg | 294729 |
| S3_2F7D0004_38000000_17BE96F9F9796346_logo_large_ep4_es_es%%+IMAG.svg | svg | 294747 |
| S3_2F7D0004_40000000_A3843D06135B4CC4_logo_large_sp4_ES_ES%%+IMAG.svg | svg | 294733 |
| S3_2F7D0004_48000000_8A1058DC608DBAC3_logo_large_ep5_es_es%%+IMAG.svg | svg | 294747 |
| S3_2F7D0004_50000000_6F5F82EEA522CFE1_logo_large_sp5_es_es%%+IMAG.svg | svg | 285186 |
| S3_2F7D0004_58000000_6F3542E33CFACE00_logo_large_ep6_es_es%%+IMAG.svg | svg | 294747 |
| S3_2F7D0004_60000000_B59FFD22214C58AA_logo_large_sp6_es_es%%+IMAG.svg | svg | 285217 |
| S3_2F7D0004_68000000_42270AB456A2D457_logo_large_sp7_es_es%%+IMAG.svg | svg | 285186 |
| S3_2F7D0004_70000000_FBCCB810E97C1A1D_logo_large_ep7_es_es%%+IMAG.svg | svg | 294747 |
| S3_2F7D0004_78000000_04DD898F2C8D3742_logo_large_ep8_es_es%%+IMAG.svg | svg | 294747 |
| S3_2F7D0004_80000000_D8F0D065DC99A098_logo_large_sp8_es_es%%+IMAG.svg | svg | 285181 |
| S3_2F7D0004_88000000_A219BF7835594FAF_logo_large_ep9_es_es%%+IMAG.svg | svg | 294747 |
| S3_2F7D0004_90000000_3E1907F64B3EA739_logo_large_ep10_es_es%%+IMAG.svg | svg | 285204 |
| S3_2F7D0004_98000000_A759164E708C5C75_logo_large_sp9_es_es%%+IMAG.svg | svg | 285181 |
| S3_2F7D0004_A0000000_F0AD24013F92E99C_logo_large_ep11_es_es%%+IMAG.svg | svg | 294717 |
| desktop.ini | ini | 3042 |
| S3_2F7D0004_00000000_86F2FC90EC619082_logo_large_fr_fr%%+IMAG.svg | svg | 281884 |
| S3_2F7D0004_08000000_78E0707FF38C4A5B_logo_large_ep1_fr_fr%%+IMAG.svg | svg | 292033 |
| S3_2F7D0004_10000000_14F224F4C8878E71_logo_large_sp1_fr_fr%%+IMAG.svg | svg | 292033 |
| S3_2F7D0004_18000000_B41F07FE661F753C_logo_large_ep2_fr_fr%%+IMAG.svg | svg | 292033 |
| S3_2F7D0004_20000000_B9D129522CEA27A6_logo_large_sp2_fr_fr%%+IMAG.svg | svg | 292033 |
| S3_2F7D0004_28000000_274AC1D51B9127D5_logo_large_ep3_fr_fr%%+IMAG.svg | svg | 292026 |
| S3_2F7D0004_30000000_CFFA91DF25CAED97_logo_large_sp3_fr_fr%%+IMAG.svg | svg | 292015 |
| S3_2F7D0004_38000000_DA785D125ABC7D86_logo_large_ep4_fr_fr%%+IMAG.svg | svg | 292026 |
| S3_2F7D0004_40000000_8F243EFAA5B466DC_logo_large_sp4_FR_FR%%+IMAG.svg | svg | 292018 |
| S3_2F7D0004_48000000_F4F55AE2E635FCF7_logo_large_ep5_fr_fr%%+IMAG.svg | svg | 292026 |
| S3_2F7D0004_50000000_AF31F8D64609A075_logo_large_sp5_fr_fr%%+IMAG.svg | svg | 292028 |
| S3_2F7D0004_58000000_1B3374DD55C55EC8_logo_large_ep6_fr_fr%%+IMAG.svg | svg | 292026 |
| S3_2F7D0004_60000000_632AA339E5900A8A_logo_large_sp6_fr_fr%%+IMAG.svg | svg | 292018 |
| S3_2F7D0004_68000000_AD0B3CBADC49B4FB_logo_large_sp7_fr_fr%%+IMAG.svg | svg | 292033 |
| S3_2F7D0004_70000000_9070EDF3A0F23ED1_logo_large_ep7_fr_fr%%+IMAG.svg | svg | 292026 |
| S3_2F7D0004_78000000_C50B4FA78BA6CCC2_logo_large_ep8_fr_fr%%+IMAG.svg | svg | 292026 |
| S3_2F7D0004_80000000_C491A25A6EF41C20_logo_large_sp8_fr_fr%%+IMAG.svg | svg | 292028 |
| S3_2F7D0004_88000000_F61BD17E1C8F3353_logo_large_ep9_fr_fr%%+IMAG.svg | svg | 292026 |
| S3_2F7D0004_90000000_E7ED5DD99FB5E76D_logo_large_ep10_fr_fr%%+IMAG.svg | svg | 292033 |
| S3_2F7D0004_98000000_4E9FAC31C2D71D29_logo_large_sp9_fr_fr%%+IMAG.svg | svg | 292028 |
| S3_2F7D0004_A0000000_DFB3E5F5D4D07354_logo_large_ep11_fr_fr%%+IMAG.svg | svg | 292022 |
| desktop.ini | ini | 2754 |
| S3_2F7D0004_00000000_E17097303264D66D_logo_large_ja_jp%%+IMAG.svg | svg | 355500 |
| S3_2F7D0004_08000000_5C87FD1A6DDFF7FC_logo_large_ep1_ja_jp%%+IMAG.svg | svg | 355577 |
| S3_2F7D0004_10000000_EEDA4D8FCF62DA4A_logo_large_sp1_ja_jp%%+IMAG.svg | svg | 355577 |
| S3_2F7D0004_18000000_1A86C6DFD343E66F_logo_large_ep2_ja_jp%%+IMAG.svg | svg | 355580 |
| S3_2F7D0004_20000000_14193CB22AB4D161_logo_large_sp2_ja_jp%%+IMAG.svg | svg | 355577 |
| S3_2F7D0004_28000000_54CD633AAAEAD1DE_logo_large_ep3_ja_jp%%+IMAG.svg | svg | 355496 |
| S3_2F7D0004_30000000_493FC6C09E0EC488_logo_large_sp3_ja_jp%%+IMAG.svg | svg | 355500 |
| S3_2F7D0004_38000000_DFEE707741F766C1_logo_large_ep4_ja_jp%%+IMAG.svg | svg | 355496 |
| S3_2F7D0004_48000000_C30B8FBF7507E168_logo_large_ep5_ja_jp%%+IMAG.svg | svg | 355496 |
| S3_2F7D0004_58000000_AD60BBFB526BA66B_logo_large_ep6_ja_jp%%+IMAG.svg | svg | 355496 |
| S3_2F7D0004_60000000_7E314E5CB84B7635_logo_large_sp6_ja_jp%%+IMAG.svg | svg | 355505 |
| S3_2F7D0004_68000000_90B2C955569D619C_logo_large_sp7_ja_jp%%+IMAG.svg | svg | 355485 |
| S3_2F7D0004_70000000_122116938E5AA12A_logo_large_ep7_ja_jp%%+IMAG.svg | svg | 355496 |
| S3_2F7D0004_78000000_760DEA41E9AB66AD_logo_large_ep8_ja_jp%%+IMAG.svg | svg | 355496 |
| S3_2F7D0004_80000000_AFA418F57F7CF623_logo_large_sp8_ja_jp%%+IMAG.svg | svg | 355471 |
| S3_2F7D0004_88000000_59D06EA1A95287D4_logo_large_ep9_ja_jp%%+IMAG.svg | svg | 355496 |
| S3_2F7D0004_90000000_525A0EBBA02C6956_logo_large_ep10_ja_jp%%+IMAG.svg | svg | 355572 |
| S3_2F7D0004_98000000_91B2A5553DB0DD42_logo_large_sp9_ja_jp%%+IMAG.svg | svg | 355472 |
| S3_2F7D0004_A0000000_1D86F55B6D1E3DE7_logo_large_ep11_ja_jp%%+IMAG.svg | svg | 355542 |
| desktop.ini | ini | 3042 |
| S3_2F7D0004_00000000_3625364F2E40892A_logo_large_nl_nl%%+IMAG.svg | svg | 289729 |
| S3_2F7D0004_08000000_919CB63E71A679CF_logo_large_ep1_nl_nl%%+IMAG.svg | svg | 289570 |
| S3_2F7D0004_10000000_A9140EAE7427C085_logo_large_sp1_nl_nl%%+IMAG.svg | svg | 289570 |
| S3_2F7D0004_18000000_B5F7FDBC45C6A374_logo_large_ep2_nl_nl%%+IMAG.svg | svg | 289570 |
| S3_2F7D0004_20000000_59069B938538306E_logo_large_sp2_nl_nl%%+IMAG.svg | svg | 289570 |
| S3_2F7D0004_28000000_FCB2A41BAC2BBF49_logo_large_ep3_nl_nl%%+IMAG.svg | svg | 289589 |
| S3_2F7D0004_30000000_8E058F9CDF77A86B_logo_large_sp3_nl_nl%%+IMAG.svg | svg | 289588 |
| S3_2F7D0004_38000000_268ECF589DEC5A4E_logo_large_ep4_nl_nl%%+IMAG.svg | svg | 289589 |
| S3_2F7D0004_40000000_92B134B886CEDB94_logo_large_sp4_NL_NL%%+IMAG.svg | svg | 289591 |
| S3_2F7D0004_48000000_B2FF58A09FE103CB_logo_large_ep5_nl_nl%%+IMAG.svg | svg | 289589 |
| S3_2F7D0004_50000000_DB1EDB17EEA58CE9_logo_large_sp5_nl_nl%%+IMAG.svg | svg | 289576 |
| S3_2F7D0004_58000000_AFD0631F39E2DEF0_logo_large_ep6_nl_nl%%+IMAG.svg | svg | 289589 |
| S3_2F7D0004_60000000_49955D7B66BDEAD2_logo_large_sp6_nl_nl%%+IMAG.svg | svg | 289591 |
| S3_2F7D0004_68000000_C5C782795A63E46F_logo_large_sp7_nl_nl%%+IMAG.svg | svg | 289600 |
| S3_2F7D0004_70000000_CC5AD7B2331F8865_logo_large_ep7_nl_nl%%+IMAG.svg | svg | 289589 |
| S3_2F7D0004_78000000_77A48965D06AA16A_logo_large_ep8_nl_nl%%+IMAG.svg | svg | 289589 |
| S3_2F7D0004_80000000_255C301916A61448_logo_large_sp8_nl_nl%%+IMAG.svg | svg | 289572 |
| S3_2F7D0004_88000000_58B277C074CC0DC7_logo_large_ep9_nl_nl%%+IMAG.svg | svg | 289589 |
| S3_2F7D0004_90000000_DCA21F9809038F21_logo_large_ep10_nl_nl%%+IMAG.svg | svg | 289565 |
| S3_2F7D0004_98000000_560DB677DF5223BD_logo_large_sp9_nl_nl%%+IMAG.svg | svg | 289572 |
| S3_2F7D0004_A0000000_2D1B9C37900E36CC_logo_large_ep11_nl_nl%%+IMAG.svg | svg | 289586 |
| desktop.ini | ini | 2906 |
| S3_2F7D0004_08000000_EA9FACD36D5F1407_logo_large_ep1_pt_pt%%+IMAG.svg | svg | 302772 |
| S3_2F7D0004_10000000_21EB505AED0BF6CD_logo_large_sp1_pt_pt%%+IMAG.svg | svg | 302805 |
| S3_2F7D0004_18000000_63014BAAFE3602F0_logo_large_ep2_pt_pt%%+IMAG.svg | svg | 302797 |
| S3_2F7D0004_20000000_84750CDB7FBC7D9A_logo_large_sp2_pt_pt%%+IMAG.svg | svg | 302805 |
| S3_2F7D0004_28000000_FA349D81C8745E51_logo_large_ep3_pt_pt%%+IMAG.svg | svg | 302808 |
| S3_2F7D0004_30000000_D5B72E73F34B46B3_logo_large_sp3_pt_pt%%+IMAG.svg | svg | 302807 |
| S3_2F7D0004_38000000_504A40A096FF13FA_logo_large_ep4_pt_pt%%+IMAG.svg | svg | 302808 |
| S3_2F7D0004_40000000_3E0682A73DCAF390_logo_large_sp4_PT_PT%%+IMAG.svg | svg | 302785 |
| S3_2F7D0004_48000000_F74BF777B0D32C13_logo_large_ep5_pt_pt%%+IMAG.svg | svg | 302808 |
| S3_2F7D0004_50000000_7EB5D482F009ADF1_logo_large_sp5_pt_pt%%+IMAG.svg | svg | 302775 |
| S3_2F7D0004_58000000_A3AE694F1810F0DC_logo_large_ep6_pt_pt%%+IMAG.svg | svg | 302808 |
| S3_2F7D0004_60000000_88E166814B5126CE_logo_large_sp6_pt_pt%%+IMAG.svg | svg | 302785 |
| S3_2F7D0004_68000000_1ECA790E561C7EA7_logo_large_sp7_pt_pt%%+IMAG.svg | svg | 302783 |
| S3_2F7D0004_70000000_4532195EAC03BDAD_logo_large_ep7_pt_pt%%+IMAG.svg | svg | 302808 |
| S3_2F7D0004_78000000_EE27F2EEF44ADB66_logo_large_ep8_pt_pt%%+IMAG.svg | svg | 302808 |
| S3_2F7D0004_80000000_F83AB6D11AB02454_logo_large_sp8_pt_pt%%+IMAG.svg | svg | 302805 |
| S3_2F7D0004_88000000_3E260CC595A97A3F_logo_large_ep9_pt_pt%%+IMAG.svg | svg | 302808 |
| S3_2F7D0004_90000000_B770798649B4AE29_logo_large_ep10_pt_pt%%+IMAG.svg | svg | 302798 |
| S3_2F7D0004_98000000_1C25B8A8353CD0A5_logo_large_sp9_pt_pt%%+IMAG.svg | svg | 302805 |
| S3_2F7D0004_A0000000_B6974AAE6C2C7228_logo_large_ep11_pt_pt%%+IMAG.svg | svg | 302796 |
| desktop.ini | ini | 302 |
| S3_2F7D0004_00000000_1B1287FBE589822E_logo_large_th_th%%+IMAG.svg | svg | 303761 |
| S3_2F7D0004_08000000_AF8D9CF218C78297_logo_large_ep1_th_th%%+IMAG.svg | svg | 303765 |
| desktop.ini | ini | 302 |
| S3_2F7D0004_00000000_4F41AEA837B9655B_logo_large_zh_cn%%+IMAG.svg | svg | 294002 |
| S3_2F7D0004_08000000_6DE7659EB91A669A_logo_large_ep1_zh_cn%%+IMAG.svg | svg | 294007 |
| desktop.ini | ini | 302 |
| S3_2F7D0004_00000000_4F41B3A837B96DDF_logo_large_zh_hk%%+IMAG.svg | svg | 280140 |
| S3_2F7D0004_08000000_6DE7609EB91A5E1E_logo_large_ep1_zh_hk%%+IMAG.svg | svg | 280140 |
| desktop.ini | ini | 3042 |
| S3_2F7D0004_00000000_4F4197A837B93E57_logo_large_zh_tw%%+IMAG.svg | svg | 280632 |
| S3_2F7D0004_08000000_6DE7549EB91A4A66_logo_large_ep1_zh_tw%%+IMAG.svg | svg | 280637 |
| S3_2F7D0004_10000000_55A2300BC7E5DE74_logo_large_sp1_zh_tw%%+IMAG.svg | svg | 280637 |
| S3_2F7D0004_18000000_8930DB57D95060A9_logo_large_ep2_zh_tw%%+IMAG.svg | svg | 280668 |
| S3_2F7D0004_20000000_2C3F452F18C1951B_logo_large_sp2_zh_tw%%+IMAG.svg | svg | 280637 |
| S3_2F7D0004_28000000_BC6F4DB6A42786B8_logo_large_ep3_zh_tw%%+IMAG.svg | svg | 280658 |
| S3_2F7D0004_30000000_3040D643AF4A38D2_logo_large_sp3_zh_tw%%+IMAG.svg | svg | 280655 |
| S3_2F7D0004_38000000_F81478F430042B7B_logo_large_ep4_zh_tw%%+IMAG.svg | svg | 280658 |
| S3_2F7D0004_40000000_679D12541BCA2E49_logo_large_sp4_ZH_TW%%+IMAG.svg | svg | 280633 |
| S3_2F7D0004_48000000_553A9F476FB39432_logo_large_ep5_zh_tw%%+IMAG.svg | svg | 280658 |
| S3_2F7D0004_50000000_977484B2E3BC7858_logo_large_sp5_zh_tw%%+IMAG.svg | svg | 280668 |
| S3_2F7D0004_58000000_F013A98441E6FBB5_logo_large_ep6_zh_tw%%+IMAG.svg | svg | 280658 |
| S3_2F7D0004_60000000_7553EED50B0AEB5F_logo_large_sp6_zh_tw%%+IMAG.svg | svg | 280633 |
| S3_2F7D0004_68000000_4D4020DE8B47F386_logo_large_sp7_zh_tw%%+IMAG.svg | svg | 280683 |
| S3_2F7D0004_70000000_CF6DF90A9EDEFA54_logo_large_ep7_zh_tw%%+IMAG.svg | svg | 280658 |
| S3_2F7D0004_78000000_90BFEABED9E1A297_logo_large_ep8_zh_tw%%+IMAG.svg | svg | 280658 |
| S3_2F7D0004_80000000_5070867D81AB1A4D_logo_large_sp8_zh_tw%%+IMAG.svg | svg | 280699 |
| S3_2F7D0004_88000000_B6772519A4F968DE_logo_large_ep9_zh_tw%%+IMAG.svg | svg | 280658 |
| S3_2F7D0004_90000000_857B9932628C8BD0_logo_large_ep10_zh_tw%%+IMAG.svg | svg | 280690 |
| S3_2F7D0004_98000000_EF6228D80181658C_logo_large_sp9_zh_tw%%+IMAG.svg | svg | 280699 |
| S3_2F7D0004_A0000000_13FF4ADE86959C81_logo_large_ep11_zh_tw%%+IMAG.svg | svg | 280645 |
| S3_2F7D0004_00000000_69694178E8DA7A51_logo_large_en_us%%+IMAG.svg | svg | 249959 |
| Read me.txt | txt | 204 |
| S3_025C95B6_00000000_DA0227DFD918ADF7_GameEntryMainMenu%%+LAYO.layout | layout | 515210 |
| Read me.txt | txt | 612 |
| S3_025C95B6_00000000_72E0D2713610407F_CAPAccessories%%+LAYO.layout | layout | 40265 |
| S3_025C95B6_00000000_864B7DDF93A7A860_CASDresserClothing%%+LAYO.layout | layout | 66144 |
| S3_025C95B6_00000000_D6B52B0EF7372F30_CASClothingCategory%%+LAYO.layout | layout | 115449 |
| S3_025C95B6_00000000_E92E356742809668_CASClothing%%+LAYO.layout | layout | 63474 |
| Read me.txt | txt | 303 |
| S3_025C95B6_00000000_0A18231C4DBB9177_CASCompositor%%+LAYO.layout | layout | 604576 |
| S3_025C95B6_00000000_751448ABEBCD492C_MaterialsGridItem%%+LAYO.layout | layout | 12558 |
| S3_025C95B6_00000000_BE89CAB9DEBCF5EE_CABCompositor%%+LAYO.layout | layout | 604965 |
| S3_2F7D0004_00000000_7F213CCC5AE1E6E2_bbot designTool_bk%%+IMAG.svg | svg | 98811 |
| S3_2F7D0004_00000000_EB8915E3AFD7AF89_bbot designTool_bk_cab%%+IMAG.svg | svg | 371060 |
| Read me.txt | txt | 471 |
| S3_025C95B6_00000000_3988DA83C5405A65_CASDresserSheet%%+LAYO.layout | layout | 171470 |
| S3_025C95B6_00000000_E92E356742809668_CASClothing%%+LAYO.layout | layout | 69860 |
| S3_025C95B6_00000000_F2D661E40C4A404B_CASTattoo%%+LAYO.layout | layout | 569367 |
| S3_2F7D0004_00000000_0614E80786BFA5A9_cas_tattoos_i_BackLowerlower%%+IMAG.svg | svg | 5104 |
| S3_2F7D0004_00000000_1135E1034D8A9EDF_cas_tattoos_i_ShoulderBack%%+IMAG.svg | svg | 5082 |
| S3_2F7D0004_00000000_17878F9AA68A9DC8_cas_nav_btn_naked_norm%%+IMAG.svg | svg | 17475 |
| S3_2F7D0004_00000000_22CA565D698DAB9C_cas_tattoos_i_throat%%+IMAG.svg | svg | 4712 |
| S3_2F7D0004_00000000_24EABE43B038387F_cas_clothing_i_naked_r2%%+IMAG.svg | svg | 4388 |
| S3_2F7D0004_00000000_350363282995BC84_cas_tattoos_i_nipple%%+IMAG.svg | svg | 4841 |
| S3_2F7D0004_00000000_4AEF1A80A9024A70_cas_tattoos_i_ribs%%+IMAG.svg | svg | 4807 |
| S3_2F7D0004_00000000_54C8C1A45E2D3DAD_cas_tattoos_i_calffront%%+IMAG.svg | svg | 4694 |
| S3_2F7D0004_00000000_5D367680B3A1AD4E_cas_tattoos_i_palm%%+IMAG.svg | svg | 4839 |
| S3_2F7D0004_00000000_65FF08E3D267F3C7_cas_tattoos_i_thighfront%%+IMAG.svg | svg | 4776 |
| S3_2F7D0004_00000000_6742303D0E88A49B_cas_tattoos_i_thighback%%+IMAG.svg | svg | 4694 |
| S3_2F7D0004_00000000_6D59AEB176C14973_cas_tattoos_i_pubic%%+IMAG.svg | svg | 4605 |
| S3_2F7D0004_00000000_78BE16BD039B990D_cas_nav_btn_naked_ac_r2%%+IMAG.svg | svg | 15996 |
| S3_2F7D0004_00000000_8274706CC7C23162_cas_tattoos_i_forehead%%+IMAG.svg | svg | 4742 |
| S3_2F7D0004_00000000_84D8B9FFB4CF768D_cas_tattoos_i_hip%%+IMAG.svg | svg | 4737 |
| S3_2F7D0004_00000000_84E6CDFFB4DBD632_cas_tattoos_i_leg%%+IMAG.svg | svg | 4522 |
| S3_2F7D0004_00000000_8D138AD65A604054_cas_tattoos_i_ankleouter%%+IMAG.svg | svg | 4230 |
| S3_2F7D0004_00000000_A9AD899DFA271B5B_cas_tattoos_i_bodygroup%%+IMAG.svg | svg | 4665 |
| S3_2F7D0004_00000000_C1FC80805BE7DBAD_cas_tattoos_i_Butt%%+IMAG.svg | svg | 5198 |
| S3_2F7D0004_00000000_CC7987C5939EA27D_cas_tattoos_i_breast%%+IMAG.svg | svg | 4857 |
| S3_2F7D0004_00000000_CF318CBB45B34C2D_cas_tattoos_i_bellylower%%+IMAG.svg | svg | 4934 |
| S3_2F7D0004_00000000_D910DC958003FD1E_cas_tattoos_i_facegroup%%+IMAG.svg | svg | 4730 |
| S3_2F7D0004_00000000_E1AB4E4945C39E09_cas_tattoos_i_calfback%%+IMAG.svg | svg | 4874 |
| S3_2F7D0004_00000000_E23E45806D7F6171_cas_tattoos_i_face%%+IMAG.svg | svg | 5449 |
| S3_2F7D0004_00000000_E25339806D91A8CE_cas_tattoos_i_foot%%+IMAG.svg | svg | 4558 |
| S3_2F7D0004_00000000_EAA1271DA18C4CE9_cas_tattoos_i_fullbody%%+IMAG.svg | svg | 5497 |
| S3_2F7D0004_00000000_EBBF57221ABA6768_cas_tattoos_i_cheek%%+IMAG.svg | svg | 4881 |
| Read me.txt | txt | 291 |
| S3_2F7D0004_00000000_2170A53EBF038D3E_ATLAS_HUDRelationshipsPanelEntry_00%%+IMAG.svg | svg | 236496 |
| Read me.txt | txt | 261 |
| S3_025C95B6_00000000_1FFAA4A741A77F99_HUDBorderTreatments%%+LAYO_Pink.layout | layout | 78344 |
| S3_2F7D0004_00000000_08DF60BE4F1FDA68_ATLAS_HUDBorderTreatments_00%%+IMAG.svg | svg | 72768 |
| S3_2F7D0004_00000000_08DF60BE4F1FDA69_ATLAS_HUDBorderTreatments_01%%+IMAG.svg | svg | 25279 |
| Read me.txt | txt | 102 |
| S3_2F7D0004_00000000_2170A53EBF038D3E_ATLAS_HUDRelationshipsPanelEntry_00%%+IMAG.svg | svg | 273912 |
| Read me.txt | txt | 195 |
| S3_2F7D0004_00000000_6A3BADD06734D1D8_ATLAS_HUDSimDisplay_00%%+IMAG.svg | svg | 4292978 |
| S3_2F7D0004_00000000_C503E8D3870E2BC8_MoonPhase5%%+IMAG.svg | svg | 10245 |
| S3_2F7D0004_00000000_C503E8D3870E2BC9_MoonPhase4%%+IMAG.svg | svg | 8819 |
| S3_2F7D0004_00000000_C503E8D3870E2BCA_MoonPhase7%%+IMAG.svg | svg | 9462 |
| S3_2F7D0004_00000000_C503E8D3870E2BCB_MoonPhase6%%+IMAG.svg | svg | 9611 |
| S3_2F7D0004_00000000_C503E8D3870E2BCC_MoonPhase1%%+IMAG.svg | svg | 9421 |
| S3_2F7D0004_00000000_C503E8D3870E2BCD_MoonPhase0%%+IMAG.svg | svg | 10526 |
| S3_2F7D0004_00000000_C503E8D3870E2BCE_MoonPhase3%%+IMAG.svg | svg | 10249 |
| S3_2F7D0004_00000000_C503E8D3870E2BCF_MoonPhase2%%+IMAG.svg | svg | 9652 |
| Read me.txt | txt | 272 |
| S3_025C95B6_00000000_2EFA36FFE6D8335F_KarmicBacklashDialog%%+LAYO.layout | layout | 47582 |
| S3_025C95B6_00000000_A72BB6B7B4B9DD84_HUDRewardTraitsPanel%%+LAYO.layout | layout | 105630 |
| S3_025C95B6_00000000_BE899B75F7F9536D_OptionsDialog%%+LAYO.layout | layout | 1377304 |
| S3_025C95B6_00000000_DC721D2C07F01139_WonderPowerEntry%%+LAYO.layout | layout | 21280 |
| S3_025C95B6_00000000_F77F23C857AA652D_WonderMode%%+LAYO.layout | layout | 166435 |
| S3_2F7D0004_00000000_163462CF3324A2A8_glb_panel_tertiary_lg_1nub_r2%%+IMAG.svg | svg | 173422 |
| S3_2F7D0004_00000000_2A7C230365600209_mm_panel_bg_r2%%+IMAG.svg | svg | 7284 |
| S3_2F7D0004_00000000_32D04B830172B263_LoaderBar%%+IMAG.svg | svg | 9895 |
| S3_2F7D0004_00000000_49E2074790D1E49B_glb_panel_grid_bk_inner2_r3%%+IMAG.svg | svg | 16376 |
| S3_2F7D0004_00000000_4BC74CD87E5F75CE_tooltip_special%%+IMAG.svg | svg | 13577 |
| S3_2F7D0004_00000000_4FFCC6ECABD4C826_game_entry_thumb_bg_ac%%+IMAG.svg | svg | 13328 |
| S3_2F7D0004_00000000_4FFCCDECABD4D446_game_entry_thumb_bg_hl%%+IMAG.svg | svg | 6064 |
| S3_2F7D0004_00000000_54C62BB0179D7F79_glb_panel_tertiary_header_r2%%+IMAG.svg | svg | 5277 |
| S3_2F7D0004_00000000_56F4EA61ADC1888A_glb_btn_jelly_xsm_di_r2%%+IMAG.svg | svg | 5359 |
| S3_2F7D0004_00000000_5A0BD249BC2251D1_glb_btn_jelly_xsm_ac_r2%%+IMAG.svg | svg | 9176 |
| S3_2F7D0004_00000000_6AAD1D56EF5E399B_caf_genetics_thumb_ac_r2%%+IMAG.svg | svg | 6790 |
| S3_2F7D0004_00000000_70E4746F573BDA64_game_entry_thumb_shell%%+IMAG.svg | svg | 3893 |
| S3_2F7D0004_00000000_7A91827E813BB2F2_glb_btn_chrome_sm_r2%%+IMAG.svg | svg | 13311 |
| S3_2F7D0004_00000000_82506774DB91718F_game_entry_thumb_bg%%+IMAG.svg | svg | 12893 |
| S3_2F7D0004_00000000_A11C98CFE0BEFF5A_glb_i_cancel_r2%%+IMAG.svg | svg | 5768 |
| S3_2F7D0004_00000000_ABD39B841A6B391B_mm_panel_inset_bg_r2%%+IMAG.svg | svg | 36131 |
| S3_2F7D0004_00000000_B792F8485508A37F_caf_genetics_generic_bg_r2%%+IMAG.svg | svg | 3581 |
| S3_2F7D0004_00000000_CA45721B0A7FBEBA_glb_btn_chrome_sm_di_r2%%+IMAG.svg | svg | 13182 |
| S3_2F7D0004_00000000_D0C25A031BC3B081_glb_btn_chrome_sm_ac_r2%%+IMAG.svg | svg | 13697 |
| S3_2F7D0004_00000000_D58F144D5B0FE27A_glb_panel_tertiary_lg_2nubs_r2%%+IMAG.svg | svg | 173832 |
| S3_2F7D0004_00000000_E89AB064542F4DB2_glb_i_ok_r2%%+IMAG.svg | svg | 6893 |
| S3_2F7D0004_00000000_EA7394E86250F782_glb_btn_jelly_xsm_r2%%+IMAG.svg | svg | 6464 |
| Read me.txt | txt | 275 |
| S3_025C95B6_00000000_A4F8B19F46BE592C_BuyExpandableCatalogGrid%%+LAYO.layout | layout | 44429 |
| S3_025C95B6_00000000_F3A2D4121C665304_BuildExpandableCatalogGrid%%+LAYO.layout | layout | 44442 |
| S3_2F7D0004_00000000_3E0E9A9A374C0EB3_ld_bb_searchbutton%%+IMAG.svg | svg | 10370 |
| Read me.txt | txt | 316 |
| S3_2F7D0004_00000000_6A3BADD06734D1D8_ATLAS_HUDSimDisplay_00%%+IMAG.svg | svg | 3482051 |
| Read me.txt | txt | 294 |
| S3_2F7D0004_00000000_0AE62A81BE4FA53A_ATLAS_ChangeFavoritesDialog_01%%+IMAG.svg | svg | 13834 |
| S3_2F7D0004_00000000_2C0BA10597B7B3C8_ATLAS_FavoritesGridItem_00%%+IMAG.svg | svg | 24257 |
| S3_2F7D0004_00000000_4EDE14AB06A16260_ATLAS_CASCharacter_00%%+IMAG.svg | svg | 518049 |
| S3_2F7D0004_00000000_8B581B183D7E25DB_ATLAS_CreateProfileDialog_00%%+IMAG.svg | svg | 120309 |
| S3_2F7D0004_00000000_EE06B01D4BCB3EFF_ATLAS_BrowseDatingProfilesDialog_00%%+IMAG.svg | svg | 506919 |
| Filename | Type | Size |
|---|---|---|
| Cloud UI Recolour Tool v1.0.0.zip | zip | |
| Cloud UI Recolour Tool.exe | exe | 14148670 |
| Credits - For Sharing.txt | txt | 734 |
| PinkPlumbob.ico | ico | 410598 |
| UI_Preview.svg | svg | 3096121 |
|
Cloud UI Recolour Tool v1.0.0.zip
Download
Uploaded: 29th Aug 2025, 15.11 MB.
1,956 downloads.
|
||||||||
|
Base UI v1.4.0.zip
Download
Uploaded: 29th Aug 2025, 209.52 MB.
1,483 downloads.
|
||||||||
| For a detailed look at individual files, see the Information tab. | ||||||||
Install Instructions
1. Click the download button, or the filename, to download the file to your computer.
2. Extract the zip, rar, or 7z file. Now you will have either a .package or a .sims3pack file.
For Package files:
1. Cut and paste the file into your Documents\Electronic Arts\The Sims 3\Mods\Packages folder. If you do not already have this folder, you should read the full guide to Package files first: Sims 3:Installing Package Fileswiki, so you can make sure your game is fully patched and you have the correct Resource.cfg file.
2. Run the game, and find your content where the creator said it would be (build mode, buy mode, Create-a-Sim, etc.).
For Sims3Pack files:
1. Cut and paste it into your Documents\Electronic Arts\The Sims 3\Downloads folder. If you do not have this folder yet, it is recommended that you open the game and then close it again so that this folder will be automatically created. Then you can place the .sims3pack into your Downloads folder.
2. Load the game's Launcher, and click on the Downloads tab. Find the item in the list and tick the box beside it. Then press the Install button below the list.
3. Wait for the installer to load, and it will install the content to the game. You will get a message letting you know when it's done.
4. Run the game, and find your content where the creator said it would be (build mode, buy mode, Create-a-Sim, etc.).
Extracting from RAR, ZIP, or 7z: You will need a special program for this. For Windows, we recommend 7-Zip and for Mac OSX, we recommend Keka. Both are free and safe to use.
Need more help?
If you need more info, see:
- For package files: Sims 3:Installing Package Fileswiki
- For Sims3pack files: Game Help:Installing TS3 Packswiki
Loading comments, please wait...
Uploaded: 29th Aug 2025 at 7:03 PM
Updated: 22nd Feb 2026 at 8:04 AM
#clouduirecolourtool, #clouduirecolortool, #cloudui, #sims 3 ui, #ui, #ui recolour, #ui recolor
-

by sasunaru123 24th Mar 2016 at 12:02pm
-

-

-

-

-
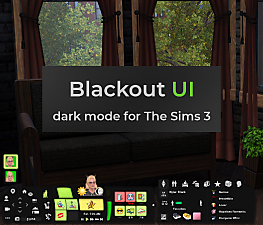
Blackout UI - Dark mode mod for The Sims 3
by simstateTS3 updated 19th Feb 2025 at 3:14pm
-

by cowplantcartel updated 26th Aug 2025 at 10:56am
-

by cowplantcartel updated 26th Aug 2025 at 11:31am
-

by cowplantcartel updated 26th Aug 2025 at 11:36am
-

by cowplantcartel 26th Aug 2025 at 12:53pm


-

by cowplantcartel updated 26th Aug 2025 at 9:56am
A brand new UI for The Sims 3! more...
-

by cowplantcartel updated 26th Aug 2025 at 10:31am
A brand new UI for the Sims 3! more...
-


Pretty Pause, Map View and Recording Border
by cowplantcartel 27th May 2025 at 4:22pm
A small mod that replaces the pause, map view and video recording border and buttons. Map View has been recoloured to more...
-


by cowplantcartel updated 26th Aug 2025 at 10:12am
A brand new UI for the Sims 3! more...
-


by cowplantcartel 6th Jul 2025 at 9:42am
This is a default replacement for the build cursor tool (used for drawing walls, pools, fences etc) and the place more...
-


Cuter Speech & Thought Bubbles
by cowplantcartel 16th May 2025 at 8:10am
This mod is a default replacement for the speech, scream and thought bubbles in The Sims 3. more...
-


by cowplantcartel 26th Aug 2025 at 12:52pm
-

by cowplantcartel 26th Aug 2025 at 11:53am
-


by cowplantcartel updated 18th Jul 2025 at 2:00pm
In the relationship panel, occult sims from the Supernatural pack have coloured borders around their pictures to indicate which occult more...
-


by cowplantcartel 8th Jun 2025 at 10:05am
I don't mind most of the Sims 3 UI sounds, but repeatedly hearing the pause & play sounds gets annoying more...


