 Sign in to Mod The Sims
 Daluved1's Bright Eye Default/Contacts
 Daluved1's Bright Eye Default/Contacts


Brighteyeslogo.jpg - width=836 height=1000
ingame2.jpg - width=532 height=505
ingame.jpg - width=479 height=614
ingame4.jpg - width=645 height=679
v2_lilac.jpg - width=323 height=430
v2_grey.jpg - width=330 height=445
v2_aqua.jpg - width=334 height=428
contact.jpg - width=736 height=420

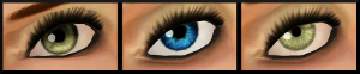
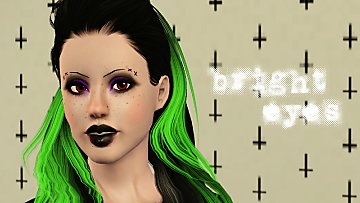
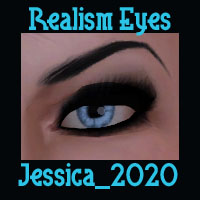
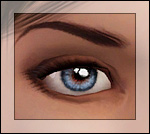
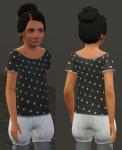
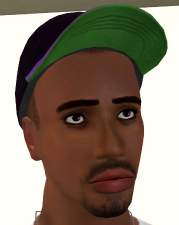
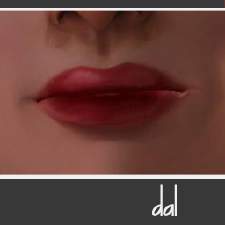
One thing I hated about the EA eyes were how dull they were. And, even most of the custom eyes out there are very dark and gloomy (no offense to any creators). So I decided to try my hand at making my own set of eyes, called the "Bright Eyes" set.
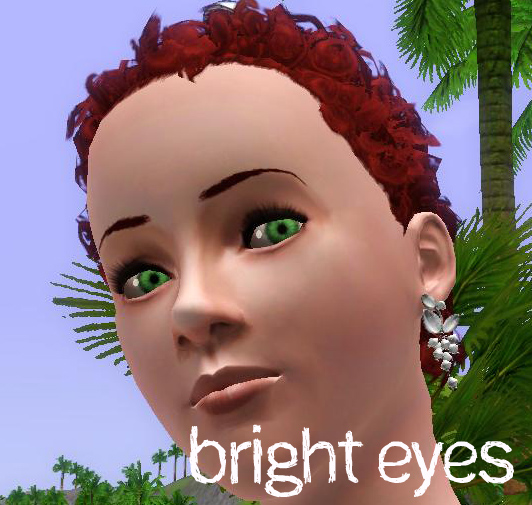
What makes my eyes unique is that they are noticeably brighter and they have a somewhat jeweled glassy effect to them.
Another thing that irked me about the default EA eyes are how big and cartoony they are, so I made my eyes a little bit smaller than original ones (10% smaller to be exact).
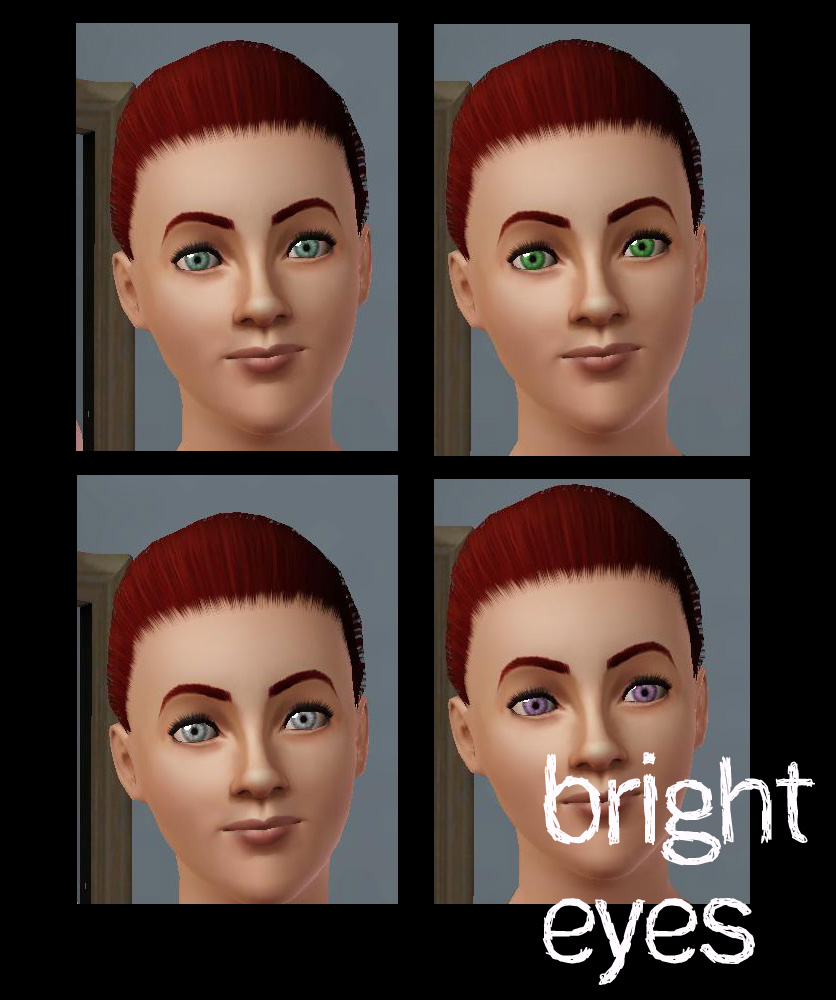
These eyes are completely recolorable, and they show up for all ages and genders.
Remember these are default replacements so you'll have to remove any other default replacement eyes to use these. Also you might have to delete your simcompositer cache file to get the eyes to regenerate on preexisting sims.
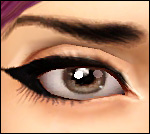
I also added a contacts version of these because I realized that some pre-existing sims looked pretty freaky with the default replacements
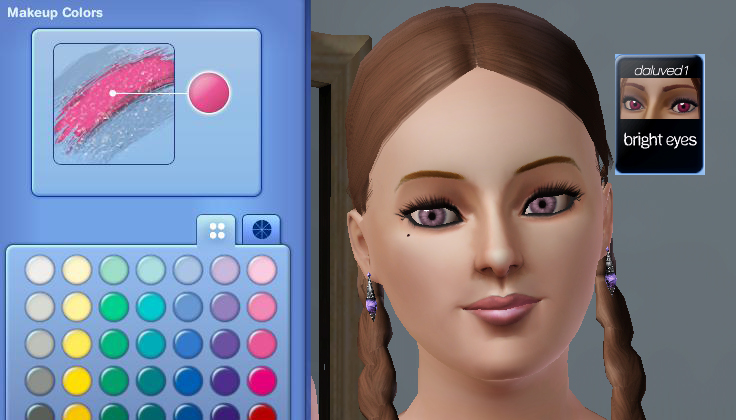
 So to use these, go to the costume makeup section in CAS and look for the Bright Eyes thumbnail. And unlike a lot of contacts, these are completely recolorable as if they were the sims genetic eyes
You may (of course) use these for sims and such, just please link back here for the download instead of including the eyes in your upload.
And just like with everything else, uploads of my content to the exchange and/or paysites are frowned upon :D
Additional Credits:
Red Adult Female Hair - HP (MTS)
Red Adult Female Brows - Me
Brown Adult Female Hair - Peggy Sims (Free)
Brown Adult Female Brows - Me
Blond Toddler Female Hair -Wojtek0 (MTS)
Default Replacement Skin (face) - Aikea_Guinea at Club Crimsyn
Default Replacement Skin (body) - HP (MTS)
Blue Dress - Liana Sims
White Toddler Dress - Around the Sims
Earrings - Rose Sims
|
daluved1_Brighteyes_contacts.rar
| Removable Contacts
Download
Uploaded: 20th Sep 2009, 38.8 KB.
1,431 downloads.
|
||||||||
|
daluved1_Brighteyes_defaultreplace.rar
| Default Replacement Eyes
Download
Uploaded: 19th Sep 2009, 8.4 KB.
1,086 downloads.
|
||||||||
| For a detailed look at individual files, see the Information tab. | ||||||||
Install Instructions
1. Click the file listed on the Files tab to download the file to your computer.
2. Extract the zip, rar, or 7z file. Now you will have either a .package or a .sims3pack file.
For Package files:
1. Cut and paste the file into your Documents\Electronic Arts\The Sims 3\Mods\Packages folder. If you do not already have this folder, you should read the full guide to Package files first: Sims 3:Installing Package Fileswiki, so you can make sure your game is fully patched and you have the correct Resource.cfg file.
2. Run the game, and find your content where the creator said it would be (build mode, buy mode, Create-a-Sim, etc.).
For Sims3Pack files:
1. Cut and paste it into your Documents\Electronic Arts\The Sims 3\Downloads folder. If you do not have this folder yet, it is recommended that you open the game and then close it again so that this folder will be automatically created. Then you can place the .sims3pack into your Downloads folder.
2. Load the game's Launcher, and click on the Downloads tab. Find the item in the list and tick the box beside it. Then press the Install button below the list.
3. Wait for the installer to load, and it will install the content to the game. You will get a message letting you know when it's done.
4. Run the game, and find your content where the creator said it would be (build mode, buy mode, Create-a-Sim, etc.).
Extracting from RAR, ZIP, or 7z: You will need a special program for this. For Windows, we recommend 7-Zip and for Mac OSX, we recommend Keka. Both are free and safe to use.
Need more help?
If you need more info, see:
- For package files: Sims 3:Installing Package Fileswiki
- For Sims3pack files: Game Help:Installing TS3 Packswiki
Loading comments, please wait...
Uploaded: 19th Sep 2009 at 3:16 AM
Updated: 29th Sep 2009 at 2:31 PM - Added Contact Version
-
-
-
EYES for eye-coholics! CONTACTS - 2 styles
by -Shady- 29th Oct 2010 at 2:55pm
-
More or Less, More Default Eyes and Contacts
by shadowwolf5889 31st Mar 2011 at 12:49pm
-
Hopefully Kind of Realistic Eyes: Defaults & Contacts (updated)
by shadowwolf5889 updated 19th Jul 2011 at 12:23am
-
Lonely Eyes - Contacts *Defaults Updated
by -Shady- updated 5th Jan 2012 at 5:34pm
-
Pixie - Contacts and DEFAULT replacement eyes
by stefizzi 7th Jun 2012 at 9:31pm
-
Bella, LoL, and Starry Night Eyes: Defaults and Contacts
by shadowwolf5889 3rd Jul 2012 at 12:33pm
-
-


-
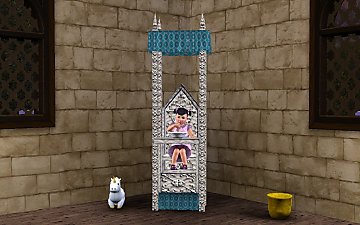

Medieval Kids Furniture Part 1 - Ye Olde Kingdom of Pudding
by The Merrye Makers 16th Jan 2012 at 3:50pm
Two medieval high chairs and medieval potty chair made by Hekate999 and Daluved1 for The Merrye Makers. more...
 10
50.7k
112
10
50.7k
112
-

-
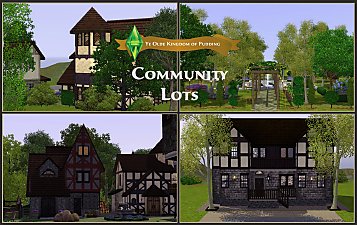

Medieval Community Lots - Ye Olde Kingdom of Pudding
by The Merrye Makers 16th Dec 2011 at 6:13pm
Ye Olde Kingdom of Pudding Community Lots Greetings, good gentles/ladies. more...
+4 packs
25 45.1k 120 World Adventures
 Ambitions
 Late Night
 Generations
-
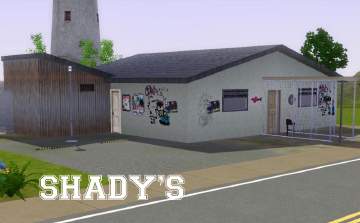
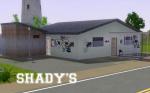
Shady's Night Club - Minimal CC
by daluved1 9th Nov 2010 at 3:58pm
Very shady on the outside....probably a little shady on the inside, too.... more...
+1 packs
22 53.6k 94 Late Night
-

-
-
-

-
-


About Me
Because my policy is really inconsistent on my uploads, I've decided to make an official policy! So whatever you see here on my profile is my current policy. You may disregard any ''policy'' information you see on the actual upload itself.
-You may use my creations with sims
-You may use my objects with lots.
-You may retexture my meshes.
-You may include my meshes with retextures.
-You may NOT upload my creations with sims
-You may NOT upload my objects with lots.
-You may NOT upload my creations to paysites.
-You may NOT upload my creations to the exchange.
-Always credit me with a link
-I do NOT take requests!