 Sign in to Mod The Sims
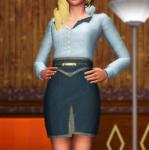
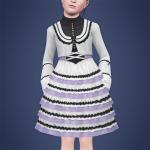
 De-uglified Basegame Long Skirt
 De-uglified Basegame Long Skirt


thumbnail.jpg - width=400 height=400
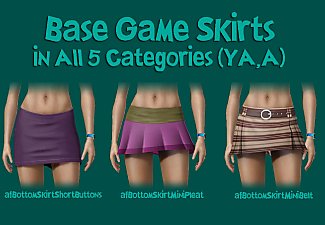
buttons.jpg - width=649 height=273
Button detail on belt.
LongSkirtChannelComparison.jpg - width=768 height=768
Channel comparison (red denotes the channel added by me).
LongSkirtTF.jpg - width=960 height=768
Teen females.
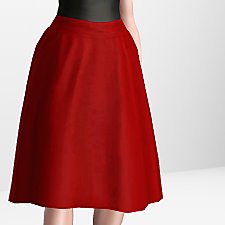
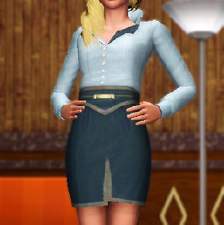
LongSkirtAF.jpg - width=768 height=768
YA-A females.
LongSkirtEF.jpg - width=960 height=768
Elder females.
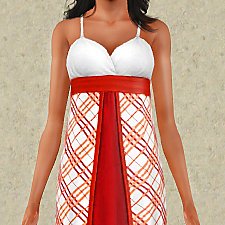
LongSkirtAFCairo.jpg - width=768 height=768
Al Simhara skirt replacement (requires World Adventures).
What's new
- This is a default replacement, so it'll replace the original skirt for the ages: Teen, Young Adult-Adult, Elder Females.
- No more ugly seams or rope!
- The channel used for the rope is now used for the belt.
- One new channel added! You can now recolor the hem line (?) on the bottom and middle of the skirt!
- Small buttons detail added to belt.
- WA introduces recolors of the skirt only for Egypt (and only for YA-A). I included a version that replaces that one too. You need World Adventures for that one!
- Skirts recategorized to also show up in Makeover and Outerwear (aside from Everyday, Formal, Career). Also enabled for Random.
- You can use all skirts at the same time, as they use different resources.
Known issues
1. There is a seam on the right side of the sim, near the arm. This is also in the EA textures, and I couldn't find a way to fix it. It's not too noticeable, and not noticeable at all if you use vertical and/or small patterns.
2. When you select the skirt on teens, the mesh looks all black and like the original skirt. Simply choose a pattern or recolor it yourself and you'll see the four-channel version.
3. Sometimes, on adults if you select the skirt the original mesh will pop up (with the rope and three channels). You can either use and recolor that version, or pick any of the other four recolors (all with four channels). Both versions work.
4. A few CAS thumbnails for the adult version show the original recolors. Haven't found a fix for this, but the outfits themselves work.
Note
If you pick a preset with 4 channels and the 4th channel doesn't show up, wait a bit; it'll show up once all the patterns in that category are loaded.
You may have to delete your cache files for this to show up properly.
(Tedious) Work process
I have a tendency to forget, and maybe someone will find this useful, so here's the work process:
0) *insert string of expletives*
1) Using S3OC, clone the CAS items. Keep a backup copy of these .package files somewhere.
2) Using S3PE, extract the four .DDS files needed to change the texture of the mesh: RGB mask, bump/normal map, base, specular.
3) Edit these accordingly in graphics editor of choice. Enable alpha channel when needed (acts as fourth channel). Save as .DDS using DXT5.
4) From FullBuild0.package, extract only the CASP entries of the CAS items you cloned earlier.
5) One by one, open the CASP entries in CTU. If they have four channels, tick the "4 channel RGBA" option under "Other" tab. "Commit" after each change.
6) Go to "Designs" tab; in the "Textures" tab, replace the appropriate files with your modified .DDS files. There is a bump map option under the "Meshes" tab, but we'll get to that later. Leave it alone for now. After replacing the DDS images, "Commit" and move to the "Patterns" tab.
7) Delete all existing designs except the first, but remember how many there were. You will need to create as many custom ones as there were before, or the ones from the game will show up alongside the custom ones (e.g. if an item has 4 designs and you include only 3 custom ones, you will see your 3 + the last EA design in CAS). If you want your file size to be small, tick the "Linked" option under each pattern channel; this means the textures will be retrieved from the game files rather than being saved with your edited file.
8) Add designs according to your tastes. To add a new design, I recommend going to "Add Design" -> "Add New (Copy Last). This makes it so you don't have to re-add all your DDS fies in the "Textures" tab. I'd recommend not working with pure black or white (the latter turns to black in CAS), or solid colors (same issue).
If the fourth channel (D) isn't enabled and you've already ticked the "4 channel RGBA" option, switch between patterns A-C and it should be enabled.
Now, I also get a glitch if the "Solid color" option is selected for channel D. To fix it, just switch to one of the other two options, choose a pattern, and it should be OK.
9) After finishing the designs, click File / Save (not Save as!).
10) Now open your cloned .package file (the backup copy is there in case something goes wrong). Go to Resource / Import / From package... and pick the CASP file you edited in CTU. Click OK to the popups that appear. You'll see that you have a few resources added to the list, which have no name. Some of these are your edited DDS files. Keep those, and look through the other _IMG resources and delete the unedited ones (basically the original textures from the mesh).
DO NOT delete the bump map! (this is usually the last _IMG resource when sorting by tag name). Instead, right-click it, choose "Replace", and replace it with your edited bump map. I chose to do things like this because CTU didn't play well with the extracted LODs and didn't read the bump map properly. Like this, you don't have to mess with meshes at all

Now save the .package and plop it in your game, because you're done! Remember to delete the cache files too.
Credits
Creators of S3PE, S3OC, CTU.
Poses: spectacledchic, bodacsims, Skylar, Skylar again, yup still Skylar (seriously, it's a pose goldmine)
|
sweetdevil_LongSkirtEdit_Cairo.zip
| Requires World Adventures (replaces the version of the YA-A skirt used in Al Simhara).
Download
Uploaded: 30th Mar 2016, 1.74 MB.
3,788 downloads.
|
||||||||
|
sweetdevil_LongSkirtEdit_TAEF.zip
| Basegame.
Download
Uploaded: 30th Mar 2016, 4.01 MB.
5,693 downloads.
|
||||||||
| For a detailed look at individual files, see the Information tab. | ||||||||
Install Instructions
1. Click the file listed on the Files tab to download the file to your computer.
2. Extract the zip, rar, or 7z file. Now you will have either a .package or a .sims3pack file.
For Package files:
1. Cut and paste the file into your Documents\Electronic Arts\The Sims 3\Mods\Packages folder. If you do not already have this folder, you should read the full guide to Package files first: Sims 3:Installing Package Fileswiki, so you can make sure your game is fully patched and you have the correct Resource.cfg file.
2. Run the game, and find your content where the creator said it would be (build mode, buy mode, Create-a-Sim, etc.).
For Sims3Pack files:
1. Cut and paste it into your Documents\Electronic Arts\The Sims 3\Downloads folder. If you do not have this folder yet, it is recommended that you open the game and then close it again so that this folder will be automatically created. Then you can place the .sims3pack into your Downloads folder.
2. Load the game's Launcher, and click on the Downloads tab. Find the item in the list and tick the box beside it. Then press the Install button below the list.
3. Wait for the installer to load, and it will install the content to the game. You will get a message letting you know when it's done.
4. Run the game, and find your content where the creator said it would be (build mode, buy mode, Create-a-Sim, etc.).
Extracting from RAR, ZIP, or 7z: You will need a special program for this. For Windows, we recommend 7-Zip and for Mac OSX, we recommend Keka. Both are free and safe to use.
Need more help?
If you need more info, see:
- For package files: Sims 3:Installing Package Fileswiki
- For Sims3pack files: Game Help:Installing TS3 Packswiki
Loading comments, please wait...
Uploaded: 30th Mar 2016 at 11:27 AM
Updated: 6th Jun 2018 at 1:45 PM
-
by Anubis360 13th Sep 2009 at 2:42pm
 49
195.2k
232
49
195.2k
232
-
-
-
Stylish Comfort Jeans set for females - teen to elder!
by Simlicious updated 13th Dec 2012 at 11:50pm
44
131.2k
385
-
by HystericalParoxysm 2nd Aug 2014 at 7:52pm
29
58.6k
271
-
Unhidden Ambitions Stylist outfits
by sweetdevil 17th Mar 2016 at 11:11am
+1 packs
13 26.8k 82 Ambitions
-
by sweetdevil 1st Jan 2017 at 11:57am
21
24.2k
70
-
by sweetdevil 5th Jan 2017 at 6:36pm
5
18.1k
36
-

by sweetdevil 20th Jun 2017 at 8:18pm
11
13.4k
43
-


-
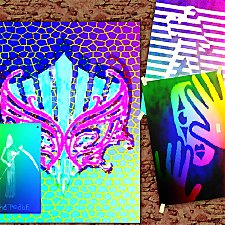
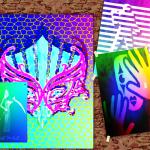
by sweetdevil 4th Nov 2018 at 10:23am
Colorful posters cobbled together from game graphics. more...
6
24.5k
27
-
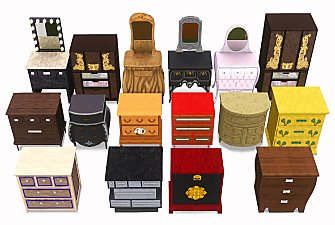
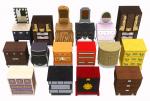
More 1-tile Dressers! [UPDATE 10/MAR/2020 redownload!]
by sweetdevil updated 10th Mar 2020 at 8:55am
1-tile dressers from EPs and HELS. more...
25
32.5k
184
-

Tell Ghost Story - no auto or none at all
by sweetdevil 26th Mar 2017 at 2:07pm
No autonomous Tell Ghost Story, or none at all. more...
+1 packs
7 12.8k 41 Generations
-
Unhidden Ambitions Stylist outfits
by sweetdevil 17th Mar 2016 at 11:11am
Ambitions Stylist outfits, unhidden in CAS, for Teen-Elder Males and Females. more...
+1 packs
13 26.9k 82 Ambitions
-
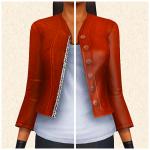
by sweetdevil 20th Jun 2017 at 8:18pm
Edit of the basegame leather jacket to make it more like a leather jacket! more...
11
13.5k
44
-
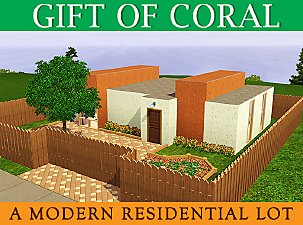

by sweetdevil 18th Oct 2016 at 3:41pm
A modern residential lot with an open layout, medium yard, and basement. more...
1
6.3k
11
-


by sweetdevil 4th Apr 2017 at 9:54pm
Meditating raises Fun motive. For World Adventures and Showtime. more...
+2 packs
8 19.3k 71 World Adventures
 Showtime
-
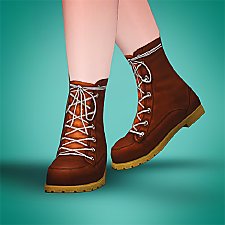
University Life boots for kids
by sweetdevil 10th Oct 2018 at 11:18am
University Life female boots converted for children. more...
16
43.8k
134
-
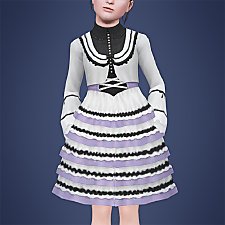
'Walk Bobita Walk' Dress for Children
by sweetdevil 25th Feb 2019 at 7:20am
Store 'Walk Bobita Walk' dress converted for children. more...
-
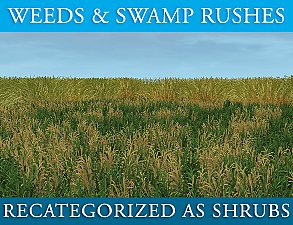
Ranch Weeds and Swamp Rushes as Shrubs
by sweetdevil 21st Jun 2016 at 1:35am
PETS Weeds and AMB Swamp Rushes - now as Shrubs and in World Editor! more...
+2 packs
1 13.6k 36 Ambitions
 Pets
Pets


Packs Needed
| Base Game | |
|---|---|
 | Sims 3 |
| Expansion Pack | |
|---|---|
 | World Adventures |
About Me
Feel free to pick apart, reuse, reduce, recycle etc. my stuff. Don't put it behind paywalls or ask for money for it.
If there are any dead links, feel free to reupload my things but let me know so that I can fix the links.
Click here for my backups of inactive creators' + my own CC.
Icon art © Umishima Senbon