 Servo - Complete Conversion

Lineup.jpg - width=1360 height=768

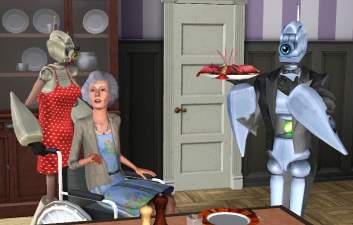
Formal.jpg - width=1180 height=753

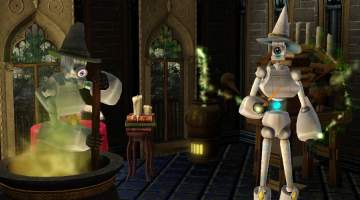
Magic.jpg - width=1259 height=698

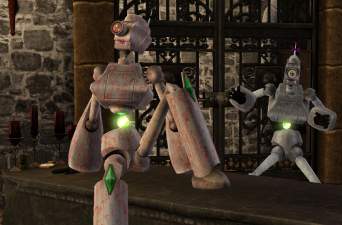
Dungeon.jpg - width=1167 height=768

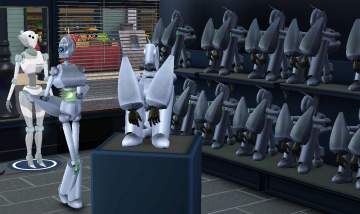
Store.jpg - width=1106 height=656

Child.jpg - width=578 height=768

RGB_deco.jpg - width=818 height=682

RGB_warlock.jpg - width=2196 height=770

RGB_witch.jpg - width=2196 height=768

RGB_antennae.jpg - width=1056 height=850

RGB_tuxedo.jpg - width=1278 height=600

RGB_dress.jpg - width=1278 height=600

RGB_body.jpg - width=852 height=1200

RGB_headM.jpg - width=996 height=672

RGB_headF.jpg - width=996 height=672

RGB_fangM.jpg - width=996 height=672

RGB_fangF.jpg - width=996 height=672




Long time no see, I know. I also know I mentioned these were coming soon back when I released my TS4 Servo conversion...back in 2015. This project actually goes back far longer than that; Servo for TS3 was my very first mod, not just for The Sims but for any game, and it's been a learning process the whole time, going through many, many versions since I began in 2011, but most of that time has been spent being distracted by other modding projects. I figured I should dust these off and finally finish them, and I think I finally have it as good as I can, so my endless tweaking comes to a close. So, without further ado, introducing Servo...again!
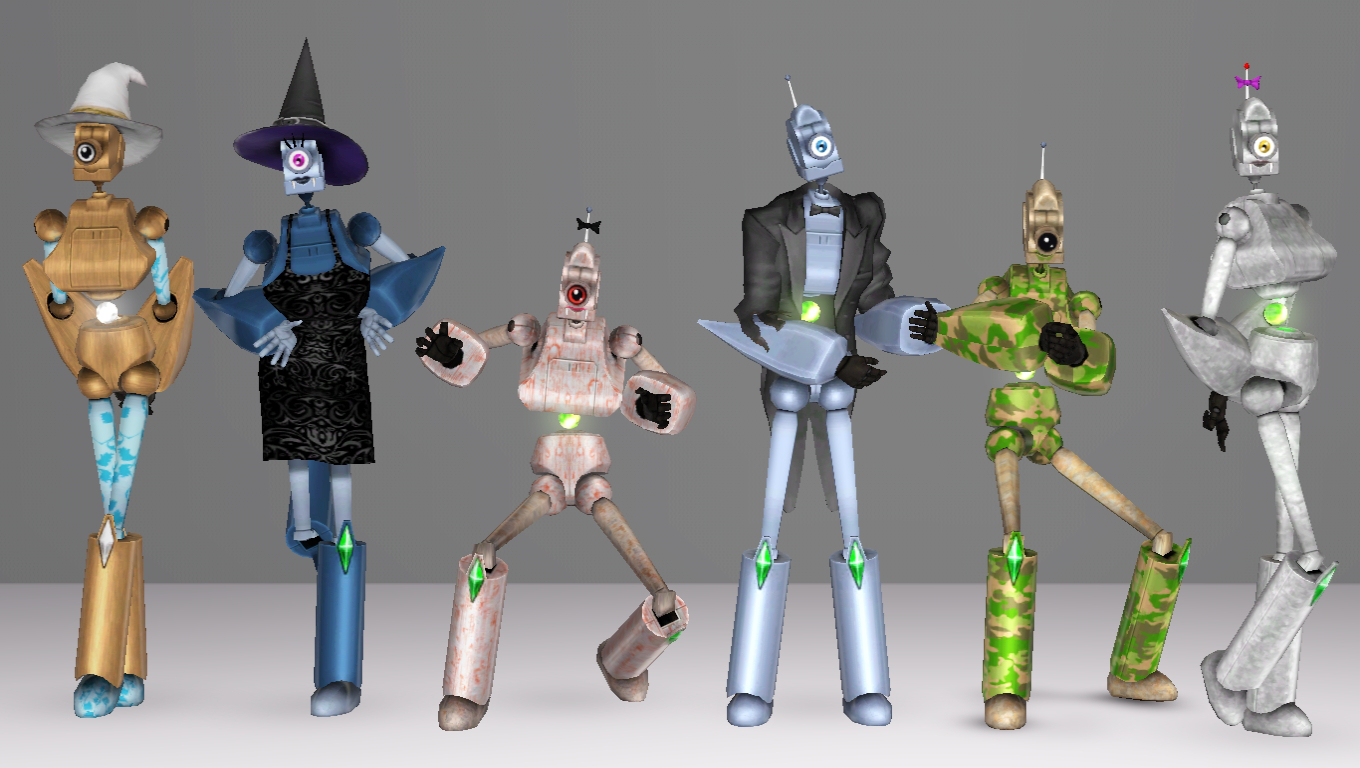
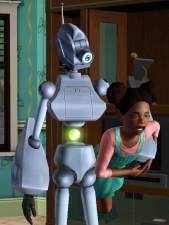
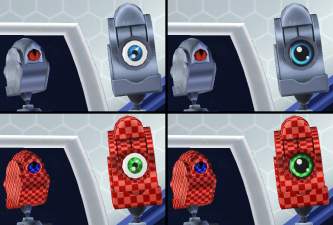
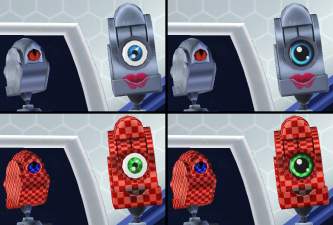
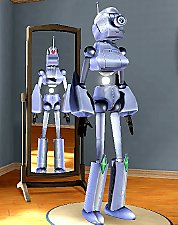
This is a set of CAS items that can be used to make your ITF PlumBots look like classic TS2 Servos, including their formal outfits and their occult variants (which come in very handy with NRaas' Hybrid mod!). Everything is as recolourable as possible, and the heads and bodies include different stencils and RGB layouts for maximum customisation.
In addition to being made recolourable, each CAS item has fully custom specular and bump maps, making them really blend in with the graphical style of TS3 and looking even better than they did in TS2. They also use the reflective PlumBot shader, meaning you get dynamic reflections in the metal and not just a specular highlight. Their orbs also really glow! Just like my TS4 version, these are designed to be mixed and matched between themselves. Unfortunately, they cannot be used with other PlumBot pieces - they're just too different for that.
Instead, the torso section contains Servo's entire body and limbs, and the legs and arms sections have been repurposed to hold accessories,like hats and eyelashes!
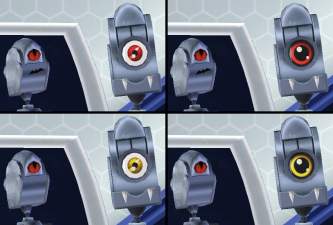
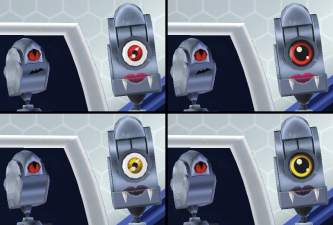
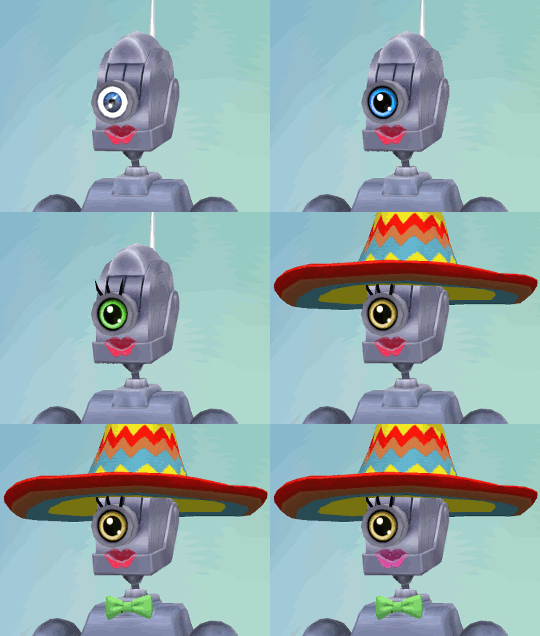
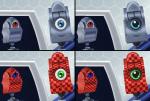
You get four heads: the basic head in male and female; and one with fangs (for vampires and werewolves), also male and female. Both heads include two variants: one with the default Maxis eyes, and another with the fabulous Skelljay eyes! Each has three recolourable channels, plus a fourth channel for lipstick on females.
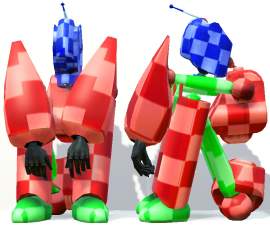
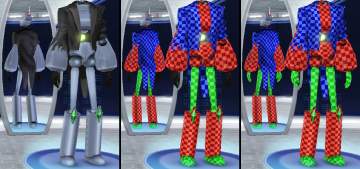
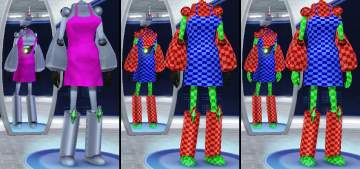
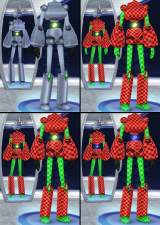
You get three bodies; the basic body, one in a dress, and one in a tuxedo, all recolorable, and the basic body includes two RGB variants - one enabling you to recolour the torso and limbs only, the other letting you recolour the orb and knees too. Additionally, they all have a stencil variant without the black glove..
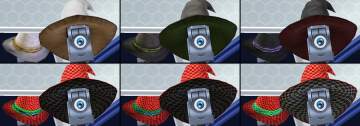
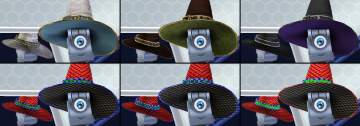
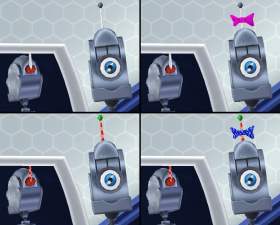
Additionally, you get a five accessories - an antenna, an antenna with a bow, a set of eyelashes, a warlock hat and a witch hat, again, all fully recolourable, and the witch and warlock hats include three totally different textures each, matching the originals.
Because of the way this is set up, you also get a blank arm and a blank leg, to be worn when you don't want an antenna / hat or eyelashes, otherwise the Maxis arms and legs will cause a fair degree of interference. And as a final bonus, you also get a buy mode item, in the form of the deactivated Servo, with three recolourable channels!

While working on this project, I made many small improvements that have been carried over to the older TS4 port, such as better bone assignments, more detailed specular and normal maps, and glowing orbs. An updated version for TS4 is available right now, here , along with an accessory pack including new eyes, eyelashes and accessories .
Whichever game you play, I hope you enjoy it with Servo!
Polygon Counts:
auBody
LOD 1: 4128 (3824 + 304)
LOD 2: 2112 (1956 + 156)
LOD 3: 977 (913 + 64)
amBodyTux
LOD 1: 4456 (3145 + 1007 + 304)
LOD 2: 2124 (1968 + 156)
LOD 3: 1132 (1068 + 64)
afBodyDress
LOD 1: 4363 (4060 + 304)
LOD 2: 2120 (1964 + 156)
LOD 3: 1077 (1013 + 64)
amHead / afHead
LOD 1: 388
LOD 2: 388
LOD 3: 200
amHeadFang / afHeadFang
LOD 1: 416
LOD 2: 416
LOD 3: 216
afAccWitch
LOD 1: 315
LOD 2: 153
LOD 3: 72
amAccWarlock
LOD 1: 349
LOD 2: 157
LOD 3: 72
auAntenna
LOD 1: 26
LOD 2: 18
LOD 3: 18
auAntennaBow
LOD 1: 78
LOD 2: 50
LOD 3: 50
afEyelashes
LOD 1: 27
LOD 2: 19
LOD 3: 19
auArmNull / auLegNull
LOD 1: 1
LOD 2: 1
LOD 3: 1
buyDecoServo
LOD 1: 3296
LOD 2: 1058
Additional Credits:
thanks to Skelljay for permission to use her eye texture! She can be found here: https://whattheskell.tumblr.com/
Meshes and textures modified from The Sims 2: Open For Business, The Sims 2: Pets, The Sims 2: Apartment Life and The Sims 3: Into The Future.
This is a new mesh, and means that it's a brand new self contained object that usually does not require a specific Pack (although this is possible depending on the type). It may have Recolours hosted on MTS - check below for more information.
|
Servo TS3.zip
Download
Uploaded: 19th Jul 2019, 6.85 MB.
2,522 downloads.
|
||||||||
| For a detailed look at individual files, see the Information tab. | ||||||||
Install Instructions
1. Click the file listed on the Files tab to download the file to your computer.
2. Extract the zip, rar, or 7z file. Now you will have either a .package or a .sims3pack file.
For Package files:
1. Cut and paste the file into your Documents\Electronic Arts\The Sims 3\Mods\Packages folder. If you do not already have this folder, you should read the full guide to Package files first: Sims 3:Installing Package Fileswiki, so you can make sure your game is fully patched and you have the correct Resource.cfg file.
2. Run the game, and find your content where the creator said it would be (build mode, buy mode, Create-a-Sim, etc.).
For Sims3Pack files:
1. Cut and paste it into your Documents\Electronic Arts\The Sims 3\Downloads folder. If you do not have this folder yet, it is recommended that you open the game and then close it again so that this folder will be automatically created. Then you can place the .sims3pack into your Downloads folder.
2. Load the game's Launcher, and click on the Downloads tab. Find the item in the list and tick the box beside it. Then press the Install button below the list.
3. Wait for the installer to load, and it will install the content to the game. You will get a message letting you know when it's done.
4. Run the game, and find your content where the creator said it would be (build mode, buy mode, Create-a-Sim, etc.).
Extracting from RAR, ZIP, or 7z: You will need a special program for this. For Windows, we recommend 7-Zip and for Mac OSX, we recommend Keka. Both are free and safe to use.
Need more help?
If you need more info, see:
- For package files: Sims 3:Installing Package Fileswiki
- For Sims3pack files: Game Help:Installing TS3 Packswiki
Loading comments, please wait...
Uploaded: 18th Jul 2019 at 10:28 AM
Updated: 29th Nov 2019 at 3:15 PM
-
Bleach set for young adult and adult male/female
by kuchikisan92 13th Jul 2009 at 2:54am
 20
26.6k
33
-
Manchester United - Juventus - Inter Milan / Male and Female
by billzico 9th Aug 2009 at 10:53pm
 13
32.6k
19
-
by Esmeralda 21st Feb 2010 at 9:19pm
 247
201.8k
208
-
by monca533 29th Dec 2010 at 9:30am
 10
20.1k
24
-
by guidion updated 27th Apr 2011 at 9:04pm
 +1 packs
30 50.1k 37
 Ambitions
Male » Mixed Sets » Adult
-
by guidion updated 3rd Aug 2011 at 1:16am
 73
147.3k
175
-
Mod-Ur-Servo: Accessories for the Discerning Robot
by Qahne updated 14th Jul 2019 at 8:43pm
Add-ons for the Servo mod; new eyes, lashes, hat, bow, bowtie and ducky. more...
 6
10.1k
25
-
by Qahne 30th Apr 2022 at 8:52am
Most of my time playing The Sims is spent either making content or building lots, and my sparse uploading doesn't more...
 +25 packs
1 6.1k 22
 Get to Work
 Outdoor Retreat
 Get Together
 City Living
 Perfect Patio Stuff
 Spa Day
 Cats and Dogs
 Cool Kitchen Stuff
 Seasons
 Get Famous
 Island Living
 Discover University
 Eco Lifestyle
 Romantic Garden Stuff
 Snowy Escape
 Cottage Living
 Backyard Stuff
 Vintage Glamour Stuff
 Vampires
 Horse Ranch
 Parenthood
 Laundry Day Stuff
 Jungle Adventure
 Realm of Magic
 Paranormal Stuff
-
Mighty Mansard Redux! - Store Edit & More - UPDATED
by Qahne updated 18th May 2014 at 9:18pm
A modification of the EAXis mansard roof pieces to make them more useful; also includes dormers and cresting from M&G Stuff more...
 83
53.5k
213
-
TS2 Conversion - Little Hal The Servo Plushie
by Qahne 12th Mar 2021 at 2:08am
A conversion of Queen of France's Little Hal The Servo Plushie more...
 5
6k
56
5
6k
56
Packs Needed
| Base Game | |
|---|---|
 | Sims 3 |
| Expansion Pack | |
|---|---|
 | Into the Future |

 Sign in to Mod The Sims
 Servo - Complete Conversion
