 Sign in to Mod The Sims
 EA-Match Two-Storey Walls
 EA-Match Two-Storey Walls


Dentil_stairs.jpg - width=1496 height=1065
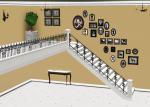
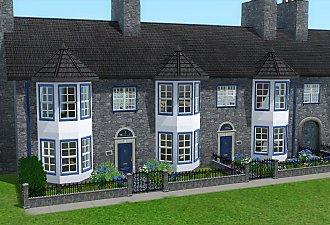
Dentil lower and upper 2-storey walls with 1-storey EA original
Set1.jpg - width=1276 height=967
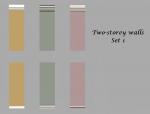
Set 1: the ‘classical’ mouldings
E&D_stairs.jpg - width=1763 height=1015
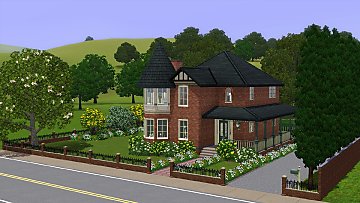
Egg-and-dart lower and upper 2-storey walls with 1-storey EA original.
Twist_hallway.jpg - width=1790 height=919
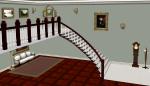
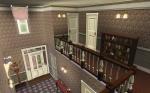
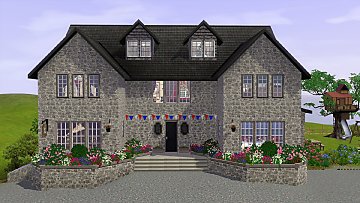
“The grander sort of entrance hall.” Twist motif lower and upper 2-storey walls with 1-storey EA original.
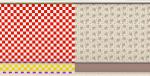
Dentil_tile.jpg - width=1697 height=793
Tiling/CASTability and preset: hzl_Wall_Dentil_Lower and hzl_Wall_Dentil_Upper
E&D_tile.jpg - width=1916 height=923
Tiling/CASTability and preset: hzl_Wall_EggDart_Lower and hzl_Wall_EggDart_Upper
Twist_tile.jpg - width=1744 height=871
Tiling/CASTability and preset: hzl_Wall_TwistMotif_Lower and hzl_Wall_TwistMotif_Upper
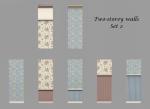
Set2.jpg - width=1418 height=1031
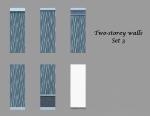
Set 2: mostly dadoes (walls with ornate crown moulding)
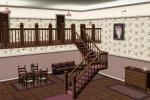
Cottage_stairs.jpg - width=1580 height=1050
2-storey walls: lower wall with tall beadboard dado, upper wall with ornate crown moulding and bordered frieze. 1 storey walls: EA wall with tall beadboard dado downstairs and my wall with tall plain dado upstairs.
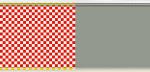
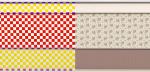
Smallboard_cornice_tile.jpg - width=1918 height=972
Tiling/CASTability and preset: hzl_Wall_Lower_Beadboard_Short. hzl_Wall_Upper_OrnateCrown recoloured to match.
Tallboard_frieze_tile.jpg - width=1898 height=910
Tiling/CASTability and preset: hzl_Wall_Lower_Beadboard_Tall and hzl_Wall_Upper_OrnateCrown_Frieze.
Baseboard_frieze_tile.jpg - width=1802 height=851
Tiling/CASTability and preset: hzl_Wall_Lower_Baseboard_Bead. hzl_Wall_Upper_OrnateCrown_Frieze recoloured to match.
Smallplain_cornice_tile.jpg - width=1792 height=828
Tiling/CASTability and preset: hzl_Wall_Lower_PlainDado_Short and hzl_Wall_Upper_OrnateCrown.
Tallplain_cornice_tile.jpg - width=1853 height=848
Tiling/CASTability and preset: hzl_Wall_Lower_PlainDado_Tall and hzl_Wall_Upper_OrnateCrown.
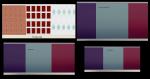
Set3.jpg - width=1325 height=1022
Set 3: the plainer ones (walls with plain baseboard)
Hall_landing.jpg - width=1746 height=1078
EA wall with trimmed border and dado, my upper wall with trimmed border and matching lower wall with dado.
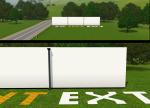
Exterior.jpg - width=1855 height=1080
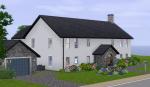
My lower wall with plain baseboard (exterior version); foundation walls with Buckley’s fix used for upper walls and gable ends.
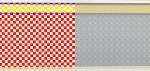
Plain_tile.jpg - width=1881 height=919
Tiling/CASTability and preset: hzl_Wall_Upper_Crown_Plain and hzl_Wall_Lower_Baseboard_Plain
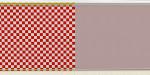
Ext_tile.jpg - width=1619 height=765
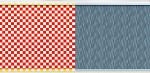
Tiling/CASTability and preset: hzl_Wall_Lower_Baseboard_Plain_Ext. hzl_Wall_Upper_Crown_Plain recoloured to match
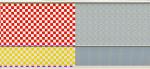
Baseboard_crowntrim_tile.jpg - width=1876 height=891
Tiling/CASTability and preset: hzl_Wall_Upper_Crown_Trim and hzl_Wall_Lower_Baseboard_Plain
Dado_border_tile.jpg - width=1875 height=894
Tiling/CASTability and preset: hzl_Wall_Upper_Crown_TrimmedBorder and hzl_Wall_Lower_Dado_TrimmedBorderMatch
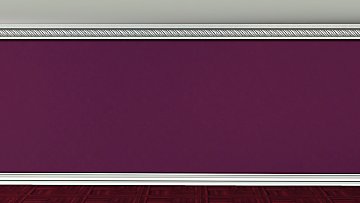
Plain_skirting_walls.jpg - width=1750 height=1256
Exterior and interior versions of wall with plain baseboard vs. EA original
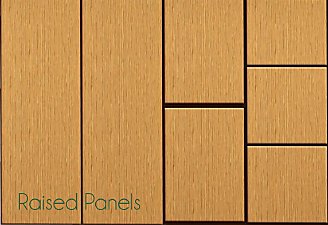
Base_wall_expt.jpg - width=2138 height=1123
Experiment using different base walls
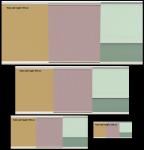
Zoom-out.jpg - width=1852 height=1923
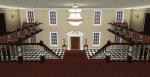
Final version of walls at different degrees of zoom-out


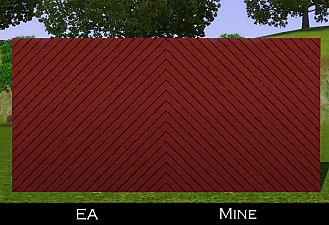
 . I returned to the project at intervals, trying out different ideas, but without making any real progress. Eventually, I gave up. Then, in August this year, I got back into making walls and started doing some serious experimentation.
The most obvious problem with joining wall (and floor) panels is that the game wraps the very edge of the pattern across to the opposite side. This means that a line of skirting/cornice colour appears across the join between the upper and lower walls. I’d addressed this very early on by editing the mask, adding a narrow border of the main wall colour (one pixel wide) to the top/bottom of the wall. This was completely hidden in-game and barely visible when building. Unfortunately, while it helped, it didn’t make the walls seamless.
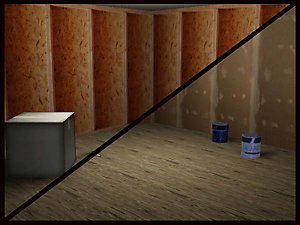
A very, very long time later, I realised that this was because you rarely see the original wall in-game: it’s mostly mipmaps. And that single line of main-colour pixels blurred into the skirting/cornice, even in the first mipmap. After coming across a discussion of a similar problem in Sims 4, I tried playing around with different mipmap generation algorithms and found that ‘nearest’ gave a much crisper result than GIMP’s default (for masks, anyway. I later discovered that it was rubbish for the other textures and the default was actually the best option.) Using ‘nearest’ preserved the line of pixels at the bottom of the wall down to the fourth or fifth mipmap. Unfortunately, it was a different story at the top, where they disappeared immediately. Then I worked out that I could edit the mipmaps in GIMP and solve that problem. The seam was a lot smaller after this but still not invisible.
The recent test walls had been based on a barn wall, because I’d found that houses using barn-based walls would export and re-import without a problem. Was the remaining seam because that wall wasn’t intended to tile vertically? So I found two other walls – the foundation wall and the sci-fi wall with vent – that would also export and import but didn’t have such an obvious edge at the top and bottom. (Incidentally, I think the secret to well-behaved walls may be having only one preset.) I built upper and lower dentil-moulding walls based on all three and tried them out in-game. They developed identical seams on zooming out, suggesting that the base wall is unlikely to affect the final result.
Next, I tried changing the width of the main-colour band at the top or bottom of the wall and got progressively better results with 1, 2 or 4 pixels. Increasing to 8 pixels wide was only slightly better than 4. This couldn’t be applied to a lower wall in-game, since even a second row of pixels was visible at the bottom of the wall. For upper walls, even an 8-pixel-wide band was hidden behind the ceiling when viewing in tab mode, although it looked a bit silly when building. I eventually settled on four pixels at the top and one at the bottom as the best compromise.
While playing around with some other walls, I noticed that the ones with dentil moulding had a more visible seam than flat walls with contrast bands at the top and bottom, even though the dentil mask mipmaps were much better. Did the other textures also influence the result? A few quick experiments showed that they did, so I also applied main-colour bands to the normal, multiplier and specular maps – and found I could get away with 4-px-wide bands at both top and bottom, because they were far less obvious than the mask, even when the modified wall was placed right next to the EA original. Editing mipmaps where necessary improved things still further and I finally felt I had something that was good enough to post.
A small seam still appears when zooming out a long way but this would only be visible in very large rooms. It’s more apparent if there’s a strong contrast between the main wall colour and trim, with plain colours and some small contrasty textures (e.g. rough concrete) being far less forgiving than patterns. The viewing angle and lighting also have an effect.
The project had started out as a set of upper and lower walls to make two-storey versions of the base-game walls with dentil, egg-and-dart and twisted motif crown mouldings, for use in houses with the grander sort of entrance hall, but now it started to grow. A two-storey version of this wall might be useful. And what about that one? So now there are three sets, with a total of 19 walls. All of them can be found in the catalogue under Wall Sets.
Set 1: the ‘classical’ mouldings
The original set:
- hzl_Wall_Dentil_Upper
- hzl_Wall_Dentil_Lower
- hzl_Wall_EggDart_Upper
- hzl_Wall_EggDart_Lower
- hzl_Wall_TwistMotif_Upper
- hzl_Wall_TwistMotif_Lower
Set 2: mostly dadoes
This, on the other hand, was deliberately made as a mix-and-match set, based on the base-game walls with ornate crown moulding. There are two upper and five lower walls, all priced at §6.
- hzl_Wall_Upper_OrnateCrown
- hzl_Wall_Upper_OrnateCrown_Frieze
- hzl_Wall_Lower_Beadboard_Short
- hzl_Wall_Lower_Beadboard_Tall
- hzl_Wall_Lower_PlainDado_Short
- hzl_Wall_Lower_PlainDado_Tall
- hzl_Wall_Lower_Baseboard_Bead
Set 3: the plainer ones
These are two-storey versions of the base-game walls with a plain baseboard:
- hzl_Wall_Upper_Crown_Plain (price §7, 2 channels)
- hzl_Wall_Upper_Crown_Trim (price §7, 2 channels)
- hzl_Wall_Upper_Crown_TrimmedBorder (price §7, 3 channels)
- hzl_Wall_Lower_Dado_TrimmedBorderMatch (price §6, 3 channels)
- hzl_Wall_Lower_Baseboard_Plain (price §5, 2 channels)
- hzl_Wall_Lower_Baseboard_Plain_Ext (price §5, 2 channels)
The upper wall with the trimmed border has had the fixes from my mod applied.
There are, of course, EA walls with just a plain crown moulding or baseboard, so my versions may not be needed, depending on how the walls are being used – the seam between the upper and lower walls may not be obvious in a small hallway.
The upper wall with plain crown moulding, like the EA original, is a lighter colour than the others in the set. I didn’t alter this because the EA wall with plain crown moulding and baseboard matches it exactly. Instead, I adjusted the preset to be slightly darker than the other walls. Similar slight colour changes will be needed if using it in a build with other walls from the set.
The odd one out (with the white-and-grey preset) is another version of the wall with a plain baseboard, with a wider strip of the main wall colour at the bottom. It’s unsuited to internal walls, since part of the strip is visible above the floor, but was created for use on exterior walls, which will generally be seen from a greater distance. When zooming out, it stays seamless for longer than the interior-wall version and there’s only a fine line even with a plain wall and a strongly contrasting baseboard.
Programs used: TSRW, S3PE, S3OC and GIMP.
Thanks to armiel for Builder’s Island, where most of the testing happened.
| Filename | Type | Size |
|---|---|---|
| hzl_walls_2-storey_set1.rar | rar | |
| hzl_Wall_Dentil_Lower.package | package | 339306 |
| hzl_Wall_Dentil_Upper.package | package | 353077 |
| hzl_Wall_EggDart_Lower.package | package | 198108 |
| hzl_Wall_EggDart_Upper.package | package | 226304 |
| hzl_Wall_TwistMotif_Lower.package | package | 348431 |
| hzl_Wall_TwistMotif_Upper.package | package | 357516 |
| Filename | Type | Size |
|---|---|---|
| hzl_walls_2-storey_set2.rar | rar | |
| hzl_Wall_Upper_OrnateCrown_Frieze.package | package | 316375 |
| hzl_Wall_Lower_Baseboard_Bead.package | package | 318272 |
| hzl_Wall_Lower_Beadboard_Short.package | package | 334399 |
| hzl_Wall_Lower_Beadboard_Tall.package | package | 314977 |
| hzl_Wall_Lower_PlainDado_Short.package | package | 297343 |
| hzl_Wall_Lower_PlainDado_Tall.package | package | 272908 |
| hzl_Wall_Upper_OrnateCrown.package | package | 337665 |
| Filename | Type | Size |
|---|---|---|
| hzl_walls_2-storey_set3.rar | rar | |
| hzl_Wall_Upper_Crown_Plain.package | package | 53071 |
| hzl_Wall_Upper_Crown_Trim.package | package | 66642 |
| hzl_Wall_Upper_Crown_TrimmedBorder.package | package | 65446 |
| hzl_Wall_Lower_Baseboard_Plain.package | package | 284005 |
| hzl_Wall_Lower_Baseboard_Plain_Ext.package | package | 274510 |
| hzl_Wall_Lower_Dado_TrimmedBorderMatch.package | package | 292630 |
|
hzl_walls_2-storey_set3.rar
Download
Uploaded: 28th Nov 2022, 431.7 KB.
2,840 downloads.
|
||||||||
|
hzl_walls_2-storey_set2.rar
Download
Uploaded: 28th Nov 2022, 882.0 KB.
2,651 downloads.
|
||||||||
|
hzl_walls_2-storey_set1.rar
Download
Uploaded: 28th Nov 2022, 514.5 KB.
2,830 downloads.
|
||||||||
| For a detailed look at individual files, see the Information tab. | ||||||||
Install Instructions
1. Click the download button, or the filename, to download the file to your computer.
2. Extract the zip, rar, or 7z file. Now you will have either a .package or a .sims3pack file.
For Package files:
1. Cut and paste the file into your Documents\Electronic Arts\The Sims 3\Mods\Packages folder. If you do not already have this folder, you should read the full guide to Package files first: Sims 3:Installing Package Fileswiki, so you can make sure your game is fully patched and you have the correct Resource.cfg file.
2. Run the game, and find your content where the creator said it would be (build mode, buy mode, Create-a-Sim, etc.).
For Sims3Pack files:
1. Cut and paste it into your Documents\Electronic Arts\The Sims 3\Downloads folder. If you do not have this folder yet, it is recommended that you open the game and then close it again so that this folder will be automatically created. Then you can place the .sims3pack into your Downloads folder.
2. Load the game's Launcher, and click on the Downloads tab. Find the item in the list and tick the box beside it. Then press the Install button below the list.
3. Wait for the installer to load, and it will install the content to the game. You will get a message letting you know when it's done.
4. Run the game, and find your content where the creator said it would be (build mode, buy mode, Create-a-Sim, etc.).
Extracting from RAR, ZIP, or 7z: You will need a special program for this. For Windows, we recommend 7-Zip and for Mac OSX, we recommend Keka. Both are free and safe to use.
Need more help?
If you need more info, see:
- For package files: Sims 3:Installing Package Fileswiki
- For Sims3pack files: Game Help:Installing TS3 Packswiki
Loading comments, please wait...
Uploaded: 28th Nov 2022 at 11:55 PM
Updated: 9th Dec 2022 at 5:05 PM
-
by daluved1 updated 13th Jan 2011 at 6:20pm
 27
53.3k
107
27
53.3k
107
-
by alexpilgrim 20th Jun 2011 at 7:55pm
61
101.9k
283
-
by HugeLunatic 12th Mar 2012 at 4:15pm
11
18.8k
52
-

-
by Jezi Bomb 31st Mar 2014 at 2:42am
19
27k
97
-
-

by Lo2ta updated 25th Dec 2024 at 8:47am
14
2.4k
16
-
by Lo2ta 4th Feb 2025 at 1:09pm
1
1.6k
3
-

by Lo2ta 26th Feb 2026 at 6:07pm
718
4
-

by Lo2ta 11th May 2026 at 8:18pm
591


-

Ha’penny Cottage (starter home)
by hazelnutter100 29th Aug 2022 at 11:05am
A one-up, one-down country cottage for the green-fingered Sim on a tight budget*. more...
10
15.8k
50
-


by hazelnutter100 12th Jul 2022 at 7:00pm
A disused signal box converted into a characterful starter home or holiday cottage for the train enthusiast. more...
+1 packs
9 4.9k 19 Ambitions
-

Modified EA wall with twisted motif crown moulding (baseboard replaced)
by hazelnutter100 updated 30th Sep 2022 at 9:06pm
Dealing with another annoyance here… I’ve always liked the base-game wall with the twisted motif cornice/crown moulding, apart from its skirting/baseboard. more...
3
3.4k
14
-
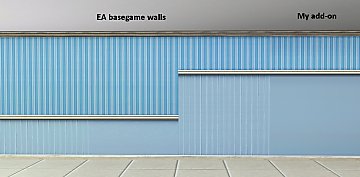
EA add-on: wall with plain tall dado
by hazelnutter100 updated 28th Aug 2022 at 6:56pm
This is a small and simple creation but one I’ve found very useful. more...
5
4.1k
18
-
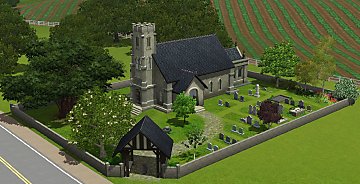
St Simeon’s – A Country Church
by hazelnutter100 23rd Jul 2022 at 7:25pm
This is a church zoned as a graveyard, partly because I wanted a Sims cemetery that was peaceful rather than more...
+1 packs
10 12k 55 World Adventures
-
by hazelnutter100 updated 7th Oct 2018 at 7:53pm
A large modern house for the rich Sim who likes entertaining. No CC. more...
+17 packs
11 45.1k 65 World Adventures
 High-End Loft Stuff
Ambitions
High-End Loft Stuff
Ambitions
 Fast Lane Stuff
 Late Night
 Outdoor Living Stuff
 Generations
 Town Life Stuff
 Master Suite Stuff
 Pets
Pets
 Showtime
 Diesel Stuff
 Supernatural
 Seasons
 University Life
 Island Paradise
 Into the Future
-

by hazelnutter100 4th Oct 2016 at 2:25am
Small 1930s suburban house with large garden. more...
+15 packs
10 18.6k 34 World Adventures
Ambitions
Fast Lane Stuff
Late Night
Outdoor Living Stuff
Generations
Town Life Stuff
Master Suite Stuff
Pets
Showtime
Supernatural
Seasons
University Life
Island Paradise
Into the Future
-

The Anchor Inn - A British Seaside Pub
by hazelnutter100 updated 21st Aug 2016 at 11:16pm
(Part of) my entry for Round 3 of the Build a Resort contest. more...
+11 packs
8 18.8k 23 World Adventures
Ambitions
Late Night
Generations
Pets
Showtime
Supernatural
Seasons
University Life
Island Paradise
Into the Future
-

by hazelnutter100 5th Jan 2023 at 10:22am
+5 packs
6.2k 15 World Adventures
Ambitions
Generations
Showtime
Supernatural
-

by hazelnutter100 updated 1st Jun 2016 at 4:13pm
Typical British seaside B&B more...
+14 packs
7 16.1k 26 World Adventures
Ambitions
Fast Lane Stuff
Late Night
Outdoor Living Stuff
Generations
Town Life Stuff
Master Suite Stuff
Pets
Showtime
Supernatural
Seasons
University Life
Island Paradise


About Me
You are welcome to use my walls in builds uploaded to MTS (and I’d like to see what you do with them) but please link to the original post rather than including them in your own upload.