 CaSTable Rocks, Crystals, Ruins, Mines & Dive Caves
beforeafter.jpg - width=1200 height=900
rockpicsx4.jpg - width=1200 height=900
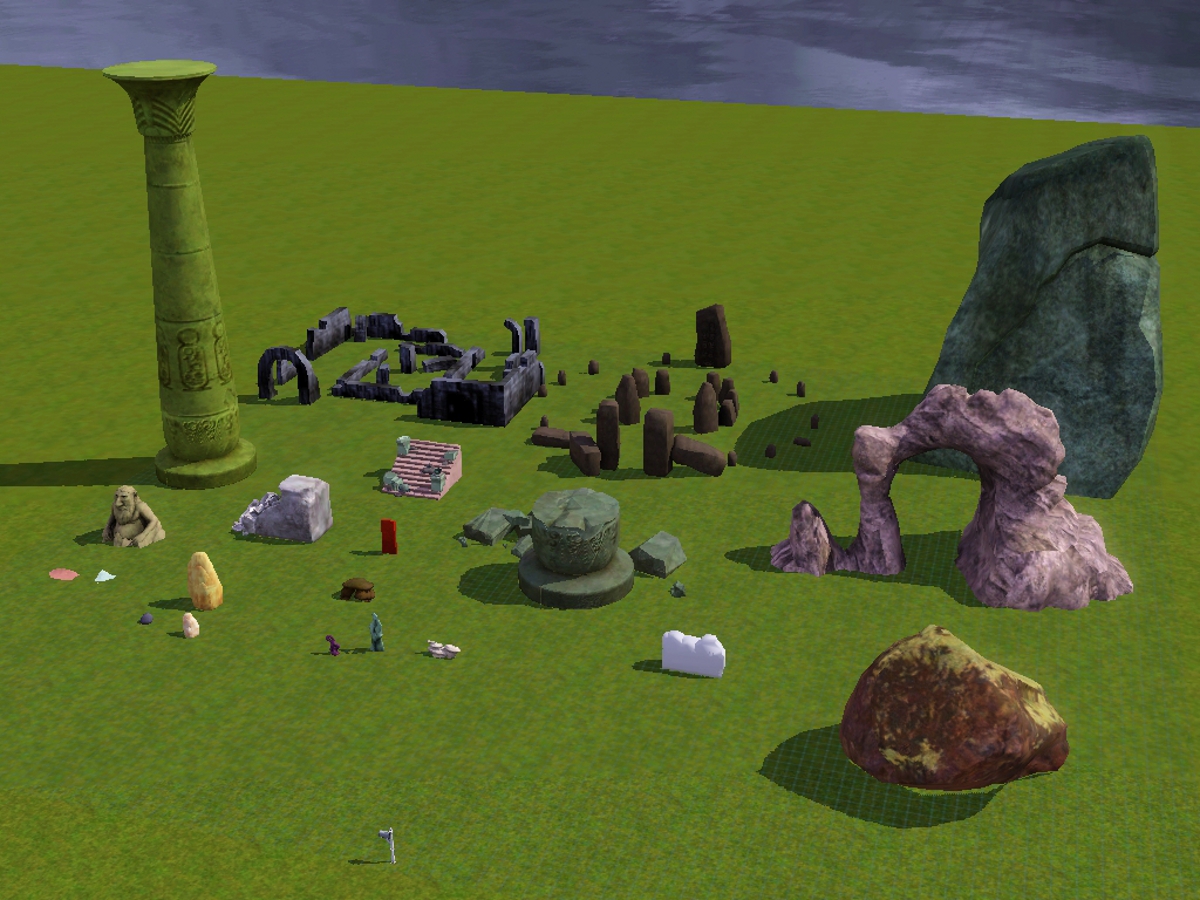
rockruinpics.jpg - width=1200 height=900
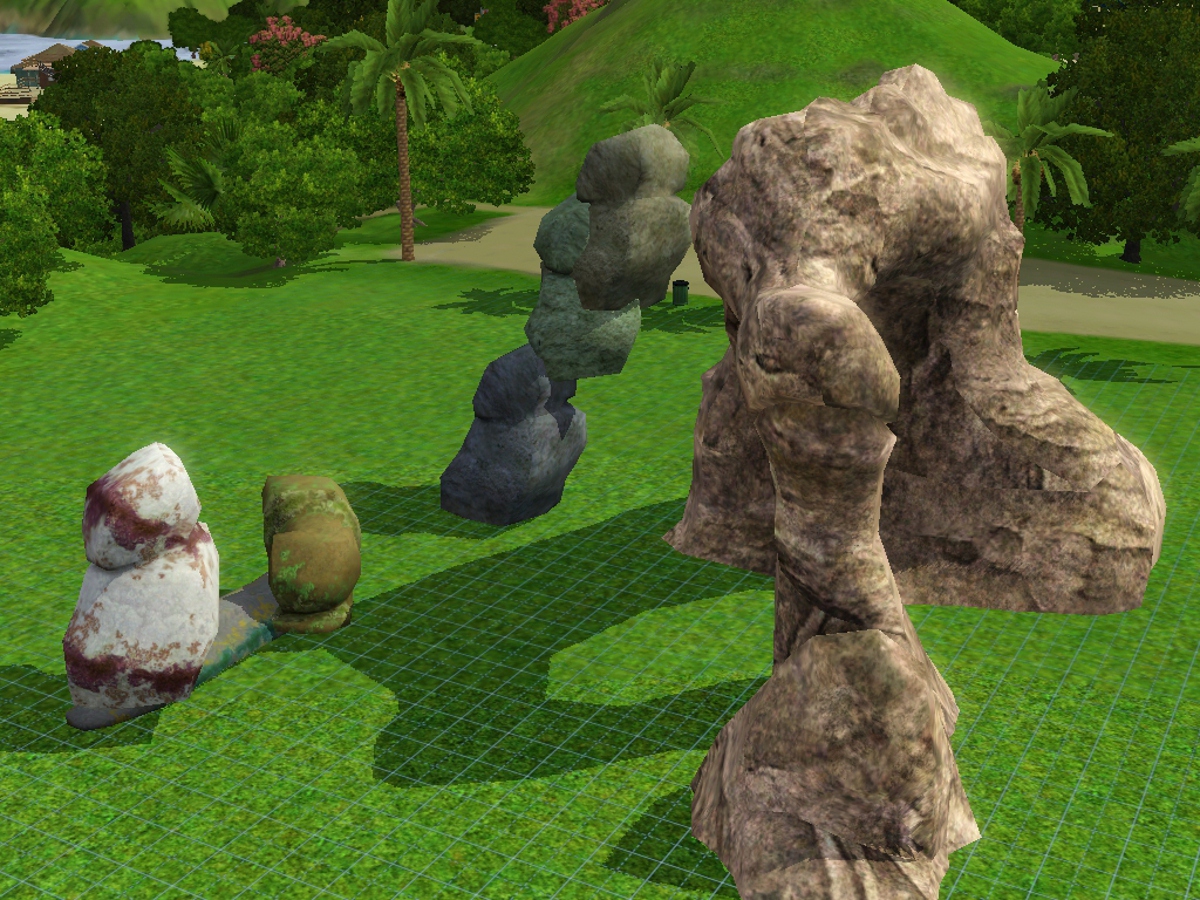
rockpic.jpg - width=1200 height=900

rockpic2.jpg - width=1200 height=900

crystals.jpg - width=1200 height=900

crystalmines.jpg - width=1200 height=900

minescavesaxe.jpg - width=1200 height=900

bustables.jpg - width=1200 height=900

pangu.jpg - width=1200 height=900

01tut.JPG - width=1200 height=900

02tut.JPG - width=1200 height=900

03tut.JPG - width=1200 height=900

04tut.JPG - width=1200 height=900

05tut.JPG - width=1200 height=900

06tut.JPG - width=1200 height=900
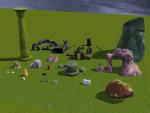
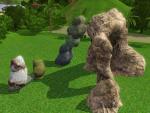
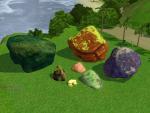
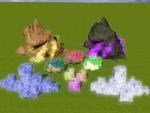
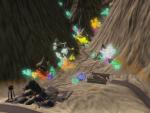
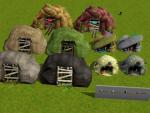
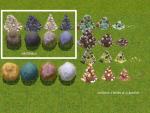


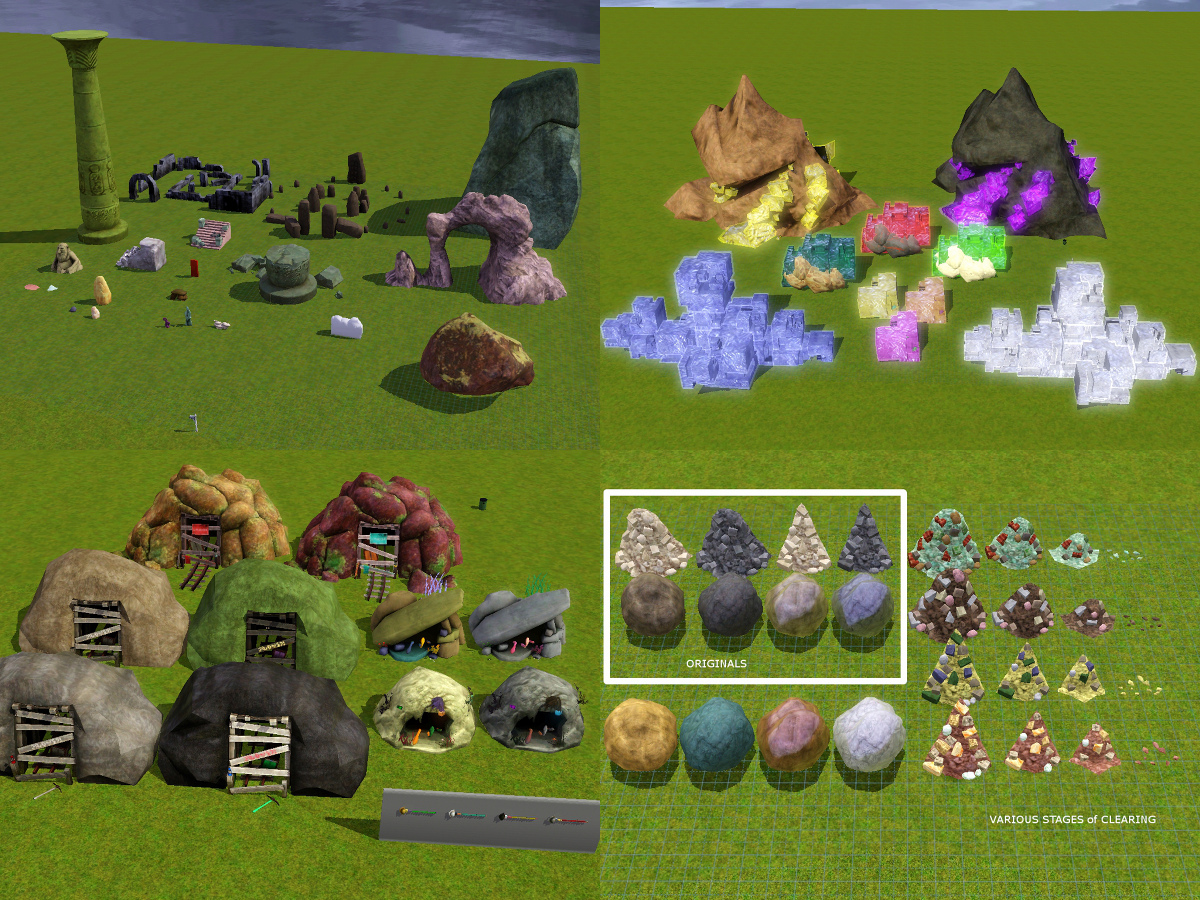
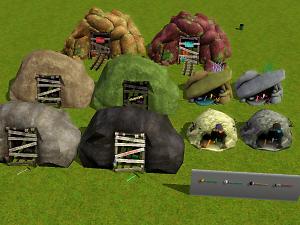
For the most part, these package files merely add the resources needed in order to make an existing object recolourable using the CaST tool. These changes are more geared towards those of us who love building and customising. Most are default overrides with the exception of a few objects that are new (due to having multiple mesh groups that needed to be converted into separate parts in order to make the entire object CaSTable). The new "Multi-Part" objects do include overrides that hide the corresponding original object in the catalogue (to avoid duplicate thumbnails) and to provide limited castability (when feasible) to one mesh group of the now hidden objects since these are the ones used in the pre-made worlds. Any new object will show up in the catalogue with a yellowish-orange thumbnail background.
 Important Note:
Overrides from store worlds & store objects use data that correspond to the original "unmodified" versions of those packages. If you have edited anything before or after installing your store stuff, you will also need to edit these files in the same manner, or the resources will probably not match up or function correctly. ALL objects do rely on resources from the originals in order to look and/or function correctly.
All of these objects contain OBJD, MLOD and MODL overrides that add necessary information to allow recolouring and catalogue sorting, and they will conflict with any other mod that alters the same resources. TXTCs and _XML are also necessary for recolouring and have been added as well. _IMG files also added as needed for masks, desaturated multipliers, etc.
Also included are STBL overrides, the main purpose being to group things together in the object list when using CAW. Searching too much usually causes my CAW to crash, and it's aggravating having to scroll to the L's for a Large Rock, then to the S's for a Small Rock, and who knows where else. With these string overrides, everything is in the "R" section (English strings) for ROCK! Hopefully, the other languages are working as well.
**HOW TO USE
I've been using these for a few years now and haven't run into any issues, but if something does pop up, let me know, and I'll take a look.
- File Location: After downloading, unzip the .rar file and place the unzipped .package file into your Mods/Packages folder. If you already use package files for your store content, then you will need to place any store object packages into a higher priority folder (i.e. overrides) to be sure that the necessary files do get overridden. Deleting the scriptCache.package and compositorCache.package may not be necessary, but it's usually the first thing I do when I start using new mods (just in case).
- Catalogue Location: Build Mode - Rocks | World Edit - Rocks
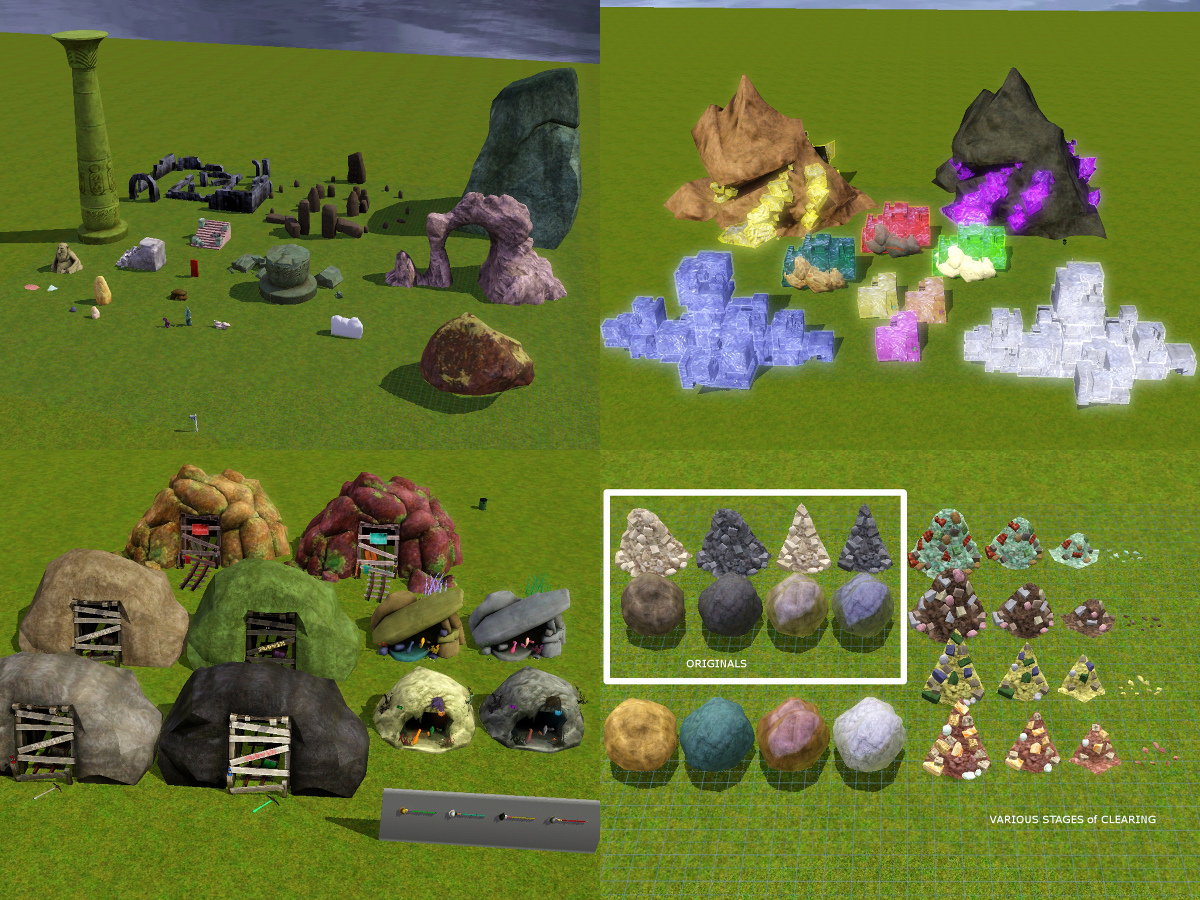
The smaller rocks intended for landscaping should appear at the front of the catalogue. The remainder are hopefully in some sensible order, though obviously a few of these will most likely never actually be used on a lot because they are huuuuuge (unless you're extremely creative, of course ). The breakable rubble and boulders used for tomb building are at the end. The Pangu Axe is also at the very end since it is only used for the purpose of destroying the "breakables" (I know, it's not a rock, haha). There is additional info on the Pangu Axe below.
- Usage: Nothing special. Just place it and / or recolour it, and be done. Multi-part objects may take a split second to assemble, probably not even noticeable with these.
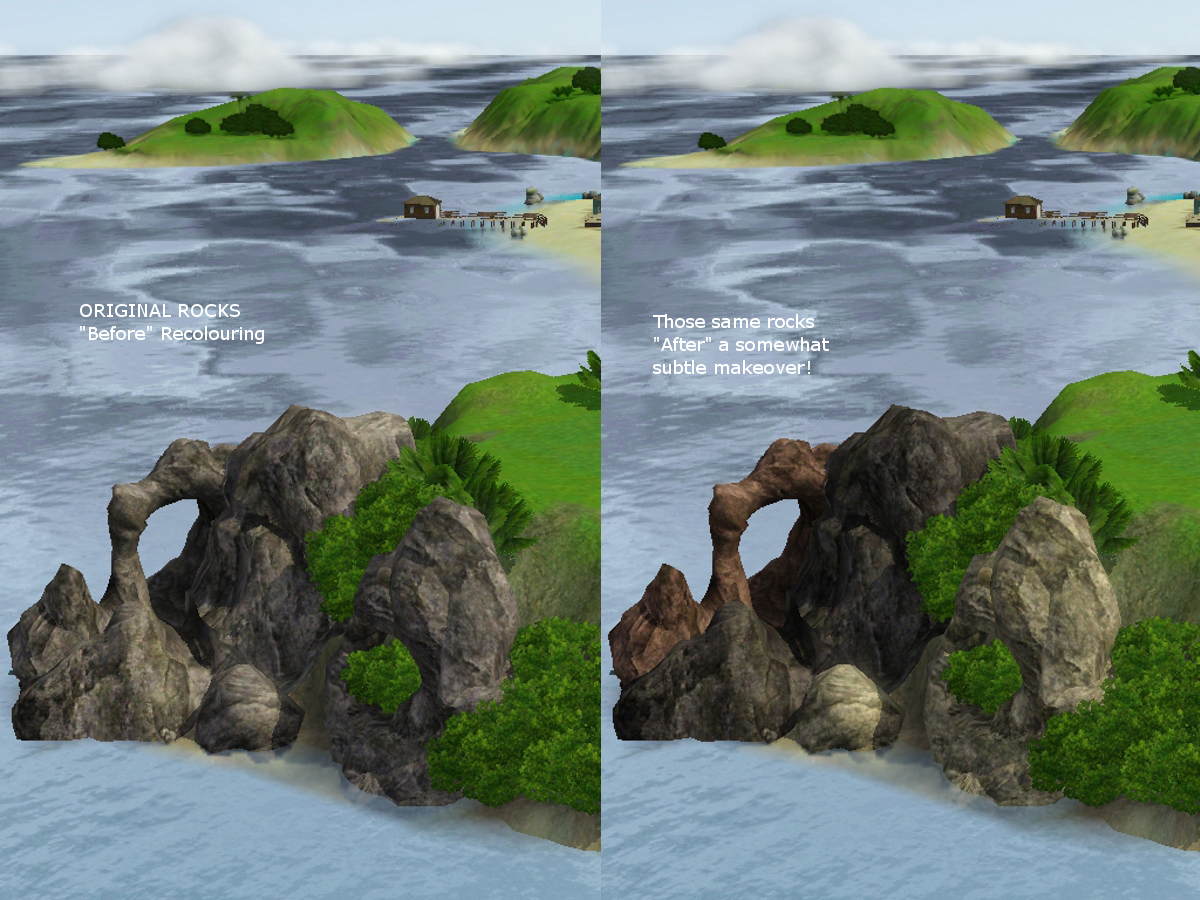
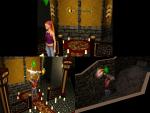
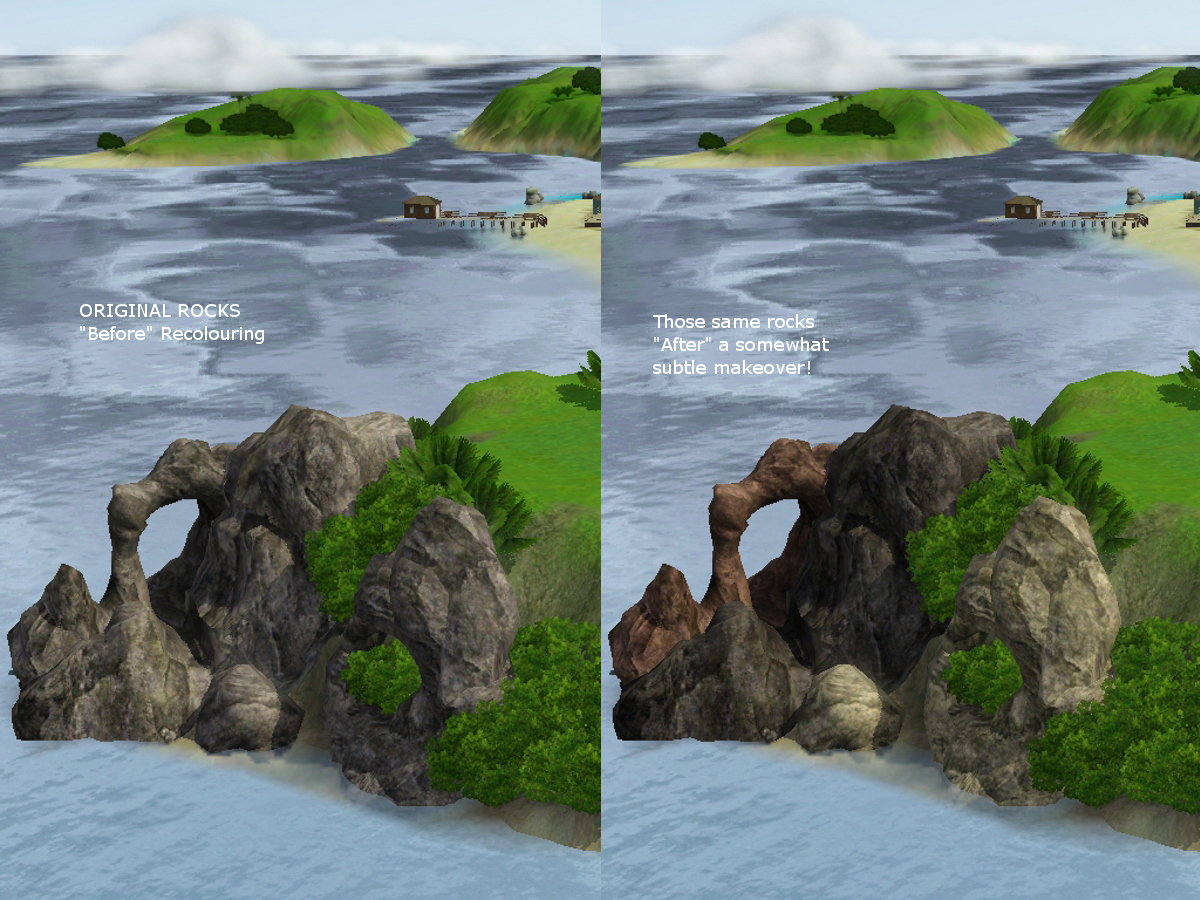
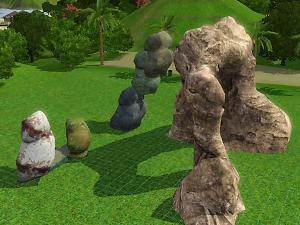
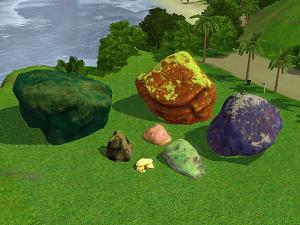
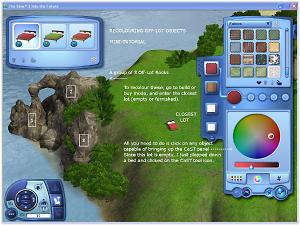
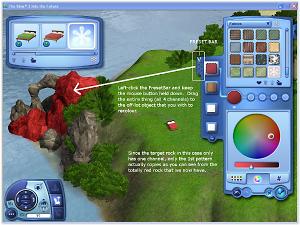
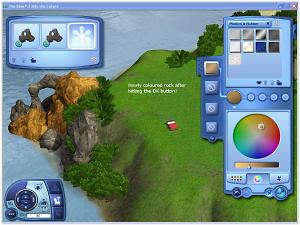
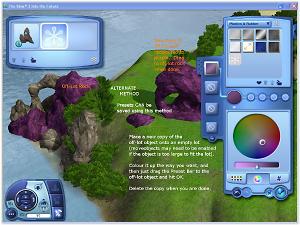
- CaST: Simply click and recolour. Multi-part objects will require clicking on the different areas to recolour (like the rabbitholes). There's a short tutorial below that explains how to recolour objects that are not located on a lot, as well as some images above (images based on pre-existing rocks from Island Paradise).
Info on Pre-Existing Objects (when using overrides)
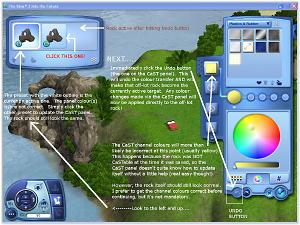
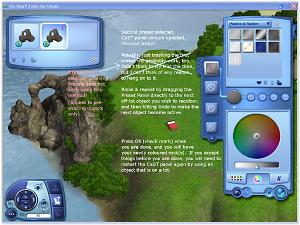
I'm using the term "pre-existing" to refer to objects placed in a world that were NOT CaSTable at the time they were used. If you later add resources that will make an object CaSTable, then the pre-existing objects become CaSTable as well. If you use Method #1 to recolour off-lot objects, then the CaST panel will probably have incorrect colours shown in the channels at first, but clicking the other preset (top left corner) should update the CaST panel with the correct colours. Saving new presets doesn't appear to work on pre-existing objects. See tutorial and images for more info.
List of Multi-Part Objects (with new script that adds assembly)
- Rock of Ancients: rock + engraving.
Pre-Existing Original: is now the "Rock of Un-Ancients" as an override with a solid front, no engraving (The pre-existing one in Riverview may change to reflect this after that world loads)
- Dustin' Rocks (large only): rock + small decals.
Pre-Existing Original: small decals not recolourable
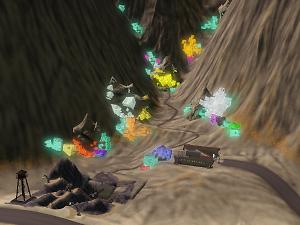
- Mine Entrances x3: rock + wood/signs.
Pre-Existing Original: only the rock is recolourable
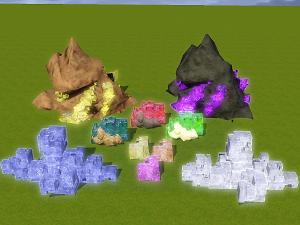
- Crystal Rocks x4: rock + crystals (Complicated Crystal contains no rock).
Pre-Existing Original: only the crystal is recolourable
- Underwater Caves x2: rock + foliage + misc.
Pre-Existing Original: only the rock is recolourable
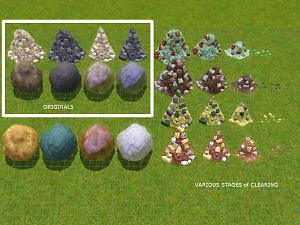
- Rubble Piles x4: main rubble pile + individual rock pieces.
Pre-Existing Original: not recolourable, use new versions instead
- Pre-existing objects that are located outside of a lot may be hard to replace using World Edit due to limitations experienced when you try to adjust an object's position.
- Pre-existing objects that are actually on a lot will probably replace ok, unless other nearby objects interfere with placement. MoveObjects may have been used during the building process and may need to be used again in some situations, i.e. Underwater Caves on dive lots.
CAW users can use the newer versions from the start of world creation.
World Edit & CAW Notes
Scripted objects can be unpredictable when off-lot. The multi-part objects do assemble correctly when placed from World Edit. However, if you change your mind and hit ESC before placing it, only the Main piece will be deleted, and any attached pieces will remain on the map. The same thing will happen after actually placing a multi-part object while in World Edit and then picking it up again to delete it. These pieces can be deleted in the following ways:
- 1. While still in build/buy mode, enter a nearby lot, Ctrl-Shift click the piece that is off-lot and select "Delete It" from the menu.
- 2. Go to live mode, Shift click the piece that is off-lot, select "Object" and then select "Delete It" from the menu.
---CAW Users---
CAW users won't see assembly until they actually go to Edit-In-Game. Upon return to CAW, the objects will remain assembled. In some cases, selecting an object to reposition it will sometimes pick an attached piece instead of the entire Main object. You'll know this has happened if you move or rotate the object and part of it gets left behind. In this case, you will need to use the World Layers menu on the left (Layer_0 - Game Objects) to locate and select the Main part of the object and then move or rotate it how you want.
Quick Tutorial - How To Cast Objects That Are Off-Lot
MAIN rules:
In order to cast an off-lot object, you must be ON a lot or else there's no way to bring up the CaST panel. You will probably want to be on a lot that is close to the off-lot object that you wish to recolour since the **camera restriction will not allow you to move too far from the active lot that you are on. Once the CaST panel is open, you can transfer colours to other objects on the lot, to objects off-lot and even from one lot to another lot if you really must. If it can be reached, it can be casted!
**I have experienced an occasional fluke on a few lots (located in different worlds) where the camera restriction does NOT kick in. If you happen upon one of these random scenarios, once you have opened up the CaST panel, you will be able to move all over the world map recolouring things like a half-crazed R-teest! The missing camera restriction thingy is very umm...inconsistent (lol, my favourite word since I started modding). When checking the same lot on both of my computers, one lot has the restriction, the other does not....go figure. The lots I remember offhand that sometimes behave this way are the "21 Sweetwater Loop" lot from a saved Twinbrook world, and one of the really tiny (10 or 15 grids) lots in Roaring Heights. More than likely, there are others, but it's a random thing.
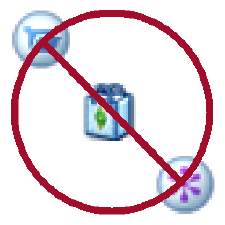
Also, in order for the off-lot object to accept the colour channel transfers, the object's resources must include an _XML file of type 0x0333406C that contains complate (pattern) information. Base game, expansions and stuff packs usually have these already, but for some reason, the "store team" never included them with anything, so store objects are not castable when off lot unless you make this _XML resource for them. If you try to cast an off-lot store object and see a red "X" saying !! No Way !!, it is because the _XML file is missing. You can look below at a sample _XML showing what info is contained within it.
Method #1
Easiest Method to recolour off-lot objects(for me, anyways) -- Presets do NOT appear to save if object is pre-existing
Once you have entered a lot, you can click on any castable object to open up the CaST panel. Once the CaST panel is open, click and hold the mouse on the "Grab Preset" tab and simply drag the patterns to whatever off-lot object you want to recolour. Immediately hit the undo button (the one on the CaST panel). This will not only remove any colours applied to the off-lot object but will also make that object become **active so that you can now recolour it directly via the CaST panel. Simply repeat this process for any other off-lot objects you want to change, and then accept when you are done. That's it!
**Once an off-lot object becomes active after hitting the undo button, you may notice that the first preset shows up in the CaST panel with any active channels coloured "yellow" (with values RGB 255 255 128, Hex 0xFFFF80) or even other arbitrarily incorrect colours and values. See the notation above regarding pre-existing objects.
Method #2
Alternative Method to recolour off-lot:objects
Simply place a copy of the same object you want to recolour on the lot, recolour it from there, then transfer the colours to the off-lot object. If the object is too big to fit the lot, you'll have to temporarily use "moveobjects" to place it there. There won't be a need to make the off-lot object active since the recolour will be from a copy of that object.
Item Specific Notes
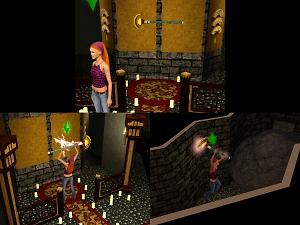
-------Pangu Axe-------
This item uses a total of three different objects -- The axe spawner, the axe itself and the axe prop used for animation scenes. The spawner is what you see in the BuyDebug menu.
The "Temple of Heaven" in China is where the spawner is placed to create the axe that the player sim takes. If you are in build/buy mode, the spawner is what you will see on the wall. Once you go to live mode, you will be seeing the actual axe that was created by the spawner. After your sim takes the axe from the wall, the spawner will create another axe, but it will now be invisible because you are only allowed one axe per household. You can tell that the empty wall space is still occupied if you try to place a wall object at that spot. The new axe will only become visible again if you switch to a different household that does not have an axe already.
Since all three CaSTable axe objects are overrides, the axe spawner will probably spawn an axe with incorrect colours when you first start playing China since the spawner and axe are pre-existing objects and were not CaSTable at the time they world was created. You can either replace the original spawner with the CaSTable version from build mode (recolouring it the way you want), or wait for your sim to take the spawned axe, move it from inventory to a wall and recolour it at that point.
The spawner and the axe are both at the end of the Rocks section now since the axe's only purpose is to bust rubble piles and boulders. The spawner will only show up in the catalogue when you're on a community lot. A bought axe will need to be placed on a wall, and your sim will need to "Take" it in the same manner as the one in the tomb. After taking the axe, the wall space will be available again since doing it this way does not involve the axe spawner object. The actual axe does have a price tag now if for some reason you'd rather buy it than locate the free one in the tomb (which will also have the value but not cost the sim any $). If you do buy the axe, the one in the tomb will probably be invisible now since only one is allowed per household. If you sell it, the game may still remember you having it, and the one in the tomb may still remain invisible. I don't know this for sure.
-------Giant Boulders & Rubble Piles-------
There were actually four boulders in the BuyDebug section of the game, two of which appear to be unused. The main difference in the pairs is the size of the footprint. The ones EA actually used are the 3x3, and the other set (path blocking is what EA called them) are 3x7. The ones with the larger footprint are also a tad shinier than the others.
Scriptwise, the larger boulders contained some code similar to the code found in transport objects like the subway and hover train. I don't really know what EA's intent was with these, but just placing them and breaking them with Pangu seems to work fine. Apparently, you can use the extra footprint area to block a passage without the boulder itself being in the passageway (it can be off to the side). Only a sim equipped with a Pangu will be able to enter the footprinted area in order to get to the boulder and bust it.
The animation sequence during the Smash / Clear interactions for the boulders and rubble piles will still show the original colours during stage transitions. This is unavoidable because it is part of the animation. The "dust cloud" effect does help to hide it somewhat, but it still may be more noticeable when using colours that are not close to the originals. The boulders and rubble piles will disappear after one smash when you use the Pangu Axe, but the rubble piles do have different stages if you clear them away using the pickaxe. Once the animation finishes between each stage, the piles should be back to their proper recolours.
-------Underwater "Dive Lot" Caves-------
Pre-existing caves will probably not be replaceable without using the moveobjects cheat. I don't know how temperamental these are with regard to routing, so you'll need to experiment if you decide to try.
The animated tentacles are recolourable as well. However, they are underneath the cave until their timer starts them up. You can use NRAAS DebugEnabler to start them manually. You can actually recolour them while they're under the cave, but you won't be able to see what you're doing unless you temporarily lower the ground level below the cave itself.
Sample Complate _XML
Resource Type = 0x0333406C
This is needed in the package when you wish to be able to recolour an off-lot object. You will see a red "X" if you try to drag the preset bar to an off-lot object that does not contain this file. (I've only ever seen this resource missing in "store" content.)
<?xml version="1.0" encoding="utf-8"?>
<preset>
<complate name="ObjectRgbaMask" reskey="key:0333406C:00000000:6C320A2F418A30C6">
<value key="assetRoot" value="X:" />
<value key="daeFileName" value="rockMoundSmall_DOT05_world_Object" />
<value key="age" value="A" />
<value key="gender" value="M" />
<value key="species" value="U" />
<value key="bodyType" value="Face" />
<value key="partType" value="Face" />
<value key="filename" value="ObjectRgbaMask" />
<value key="Overlay" value="key:00b2d882:00000000:75f8f21e0f143cac" />
<value key="Mask" value="key:00b2d882:00000000:6f04c03483c744ec" />
<value key="MaskHeight" value="512" />
<value key="MaskWidth" value="512" />
<value key="Multiplier" value="key:00b2d882:00000000:6767c6dfcce8a2c8" />
<value key="Specular" value="key:00b2d882:00000000:1418b14f28cf43ee" />
<value key="Stencil A" value="key:00b2d882:00000000:75f8f21e0f143cac" />
<value key="Stencil B" value="key:00b2d882:00000000:75f8f21e0f143cac" />
<value key="Stencil C" value="key:00b2d882:00000000:75f8f21e0f143cac" />
<value key="Stencil D" value="key:00b2d882:00000000:75f8f21e0f143cac" />
<value key="Pattern A" value="Materials\Plastic_Rubber\solidColorS1_1" />
<value key="Pattern A Tiling" value="1,2" />
<value key="Pattern B" value="Materials\Plastic_Rubber\solidColorS1_1" />
<value key="Pattern B Tiling" value="1,2" />
<value key="Pattern C" value="Materials\Plastic_Rubber\solidColorS1_1" />
<value key="Pattern C Tiling" value="1,2" />
<value key="Pattern D" value="Materials\Plastic_Rubber\solidColorS1_1" />
<value key="Pattern D Tiling" value="1,2" />
<value key="Stencil A Tiling" value="1,1" />
<value key="Stencil B Tiling" value="1,1" />
<value key="Stencil C Tiling" value="1,1" />
<value key="Stencil D Tiling" value="1,1" />
<value key="Pattern A Rotation" value="0" />
<value key="Pattern B Rotation" value="0" />
<value key="Pattern C Rotation" value="0" />
<value key="Pattern D Rotation" value="0" />
<value key="Stencil A Rotation" value="0" />
<value key="Stencil B Rotation" value="0" />
<value key="Stencil C Rotation" value="0" />
<value key="Stencil D Rotation" value="0" />
<value key="Pattern A Linked" value="False" />
<value key="Pattern B Linked" value="False" />
<value key="Pattern C Linked" value="False" />
<value key="Pattern D Linked" value="False" />
<value key="Pattern A Enabled" value="True" />
<value key="Pattern B Enabled" value="False" />
<value key="Pattern C Enabled" value="False" />
<value key="Pattern D Enabled" value="False" />
<value key="Stencil A Enabled" value="False" />
<value key="Stencil B Enabled" value="False" />
<value key="Stencil C Enabled" value="False" />
<value key="Stencil D Enabled" value="False" />
<pattern name="solidColorS1_1" reskey="key:0333406c:00000000:9097a5d3dc2de82b" variable="Pattern A">
<value key="assetRoot" value="X:" />
<value key="filename" value="Materials\Plastic_Rubber\solidColorS1_1" />
<value key="rgbmask" value="key:00b2d882:00000000:6f04c03483c744ec" />
<value key="specmap" value="key:00b2d882:00000000:0042a88e50a3045e" />
<value key="Color 0" value="168,135,105,255" />
</pattern>
<pattern name="solidColorS1_1" reskey="key:0333406c:00000000:9097a5d3dc2de82b" variable="Pattern B">
<value key="assetRoot" value="X:" />
<value key="filename" value="Materials\Plastic_Rubber\solidColorS1_1" />
<value key="rgbmask" value="key:00b2d882:00000000:6f04c03483c744ec" />
<value key="specmap" value="key:00b2d882:00000000:0042a88e50a3045e" />
<value key="Color 0" value="85,104,202,255" />
</pattern>
<pattern name="solidColorS1_1" reskey="key:0333406c:00000000:9097a5d3dc2de82b" variable="Pattern C">
<value key="assetRoot" value="X:" />
<value key="filename" value="Materials\Plastic_Rubber\solidColorS1_1" />
<value key="rgbmask" value="key:00b2d882:00000000:6f04c03483c744ec" />
<value key="specmap" value="key:00b2d882:00000000:0042a88e50a3045e" />
<value key="Color 0" value="232,227,17,255" />
</pattern>
<pattern name="solidColorS1_1" reskey="key:0333406c:00000000:9097a5d3dc2de82b" variable="Pattern D">
<value key="assetRoot" value="X:" />
<value key="filename" value="Materials\Plastic_Rubber\solidColorS1_1" />
<value key="rgbmask" value="key:00b2d882:00000000:6f04c03483c744ec" />
<value key="specmap" value="key:00b2d882:00000000:0042a88e50a3045e" />
<value key="Color 0" value="227,213,18,255" />
</pattern>
</complate>
</preset>
Additional Credits:
Inge & Peter for their wonderful S3PE / S3OC / Tweaker tools that have made this possible
icarus_allsorts for continued input when I hit a road block!
All the other modders who continue to provide us with more great game content.
|
Rocks - Complete Set.rar
| Complete set for all downloads listed above - discard the ones you do not need
Download
Uploaded: 2nd Aug 2015, 8.62 MB.
2,250 downloads.
|
||||||||
|
Rock_BrunchAtOldMill.rar
| Store Set - Brunch at the Old Mill - Pebble Henge (just adds World Edit/CAW version)
Download
Uploaded: 2nd Aug 2015, 13.6 KB.
448 downloads.
|
||||||||
|
Rock_LuxeLoungeSpa.rar
| Store Set - Luxe Lounge Spa - Rock All Night (just adds World Edit/CAW version)
Download
Uploaded: 2nd Aug 2015, 9.2 KB.
422 downloads.
|
||||||||
|
Rocks_A108_World_DragonValley.rar
| Store World - Dragon Valley - Ruins x5
Download
Uploaded: 2nd Aug 2015, 133.7 KB.
498 downloads.
|
||||||||
|
Rocks_A107_World_AuroraSkies.rar
| Store World - Aurora Skies - Solar Stones x3
Download
Uploaded: 2nd Aug 2015, 93.7 KB.
469 downloads.
|
||||||||
|
Rocks_A106_World_MonteVista.rar
| Store World - Monte Vista - Ruins x4
Download
Uploaded: 2nd Aug 2015, 118.3 KB.
475 downloads.
|
||||||||
|
Rocks_A105_World_SunlitTides.rar
| Store World - Sunlit Tides - Lava Boulders x3
Download
Uploaded: 2nd Aug 2015, 87.7 KB.
457 downloads.
|
||||||||
|
Rocks_A104_World_LuckyPalms.rar
| Store World - Lucky Palms - Dustin Rocks (Large and Small)
Download
Uploaded: 2nd Aug 2015, 412.6 KB.
435 downloads.
|
||||||||
|
Rocks_A103_World_LunarLakes.package.rar
| Store World - Lunar Lakes - Crystals x4 **Includes TWO package versions, one for those with Lunar Lakes installed, and one for those who just have the crystals -- Do NOT use both of these together!
Download
Uploaded: 2nd Aug 2015, 1.09 MB.
1,131 downloads.
|
||||||||
|
Rocks_A100_World_Riverview.rar
| Store World - Riverview - Rock of Ancients
Download
Uploaded: 2nd Aug 2015, 42.6 KB.
535 downloads.
|
||||||||
|
Rocks_A0_IntoTheFuture.rar
| Into the Future - Rocks
Download
Uploaded: 2nd Aug 2015, 124.1 KB.
593 downloads.
|
||||||||
|
Rocks_90_IslandParadise.rar
| Island Paradise - Rocks, Ruins, Dive Lot Caves
Download
Uploaded: 2nd Aug 2015, 2.03 MB.
694 downloads.
|
||||||||
|
Rock_70_Supernatural.rar
| Supernatural - Rock Troll Statue
Download
Uploaded: 2nd Aug 2015, 113.4 KB.
684 downloads.
|
||||||||
|
Rock_58_Showtime_XMLonly.rar
| Showtime - Cement Block (was not originally enabled to show up in catalogue)
Download
Uploaded: 2nd Aug 2015, 2.2 KB.
518 downloads.
|
||||||||
|
Rocks_48_Pets.rar
| Pets - Rocks, Mine
Download
Uploaded: 2nd Aug 2015, 1.88 MB.
920 downloads.
|
||||||||
|
Rocks_08_WorldAdventures.rar
| World Adventures - Rocks, Ruins, Mine, Boulders, Rubble Piles, Sand, Pangu Axe
Download
Uploaded: 2nd Aug 2015, 1.16 MB.
786 downloads.
|
||||||||
|
Rocks_00_BASEGame.rar
| BASE Game - Rocks, Ruins, Mine
Download
Uploaded: 2nd Aug 2015, 1.33 MB.
1,132 downloads.
|
||||||||
| For a detailed look at individual files, see the Information tab. | ||||||||
Install Instructions
Loading comments, please wait...
Updated: 2nd Aug 2015 at 4:59 PM - fixed typo's
-
Unlocked Child/Teen LTR and Traits (Testers Wanted)
by Chicken0895 updated 6th Nov 2013 at 8:26pm
 47
87.2k
135
-
Hewnsman unCAStables made CAStable
by omegastarr82 31st Dec 2012 at 2:22am
-
Ultra Lounge unCAStables made CAStable
by omegastarr82 7th Jan 2013 at 4:13pm
-
by LukeProduction updated 7th Jul 2013 at 1:41am
-
CaSTable RabbitHole Replacements
by AussomeDays updated 14th Dec 2015 at 7:39pm
 +10 packs
112 168.3k 410
 World Adventures
 Ambitions
 Late Night
 Town Life Stuff
 Pets
Pets
 Showtime
 Supernatural
 University Life
 Island Paradise
 Into the Future
-
CaSTable Building Shell Replacements
by AussomeDays updated 14th Dec 2015 at 7:41pm
 +5 packs
32 35.6k 86
 World Adventures
 Late Night
 Showtime
 University Life
 Into the Future
-
CaSTable Eiffel Tower (Icarus_Allsorts style) & CaSTable Arc de Triomphe
by AussomeDays updated 6th Dec 2015 at 6:03am
 +1 packs
11 20.1k 42
 World Adventures
-
by bubblegumfish 31st Aug 2018 at 3:44pm
-
Additional Entry and Exit Routing Slots to Reduce Door Crowding - Schools, University
by AussomeDays updated 6th Feb 2016 at 8:29pm
Additional routing slots - currently schools and Uni buildings - that reduce door crowding by assigning sims to all available doors more...
 57
115.2k
351
-
CaSTable Cow Plants and related objects from the "Killer Classics" store set
by AussomeDays 6th Sep 2015 at 1:49pm
"Killer Classics" store set - Cow Plant, Arcade Machine, Spring Rider - CaSTable versions more...
-
CaSTable Magic Gnome Overrides - Randomly AutoColoured - Convertible to Garden Gnomes
by AussomeDays 14th Mar 2016 at 10:33pm
Overrides that add CaSTability to all EA magical gnomes created over the course of the game releases. more...
-
CaSTable RabbitHole Replacements
by AussomeDays updated 14th Dec 2015 at 7:39pm
RabbitHole shells that can be recoloured using the Create-A-Stye tool and used in place of the default EA versions. more...
 +10 packs
112 168.4k 411
 World Adventures
 Ambitions
 Late Night
 Town Life Stuff
 Pets
Pets
 Showtime
 Supernatural
 University Life
 Island Paradise
 Into the Future
-
CaSTable Eiffel Tower (Icarus_Allsorts style) & CaSTable Arc de Triomphe
by AussomeDays updated 6th Dec 2015 at 6:03am
Deco shells converted into RabbitHoles that can be recoloured using the Create-A-Stye tool. more...
 +1 packs
11 20.2k 42
 World Adventures
-
CaSTable Building Shell Replacements
by AussomeDays updated 14th Dec 2015 at 7:41pm
Building shells that can be recoloured using the Create-A-Stye tool and used in place of the default EA versions. more...
 +5 packs
32 35.6k 86
 World Adventures
 Late Night
 Showtime
 University Life
 Into the Future
-
University Student Union / Library Shell Overrides to help with Crowding Issues
by AussomeDays 9th May 2018 at 3:07pm
Overrides for University Student Union and Library shells to help alleviate doorway crowding more...
-
Fence & Gate of Farmington texture "fix" to alleviate fence post differences with adjacent sections
by AussomeDays 1st Sep 2015 at 2:43am
Texture replacements to correct visual inconsistency with adjacent fence and gate pieces. more...
-
CaSTable Hover Train Car Models
by AussomeDays 1st Sep 2015 at 2:42am
Models used for designating the train car colours used when a rideable hover train is generated (or for deco). more...
 +1 packs
3 11.1k 23
 Into the Future
Packs Needed
| Base Game | |
|---|---|
 | Sims 3 |
| Expansion Pack | |
|---|---|
 | World Adventures |
 | Pets |
 | Showtime |
 | Supernatural |
 | Island Paradise |
 | Into the Future |

 Sign in to Mod The Sims
 CaSTable Rocks, Crystals, Ruins, Mines & Dive Caves
 ). The breakable rubble and boulders used for tomb building are at the end. The Pangu Axe is also at the very end since it is only used for the purpose of destroying the "breakables" (I know, it's not a rock, haha). There is additional info on the Pangu Axe below.