 CaSTable Building Shell Replacements

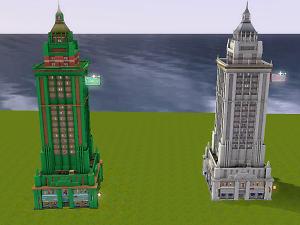
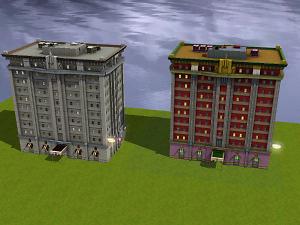
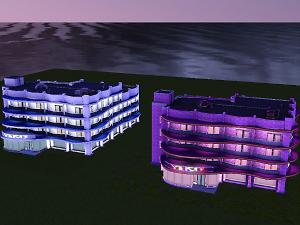
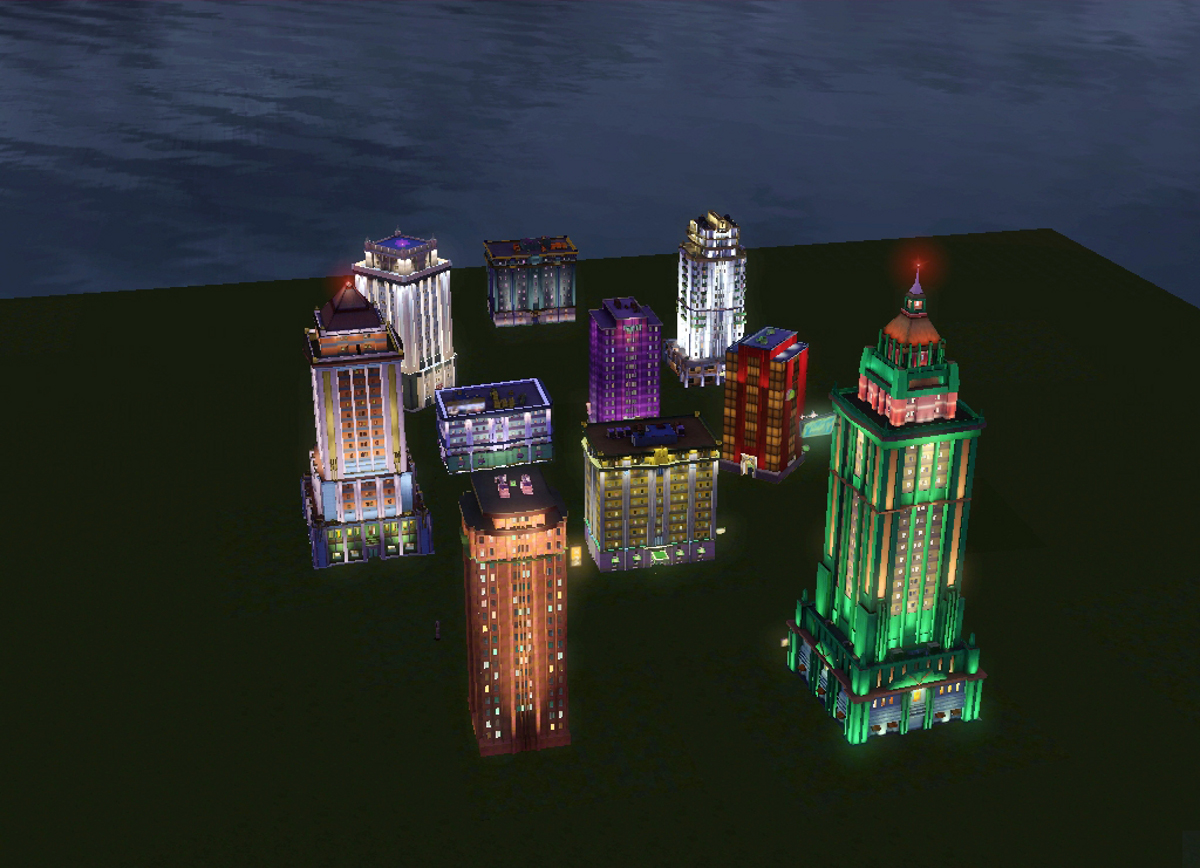
msI_B_HighriseNightBloom.jpg - width=1200 height=868

msI_B_HighriseHero.jpg - width=1200 height=900

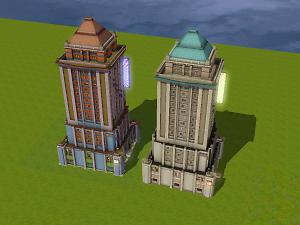
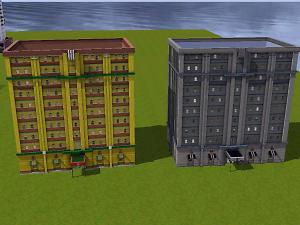
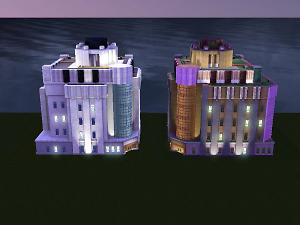
msI_B_HighriseFinanceCtr.jpg - width=1200 height=900

msI_B_HighriseFinanceCtrV1.jpg - width=1200 height=900

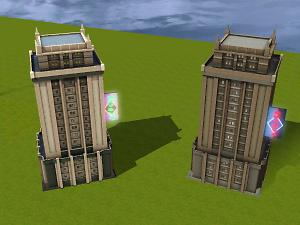
msI_B_HighriseLeoCtrV1a.jpg - width=1200 height=900

msI_B_HighriseLeoCtrV2d.jpg - width=1200 height=900

msI_B_HighriseLeoCtrV3b.jpg - width=1200 height=900

msI_B_HighriseLeoCtrV4d.jpg - width=1200 height=900

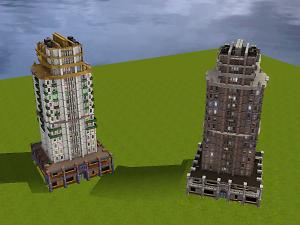
msI_B_HighriseCivicV1b.jpg - width=1200 height=900

msI_B_HighriseCivicV2.jpg - width=1200 height=900

msI_B_HighriseCivicV3.jpg - width=1200 height=900

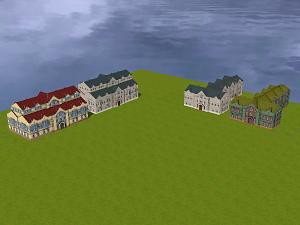
msI_U_Shells.jpg - width=1200 height=900

msI_OL_Shells.jpg - width=1200 height=900

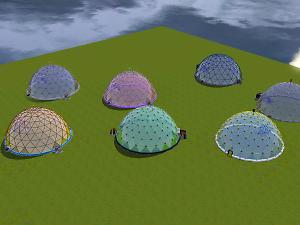
msI_Domes.jpg - width=1200 height=900

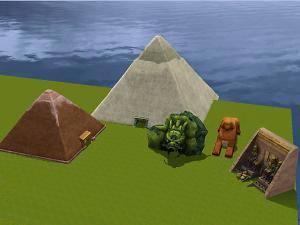
msI_WA_EgyptChina.jpg - width=1200 height=900

msI_WA_Temple.jpg - width=1200 height=900

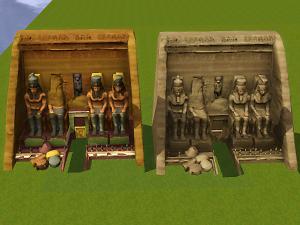
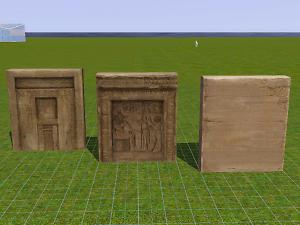
msI_WA_ShellDoorsEgypt.jpg - width=1200 height=900

msI_SS_PrivateNight.jpg - width=1200 height=900

msI_SS_RotaryNight.jpg - width=1200 height=900

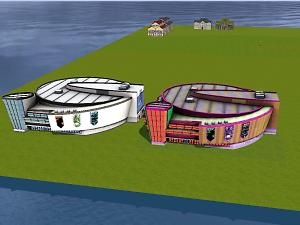
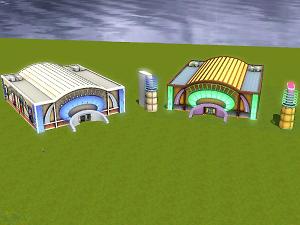
msI_SS_Stadium.jpg - width=1200 height=900

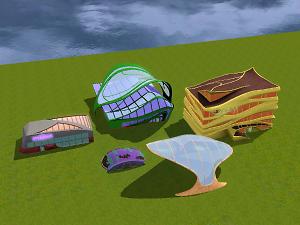
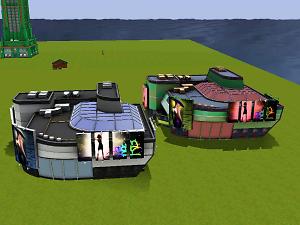
msI_SS_ConcertHall.jpg - width=1200 height=900

msI_ST_UltimateTheatre.jpg - width=1200 height=900

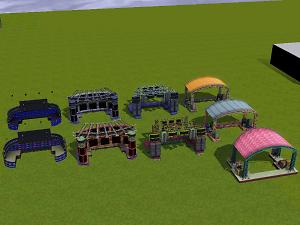
msI_SS_StageRigs.jpg - width=1200 height=900

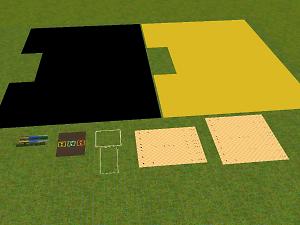
msI_SS_Extras.jpg - width=1200 height=900




Very minor...
Be sure to delete yout scriptCache.package if you update

- cleaned up duplicated and unnecessary code from the Shell Assembly script (you may want to keep a copy of the old file just in case I managed to break something)
- fixed the World Adventure shells that have multiple door designs so that they retain their colours if you decide to change the style "after" already recolouring them
- added a .package file that can be used to hide the default EA shell thumbnails if you want your catalogue to be less cluttered -- NOTE: This will override the default OBJDs to make sure that the BuildBuyProductStatusFlags value is 60 (usually 61). Works for base game, expansions, stuff packs and "unmodified" store content. Place in Mods/Packages if you have no store content OR if you install store content using the launcher. If you have converted your store content to .package files, then place in Mods/Overrides instead. Can be removed by deleting the .package file.
Update Feb 28, 2015
Added the remainder of the shell buildings and some extras. ***IMPORTANT*** Be sure to read the specific sections below for further info on using these and the peculiarities (nooohhhhhh) you may experience. The originals were very quirky at times (mainly Showtime), so hopefully, I didn't make anything worse. Shell Assembly Script updated to handle new buildings - remember to delete scriptCache.package after redownloading.
Also, did a minor update (changed one reference value) to the original Late Night (Bridgeport) - ShellDoors_Highrise_Castable.rar file. One of the two door overrides had an incorrect value in the OBJD that could affect manual placement (hot tub error). However, since the script places the doors automatically, you may not run into any problems. It has been fixed just in case.
These CaSTable Shell Replacements can be used to create more colourful buildings than what Bridgeport (and other worlds) have to offer. They complement and work pretty much the same as the CaSTable RabbitHole Replacements. I've started a separate topic for these due to a few minor differences that will be explained in the sections containing item specific notes. Unzipped .package file sizes range from 2 - 18 MB (some are rather large).
 Important Note:
These shell objects will NOT override the original game shells. However, they do rely on resources from those originals in order to function. Therefore, you will need to have the correct corresponding object from the base game / expansion pack / stuff pack / store item already installed in your game. These package files WILL NOT work by themselves! It is not recommended to use the "move objects" cheat unless absolutely necessary, i.e. Egyptian pyramids.
 Shell Assembly Script **REQUIRED**
This is the bad boy responsible for assembling all of the parts into a complete unit. It will get updated whenever new shells are added to the mix, and you will need to re-download and replace the copy in your mods/packages folder if and when you add new shells from this project to your game. Don't forget to delete the scriptCache.package file from your Sims 3 directory when you update in order for any new script changes to take effect.
**NOTE
These shells can be used in any combination. After downloading a set, you can pick and choose whichever ones you want to use as long as you already have the appropriate originals. They all work independently of each other, and the Main Shell Assembly script will assemble any and all. All of these were made after patching to game version 1.67.
**HOW TO USE
- File Location: After downloading, unzip the .rar file and place the unzipped .package file into your Mods/Packages folder.
- Catalogue Location:
Highrise shells: Buy Mode - Decor - Misc Decor (Sort By Function) -- OR -- Buy Mode - Outdoors - Lawn Ornaments (Sort By Room)
Other shells: Build Mode - Community Objects - Misc Objects (at the end)
Stage Rigs & Extras: Buy Mode - Stage Props - Props (at the end)
Shell Doors (new & overrides) - Build Mode - Doors (at the end)
**Those shell doors in build mode shouldn't really be needed. I think they can be used in the originals to manually replace a wonky door. They're supposed to snap to the slot, but when I add container entries to the RSLT, this snapping somehow quits working, and the door only looks like it's in the slot. Better to use a reset doors interaction if you need a replacement so that it's actually in the slot, or you'll get routing issues.
- Usage: Simply place the shell on a community OR residential lot as per usual. It may take a couple of seconds for the script to assemble the building if it has lots of parts, but once it's complete, it should be fully assembled. Depending on the type of shell, it may become translucent in appearance or invisible except for the foundation framework. Unlike the rabbitholes, you may not be able to pick up or move these once placed. The best ways to delete them are either with the "Undo" button or bulldozing the lot. I'm not sure if the Ctrl-Shift "Delete It" interaction removes everything completely.
- CaST: Simply click on the part of the building that you wish to recolour to bring up the create-a-style tool. You can switch to other parts of the building by clicking on them. You can also drag a colour from one part to another just like with any other object. Solid colours work best due to the way these are designed (Patterns don't always appreciate EA's UV mapping...lol). See notes below for additional info.
Many of the technical notes are the same as for the rabbitholes and can be read HERE. Just scroll down to the "Show Technical Notes" button. Just had a "DUH" moment a year after the fact and realised that CaST presets do indeed work for individual parts, just not for the building as a whole. I'll bet everyone already knows this...haha!
All shell doors should be CaSTable either via replacement or override .packages and are included in the downloads so I don't get confused trying to keep track of too many things.....mmmm, yeah.
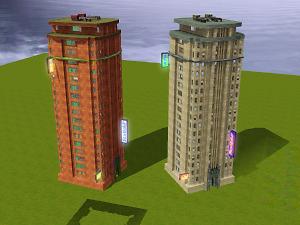
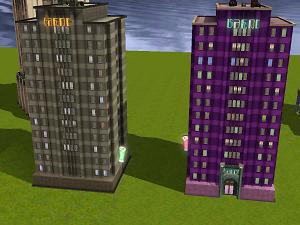
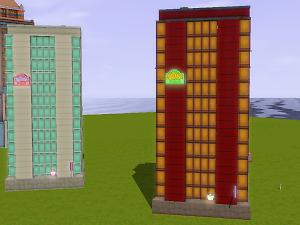
Late Night HighRise Shells
**** If you haven't yet built a highrise, you may want to google for some tutorials and/or guidelines.
Total of 28 building shells (37 MB zipped, 200 MB unzipped). These will disappear when first place on a lot leaving only the building foundation.
Catalogue Location: Buy Mode - Decor - Misc Decor (Sort By Function) -- OR -- Buy Mode - Outdoors - Lawn Ornaments (Sort By Room).
I successfully created working residential and community highrises with these while comparing what I know behaviourwise to the originals. Sims used them without problems, and the building parts appeared & disappeared when changing levels. I haven't had lots of hands-on with these though, so please let me know if I've missed something so I can take another look.
 A couple of things to note:
- Sim would occasionally clip through the corner of the shell if entering the door from an angle (original & castable versions)
- Residential callbox had oodles of sims listed as living there. Maybe things get divided up when you have multiple buildings. I don't know if the XML file entries for the # of rooms / # of floors has any effect on this or not.
Recolouring Info
When first placing a shell, try to make sure you already know where you want it since you cannot pick it up again once placed. After placing, the shell will disappear leaving only the foundation framework visible (normal behaviour). The move up/down a level buttons will work but will not at this point show the entire building (you'll just see windows glass and the upper building grids). Two ways to proceed:
- Method 1: Exit & Re-Enter the lot
The move up/down a level buttons will now display the sections of the building as the originals do. Recolouring may be more difficult, however, due to the way the camera zings you to the top of the building when you get too close and are not on the ground floor (which makes the building disappear again). This leads us a hopefully better option...
- Method 2: Ctrl-Shift-Click on the foundation framework (you may need to use the outer edge of it for a few shells) to bring up the new "Toggle Building Display" interaction.
You can then choose the "Show Full Building" interaction to make the entire building visible while remaining on the ground level. You can now recolour everything without having to worry about the camera. Also, while on the ground floor, the windows glass will be gone, so you can click on the curtains without having to zoom in past the glass like with the rabbitholes. When you're done, just exit. The script will automatically reset which building geostates to display based on the current floor level.
Although I went ahead and made replacements for all 28 shells, there were a few that appeared to be identical to each other. I've noted them here:
LeoCenter / LeoCenter 1a,
LeoCenter 2 / LeoCenter 2b
LeoCenter 4 / LeoCenter 4c
Civic / Civic 0a / Civic 0b / Civic 0c
Building Info
As with the rabbitholes, I disabled the MODL medium & low resolution switching so that zooming out wouldn't cause the shells to change colours (you still get re-rendering when you move in and out of camera view). After placing a shell on a lot, if you exit the lot before actually building anything and do not at least place a piece of wall on the uppermost grid (the move up a level button will become available to move up another floor), the shell roof will not show up until you do. After building is complete, exiting/re-entering lots and/or saving/reloading a game will usually fix things such as displayed levels or wonky night lights if something should happen to not look right. Several of these puppies use a really large (2048x2048) global texture, so that's why some of the file sizes are kinda large for some.
Catalogue Info
I've made sure these are available for both residential and commercial lots. As much as I didn't want to, I categorised them under Misc Decor (and Lawn Ornaments). The good news - they're all grouped together via the sort priority field. They were supposed to all be at the end of the section (like the rabbitholes), but they may be at the beginning. Somewhere during one of the patches, it looks like EA fiddled with the catalogue sorting algorithm, and world builder objects appear to be getting thrown to the front of the catalogue now, but I don't know this for certain. These versions are not world-builder enabled (easy to reverse if you need one off-lot for some reason), but the sorting still seems screwy.
The catalogue name contains the building name (taken from the instance name), minimum size of the shell, the number of upper levels it has, and whether or not it is classified as a penthouse in the gameplaydata.package XML file. The description will show the number of floors & rooms from the XML file as well. The size was determined by placing the shell on a lot covered by foundation, deleting all possible foundation, and then counting what was left over (length x width).
Additional Download Files Info
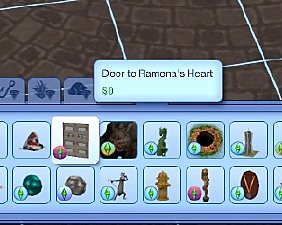
- CaSTable HighRise Shell Doors x2 (Door to Ramona's Heart / Simple Door) - Overrides OBJD, MODL, MLOD, Adds TXTCs, XML, IMG
This allows the shell doors to be CaSTable. Some of the shells have a door pattern that matches and continues above the door itself, so these are good to have to make recolours match up.
- Shell Door FIX - Needed if you have both Late Night & Showtime installed - Overrides two NGMPs and one OBJD
When Showtime came out, a new shell door was included (although I'm unable to find where it was ever used in Starlight Shores). The Showtime door looks identical to the one used by some of the Late Night highrises, except maybe a tad bit lighter in colour. The OBJD instance name for both doors is "shellDoorMetalGlass", and both doors also have identical NGMP hash values. When you place a highrise shell from Late Night that happens to use this particular door, the game tries to place the door (as per XML), but since the Showtime door uses an identical instance name and hash value, it must confuse things. Since the game cannot figure out which of the two doors to use, it plops a "white box" down instead. This file simply changes the NGMP hash value and OBJD instance name for the Showtime door to something else to eliminate the ambiguity. If anyone does run across the Showtime version door in Starlight Shores, please let me know so I can be sure this fix isn't somehow messing that up.
World Adventure - Egypt / China Shells
Includes the Egyptian Large Pyramid, Small Pyramid, Sphinx, Temple of Abu Simbel & the Chinese Dragon Cave.
Ctrl-Shift-Click on the foundation framework will bring up the "Toggle Building Opacity" interaction so you can make things solid for recolouring.
***Notes regarding shell entrance doors
The door coding is responsible for making the building appear & disappear when your sim enters or exits the structure. I had to make replacement doors to go with each shell, and these are included in each shell ,package file.
When the doors appear, you need to make sure they are actually located "On" the lot grid or things will not work properly. For this reason, you will need to have "move objects on" in order to place the two pyramids. The large pyramid will only be able to have the door on the grid by using a 64x64 lot. The sphinx will fit diagonally on a 64x64 without using "move objects on".
Ctrl-Shift-Click on the foundation framework will also bring up the "Change Door Design" on the four Egyptian models. EA apparently made a total of three different door designs, but I don't see where two of them were ever used. Idle hands.....lol. You can choose between "Heiroglyphics 1" (default), "Heiroglyphics 2" and "Plain".
Library & Student Union Shells
Ctrl-Shift-Click on the foundation framework will bring up the "Toggle Building Display" interaction so you can display the entire building while on the ground level.
Doors made CaSTable via "overrides". OBJD, MLOD, MODL have been edited (will conflict with another mod that overrides the same). New TXTCs, XML, IMG(s) added.
Future World Shells
Includes Normal / Utopian & Dystopian (Apocalyptic) versions for three of the four shells. The crashed ship did not have a dystopian version. The normal / utopian versions will switch to dystopian when used in future worlds. The dystopian version does not change and can be used in normal worlds or future worlds. Bot Shop was the only one already set up for a dystopian door, so I used it with the dystopian version of that shell.
Ctrl-Shift-Click on the foundation framework will bring up the "Toggle Building Display" interaction so you can display the entire building while on the ground level.
Also included Normal / Utopian & Dystopian (Apocalyptic) versions of the "Cafe Awning". Though not technically a shell, it does go with the decorum of the land.
Doors made CaSTable via "overrides" with the exception of the Bot Shop dystopian door (which is a new object). OBJD, MLOD, MODL have been edited (will conflict with another mod that overrides the same). New TXTCs, XML, IMG(s) added.
***Special note regarding Crashed Ship
The following issues were experienced when trying to use these ( my versions as well as the originals):
- Walls were one tile short of reaching the door and would keep giving the "cannot intersect objects" message. I made a new FTPT resource and adjusted two of the values ever so slightly so that this would stop happening. You should be able to create a closed rectangular room now (4 wide x 7 deep max). An arch can be placed in the wall behind the shell door. Remainder of building will be built underground
- Shell door opening, but closing after the sim enters the ship thus trapping them inside to do the wavey, wavey, "Hey are u crazy, get me out of here" arm signals.
 Easiest thing to do once you first place the ship on the lot is to go ahead and set up the ground floor walls and arch. Exit the lot back to map view, save a copy of the lot to the library bin, use the bulldozer on the lot (one time only to just remove the shell), then place a fresh copy down on the lot from the library bin (the one you just saved prior to bulldozing). This should fix the door. You will know it's working properly if the sim enters the ship and the shell door stays open while the sim is inside. You'll need a fully assembled "Mysterious Key" from buydebug to open the door if you want to test it.
Private Club & Rotary Club Shells
Ctrl-Shift-Click on the foundation framework will bring up the "Toggle Building Display" interaction so you can display the entire building while on the ground level.
Doors made CaSTable via "overrides". OBJD, MLOD, MODL have been edited (will conflict with another mod that overrides the same). New TXTCs, XML, IMG(s) added.
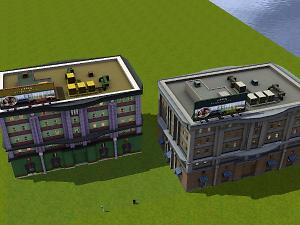
Concert Hall (Theatre) & Stadium Shells
These are combination shell - rabbitholes and have got to be the most finicky objects I have come across to date. It is no wonder EA hid them away. Breathing too hard is liable to break something, but I'll try and explain how I managed to make them to work for me. The problems I encountered were apparent on the originals as well as my versions, so I must say they are just really sensitive to breakage.
Ctrl-Shift-Click on the foundation framework will bring up the "Toggle Building Opacity" interaction so you can make things solid for recolouring.
OK, first off, they have two doors, one functioning as the rabbithole, the other controlling the proprietor. I had no issues at all with the rabbithole doors. The other door was a definite hair puller, mainly routing issues, especially when summoning the proprietor.
RabbitHole doors made CaSTable via "overrides". OBJD, MLOD, MODL have been edited (will conflict with another mod that overrides the same). New TXTCs, XML added.
New replacement doors made for the proprietor doors as they also control the building display (dark lot mode) when a sim enters the building to perform a show or exits after the show has ended.
This is pretty much what I did (I think). Recolouring caused no problems for me, so you can do that as you go, or later if you prefer:
- ***Make sure you are in "Edit Town" when building, and do not use "Build or Buy on this lot" from live mode. You can use the latter later if you want to see how things look in "dark" mode.
- Pick your poison....place the shell on the lot, and get the walls done. I followed the shell outline as close as I could get to it. I did have to make a new FTPT (adjusted four values just slightly) for the Concert(Theatre) shell so that the walls would meet the proprietor door without the "cannot intersect" message. If you are one tile away from the door, you get sims running all about between the built walls and the shell wall, in and out the door. Of course, they route there just fine...figures.
- The buildings in Starlight Shores were five floors total, but I did one with four floors that was fine. You maybe can go even lower. ***The important thing is to make sure that the topmost floor is completely covered with floor tile. If it isn't, dark mode doesn't kick in properly, and objects inside the shell turn invisible.
- I used foundation, platform and flat ground all successfully for the stage area. No issues with stage rigs, floor/table/bench areas or audience area.
- Stage seemed ok, props and lighting equipment plopped into place. Just don't move it once it's down. I think things get messed up if you do. After the show, things seemed to go into family inventory as far as I could tell, but this may be quirky.
- I tried both using and not using the proprietor square. You don't have to use it, as a proprietor should generate automatically. If you do use one, make sure you place it in the beginning before playing to make sure you don't get more than one proprietor. The square is supposed to keep them rooted to the spot, but it's definitely not crazy glue. They may still move and sit on the benches and read, or wander outside to talk. One test game spawned a proprietor who had a case of the yawns, just over & over nonstop. I got distracted....last I looked, she was on the square. When I finally did locate her, she had wandered out back behind the building and was passed out on the ground asleep....lol
- If the proprietor is sitting on the bench reading when your sim enters the building to perform, he/she will likely go invisible. I just clicked on my sim, clicked "Call over proprietor", waited for them to get off the bench (they re-materialise), then cancelled the interaction.
- Once I finished the building, I exited to map view. The proprietor door will more than likely have routing issues at this point, so you'll want to fix them before playing. Just copy the lot to the library bin, bulldoze the lot (once) and place a fresh copy from the bin onto the lot. This seemed to fix things. Proprietor was spawned and entered/exited the building fine for the 2-3 sim days that I tested for.
- Recolouring, switching stage rigs, placing tables, chairs, etc. didn't seem to break anything. Just don't move that stage.
As I said, these things are ultrasensitive, so there's no guarantee that something won't go wrong. Just hope for the best.
Limited Edition - Ultimate Venue Shell
This came with the Limited Edition version of Showtime and follows the same guidelines as the other two combo rabbithole shells.
Stage Rigs
Included CaSTable versions of the four stage rigs -- Concert Hall (Theatre), Stadium, Park & Ultimate Venue (Limited Edition only). As far as I can tell, they all work outside or inside any of the shells.
Extras
These are all overrides that I moved to the end of the prop section with the other deco so you don't have to go to buydebug to get to them.
- Show Stage (large 8x7) - overrides OBJD, OBJK.
- Show Stage (small 6x7) - overrides OBJD, OBJK, MODL. Added TXTC, XML, IMG, THUMs. Useful for smaller areas.
- Show Floor Bench - overrides OBJD, MLOD, MODL. Added TXTCs, XML, IMGs. Can be recoloured
- Show Floor for Benches - overrides OBJD, OBJK.
- Show Floor for Tables - overrides OBJD, OBJK.
- Big Show Crowd (Audience Placement) - overrides OBJD, MODL. Added TXTCs, XML, IMG. Can be recoloured if default colour (gold) is hard to see.
- Proprietor Placement Square - overrides OBJD, OBJK, MODL. Added TXTCs, XML, IMG. Can be recoloured if default colour (black) is hard to see.
I revised the script for several of the objects to enable their placement marks at the time of placement. You don't have to switch back and forth between build and buy mode to make them visible anymore. This would apply to the two stages, the two show floor markers and the proprietor placement square.
Dome Shells
I'm not sure why snow doesn't accumulate on the Sunset Valley dome. The only thing I can think may be causing it is that it uses a different shader than the other two (phong instead of rabbitholehighdetail). I experimented a bit with switching them, but this resulted in a mess of red flashing objects, so I just left it be.
***Sunset Valley - Landgraab Industries Science Dome
Keeps out weather
Snow doesn't accumulate on pipes or hatch door (phong shader)
Substituted footprint info from Bridgeport so you can now build inside it and access it via underground tunnel.
***Bridgeport - Butterfly Pavilion
Keeps out weather
Snow accumulates on pipes (even the inside one) and hatch door (rabbitholehighdetail shader)
Already supports building inside and underground tunnel access.
***Lunar Lakes - Pavilion
Does not keep out weather (at least in my game) -- walk-in door issue perhaps?
Snow accumulates on pipes (even the inside one) and hatch door (rabbitholehighdetail shader)
Can build inside, has entrance door cutout at ground level.
I have seen conflicting reports as to whether or not snow & rain happen inside the Lunar Lakes dome. It definitely does on mine. Another user said the door cutout was not the issue but didn't elaborate on what was, so I've no clue what to look for.
Additional Credits:
Inge & Peter for their wonderful S3PE / S3OC tools that have made this possible
A special Inge for her Tweaker -- she'll never know how much enjoyment I've gotten from this one
A few of the many others who have helped me stumble my way down the path of learning -- Ghost, Nona Mena, Darkitow, twallan, brappl, JunJayMdM, OmegaStarr, Bloom, sydserious, cmo and Wes Howe.
karilynmonroe2 for spotting the CAW & library bin issues that have now been resolved.
icarus_allsorts for helping me to better understand how a proxy works with object interactions.
annalise & her mom for bringing the recolour issue to my attention.
|
Hide EA defaults - SHELLS.rar
| *NEW* Dec 14, 2015 - Hides default thumbnails - only use if you no longer need to choose these from the catalogue
Download
Uploaded: 14th Dec 2015, 4.4 KB.
547 downloads.
|
||||||||
|
ShellAssemblyScript.rar
| ***UPDATED Dec 14, 2015 *** REQUIRED for Shells to be fully assembled and function correctly (works for any combination of shells), and Stage Rigs / Showtime extras.
Download
Uploaded: 14th Dec 2015, 41.6 KB.
1,807 downloads.
|
||||||||
|
Showtime (Limited Edition) - Shell.rar
| Total of 1 combo Shell-RabbitHole, 1 Stage Rig (includes rabbithole door OVERRIDE + NEW proprietor door),
Download
Uploaded: 1st Mar 2015, 1.08 MB.
1,042 downloads.
|
||||||||
|
Late Night (Bridgeport) - ShellDoors_Highrise_Castable.rar
| Recommended - Adds resources that will make the shell doors recolourable - This is an OVERRIDE ***UPDATED 2/28/2015 to fix a reference error (Simple Door OBJD)
Download
Uploaded: 28th Feb 2015, 23.9 KB.
1,432 downloads.
|
||||||||
|
LunarLakes - Pavilion.rar
| Total of 1 Dome
Download
Uploaded: 28th Feb 2015, 402.5 KB.
846 downloads.
|
||||||||
|
Bridgeport - Butterfly Pavilion.rar
| Total of 1 Dome
Download
Uploaded: 28th Feb 2015, 459.9 KB.
1,030 downloads.
|
||||||||
|
SunsetValley - Landgraab Industries Science Dome.rar
| Total of 1 Dome
Download
Uploaded: 28th Feb 2015, 443.3 KB.
971 downloads.
|
||||||||
|
Showtime_Extras.rar
| Miscellaneous items for building show venues
Download
Uploaded: 28th Feb 2015, 79.5 KB.
1,114 downloads.
|
||||||||
|
Showtime (Starlight Shores) - Shells.rar
| Total of 2 Shells, 2 combo Shell-RabbitHoles, 3 Stage Rigs (includes rabbithole door OVERRIDES + 3 NEW proprietor doors)
Download
Uploaded: 28th Feb 2015, 6.29 MB.
1,234 downloads.
|
||||||||
|
Into The Future (Oasis Landing) - Shells.rar
| Total of 4 Shells, 1 Sculpture (includes door OVERRIDES + 1 NEW door)
Download
Uploaded: 28th Feb 2015, 1.59 MB.
993 downloads.
|
||||||||
|
University (Campus) - Shells.rar
| Total of 2 Shells (includes door OVERRIDES)
Download
Uploaded: 28th Feb 2015, 1.23 MB.
1,027 downloads.
|
||||||||
|
WorldAdventures (Egypt_China) - Shells.rar
| Total of 5 Shells (includes NEW doors)
Download
Uploaded: 28th Feb 2015, 1.99 MB.
971 downloads.
|
||||||||
|
Late Night (Bridgeport) - ShellDoorFix_Highrise.rar
| ONLY needed if you have both Late Night AND Showtime installed (fixes the -- WHITE BOX -- instead of a door issue) - This is an OVERRIDE
Download
Uploaded: 30th Jan 2015, 297 Bytes.
1,395 downloads.
|
||||||||
|
Late Night (Bridgeport) - Highrise Shells.rar
| Total of 28 Shells
Download
Uploaded: 30th Jan 2015, 37.15 MB.
1,849 downloads.
|
||||||||
| For a detailed look at individual files, see the Information tab. | ||||||||
Install Instructions
Loading comments, please wait...
Uploaded: 30th Jan 2015 at 1:11 PM
Updated: 14th Dec 2015 at 8:44 PM - Updated script
#shell, #rabbithole, #castable, #recolorable, #create a style, #community, #career, #work, #highrise, #high rise, #apartments, #dome, #stage, #pyramid, #combo
-
by NekoCat updated 13th Nov 2010 at 5:02pm
 49
107.9k
75
-
"Where Is My shellDoorMetalGlass?" LN Building Shell Workaround
by GiLaNg 20th May 2012 at 4:50pm
 +1 packs
17 35.7k 41
 Late Night
-
CaSTable RabbitHole Replacements
by AussomeDays updated 14th Dec 2015 at 8:39pm
 +10 packs
112 170.5k 414
 World Adventures
 Ambitions
 Late Night
 Town Life Stuff
 Pets
Pets
 Showtime
 Supernatural
 University Life
 Island Paradise
 Into the Future
-
CaSTable Eiffel Tower (Icarus_Allsorts style) & CaSTable Arc de Triomphe
by AussomeDays updated 6th Dec 2015 at 7:03am
 +1 packs
11 20.6k 43
 World Adventures
-
CaSTable Rocks, Crystals, Ruins, Mines & Dive Caves
by AussomeDays 2nd Aug 2015 at 1:27pm
-
University Student Union / Library Shell Overrides to help with Crowding Issues
by AussomeDays 9th May 2018 at 4:07pm
-
by mingos updated 19th Oct 2021 at 11:32pm
 20
25.9k
86
-
by fantuanss12 updated 7th Jun 2024 at 11:55am
 19
17k
58
-
University Student Union / Library Shell Overrides to help with Crowding Issues
by AussomeDays 9th May 2018 at 4:07pm
Overrides for University Student Union and Library shells to help alleviate doorway crowding more...
-
CaSTable Magic Gnome Overrides - Randomly AutoColoured - Convertible to Garden Gnomes
by AussomeDays 14th Mar 2016 at 11:33pm
Overrides that add CaSTability to all EA magical gnomes created over the course of the game releases. more...
-
CaSTable Cow Plants and related objects from the "Killer Classics" store set
by AussomeDays 6th Sep 2015 at 2:49pm
"Killer Classics" store set - Cow Plant, Arcade Machine, Spring Rider - CaSTable versions more...
-
Fence & Gate of Farmington texture "fix" to alleviate fence post differences with adjacent sections
by AussomeDays 1st Sep 2015 at 3:43am
Texture replacements to correct visual inconsistency with adjacent fence and gate pieces. more...
-
CaSTable Rocks, Crystals, Ruins, Mines & Dive Caves
by AussomeDays 2nd Aug 2015 at 1:27pm
Rocks and similar objects that override the original game objects to enable CaSTability. more...
-
CaSTable RabbitHole Replacements
by AussomeDays updated 14th Dec 2015 at 8:39pm
RabbitHole shells that can be recoloured using the Create-A-Stye tool and used in place of the default EA versions. more...
 +10 packs
112 170.6k 414
 World Adventures
 Ambitions
 Late Night
 Town Life Stuff
 Pets
Pets
 Showtime
 Supernatural
 University Life
 Island Paradise
 Into the Future
-
CaSTable Eiffel Tower (Icarus_Allsorts style) & CaSTable Arc de Triomphe
by AussomeDays updated 6th Dec 2015 at 7:03am
Deco shells converted into RabbitHoles that can be recoloured using the Create-A-Stye tool. more...
 +1 packs
11 20.6k 43
 World Adventures
-
Additional Entry and Exit Routing Slots to Reduce Door Crowding - Schools, University
by AussomeDays updated 6th Feb 2016 at 9:29pm
Additional routing slots - currently schools and Uni buildings - that reduce door crowding by assigning sims to all available doors more...
 57
130.4k
363
-
CaSTable Hover Train Car Models
by AussomeDays 1st Sep 2015 at 3:42am
Models used for designating the train car colours used when a rideable hover train is generated (or for deco). more...
 +1 packs
3 11.3k 23
 Into the Future
Packs Needed
| Base Game | |
|---|---|
 | Sims 3 |
| Expansion Pack | |
|---|---|
 | World Adventures |
 | Late Night |
 | Showtime |
 | University Life |
 | Into the Future |

 Sign in to Mod The Sims
 CaSTable Building Shell Replacements
