 Sign in to Mod The Sims
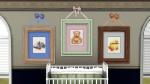
 Kiddieview Window Add-Ons
 Kiddieview Window Add-Ons


Cover.jpg - width=1920 height=1080
Plain.jpg - width=1920 height=1080
PlainChannels.jpg - width=1920 height=1080
ShutterLeft.jpg - width=1920 height=1080
ShutterLeftChannels.jpg - width=1920 height=1080
ShutterRight.jpg - width=1920 height=1080
ShutterRightChannels.jpg - width=1920 height=1080
Presets.jpg - width=1920 height=1080
Details:
- Found in Build Mode>Windows
- All priced at §185 (same as original)
- 4 Channels
- Includes same stencils/presets as originals
Polygon Counts:
Same as the originals:
Plain: MLOD - 548, MODL - 404
Left Shutter: MLOD - 728, MODL - 506
Right Shutter: MLOD - 718, MODL - 496
Additional Credits:
S3OC, S3PE, S3ASC, Milkshape
Sims 3 Store for the original window.
This is a new mesh, and means that it's a brand new self contained object that usually does not require a specific Pack (although this is possible depending on the type). It may have Recolours hosted on MTS - check below for more information.
|
heaven_KiddieviewWindowsTwoTile.rar
Download
Uploaded: 24th Oct 2015, 1.01 MB.
3,122 downloads.
|
||||||||
| For a detailed look at individual files, see the Information tab. | ||||||||
Install Instructions
1. Click the download button, or the filename, to download the file to your computer.
2. Extract the zip, rar, or 7z file. Now you will have either a .package or a .sims3pack file.
For Package files:
1. Cut and paste the file into your Documents\Electronic Arts\The Sims 3\Mods\Packages folder. If you do not already have this folder, you should read the full guide to Package files first: Sims 3:Installing Package Fileswiki, so you can make sure your game is fully patched and you have the correct Resource.cfg file.
2. Run the game, and find your content where the creator said it would be (build mode, buy mode, Create-a-Sim, etc.).
For Sims3Pack files:
1. Cut and paste it into your Documents\Electronic Arts\The Sims 3\Downloads folder. If you do not have this folder yet, it is recommended that you open the game and then close it again so that this folder will be automatically created. Then you can place the .sims3pack into your Downloads folder.
2. Load the game's Launcher, and click on the Downloads tab. Find the item in the list and tick the box beside it. Then press the Install button below the list.
3. Wait for the installer to load, and it will install the content to the game. You will get a message letting you know when it's done.
4. Run the game, and find your content where the creator said it would be (build mode, buy mode, Create-a-Sim, etc.).
Extracting from RAR, ZIP, or 7z: You will need a special program for this. For Windows, we recommend 7-Zip and for Mac OSX, we recommend Keka. Both are free and safe to use.
Need more help?
If you need more info, see:
- For package files: Sims 3:Installing Package Fileswiki
- For Sims3pack files: Game Help:Installing TS3 Packswiki
Loading comments, please wait...

Uploaded: 24th Oct 2015 at 7:42 PM
#window, #EA match, #MaxisMatch, #Maxis Match, #store match, #two tile, #2 tile, #shutters
-
-
by leefish 16th Oct 2009 at 3:56pm
 38
43.7k
68
38
43.7k
68
-
by Lisen801 18th Jul 2010 at 10:53pm
27
45.7k
96
-
Almost All One-Tile EA Windows Made Two-Tile
by whitewaterwood updated 23rd Jun 2011 at 5:36am
24
50.4k
133
-
-
by leefish 21st Jan 2012 at 9:45am
21
41.1k
114
-
-
-
-


-


-


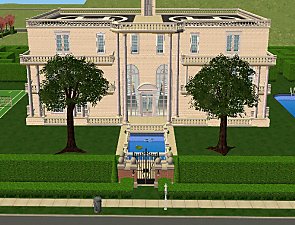
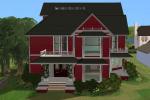
Eastlake Manor aka "The Dollhouse"
by heaven 25th Jul 2010 at 1:13am
CC Free, Victorian Style Family Home! more...
5
15.7k
28
-

-

-
-
-
-
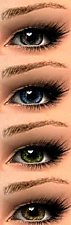
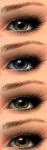
Recolors and Defaults of Unforgettable Eyes by DragonMandy
by heaven 15th Jul 2010 at 7:55pm
Let me preface this entire post by saying that I absolutely LOVE Dragonmandy's eyes. more...
-

-


About Me
Please Do Not:
- Claim my work as your own.
- Reupload my work anywhere else.
- Include my content with your own upload. Link back to the original download post instead.
- Include my content in a Mods folder upload.
- Use my creations as a base to edit and reupload as your own.
- Convert my content to other games without asking first.
- Edit my creations for your personal use only.
- Use my lots/sims/content in stories (though please don't take credit for them).